.webp)
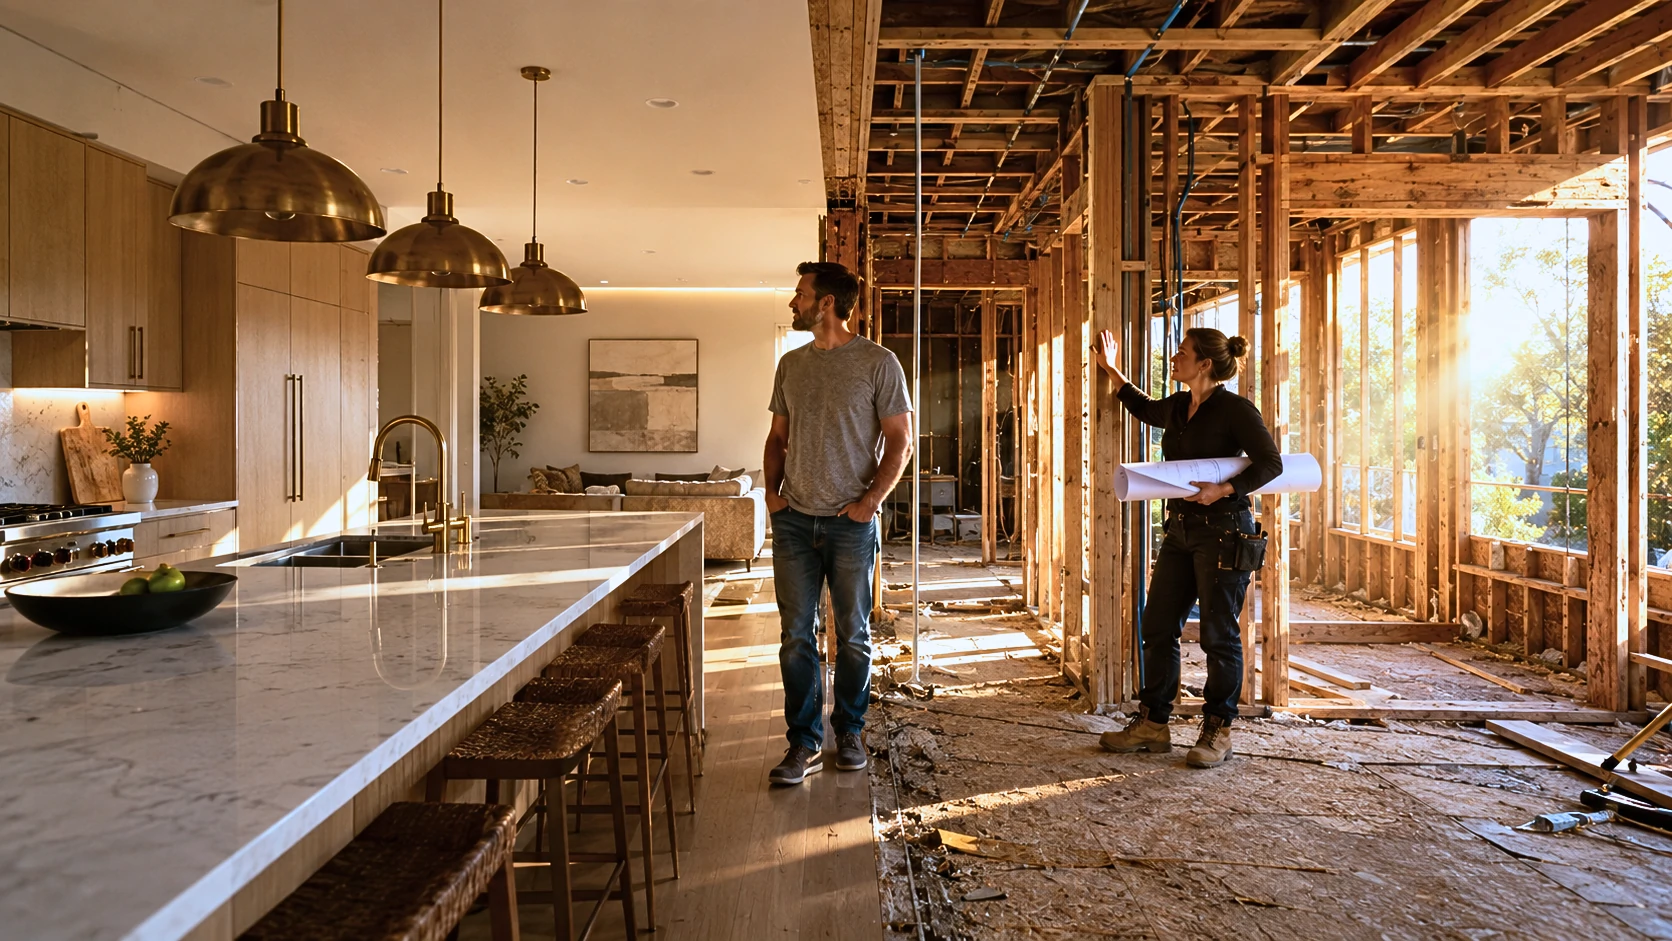
The walls of a 1979 kitchen don’t give up their secrets until you pull the cabinets off. We knew that going in — we just didn’t know exactly what we’d find, or how much it would change the decisions we thought we’d already made. What started as a straightforward design project turned into a full systems overhaul the moment demo began.
This is the real account: what the original kitchen looked like, what the demo phase revealed, every major design decision we made afterward, and the vision we’re building toward. If you’re planning something similar in an older home, this is the article you’ll want before you start swinging a pry bar.
The short answer: A full kitchen gut renovation in a home built before 1985 involves removing all existing cabinetry, inspecting and often updating electrical, plumbing, and drywall, then rebuilding from scratch. In homes from the late 1970s, discovering outdated wiring, aging supply pipes, or asbestos-containing materials is common — budget for it before demo begins, not after. All major design decisions, including cabinet layout, island sizing, countertop material, and outlet placement, must be locked in before walls are closed.
Quick Takeaways:
- Pre-1980 homes commonly contain aluminum branch circuit wiring, galvanized supply pipes, and potentially asbestos — budget $3,000–$15,000 for discoveries before committing to a full gut
- Two-tone cabinets (white shaker uppers with dark espresso lowers) are the dominant 2026 modern farmhouse kitchen aesthetic — and there’s a specific design logic behind where the color split falls
- A farmhouse apron-front sink changes your plumbing rough-in height requirements — this decision must be made before your base cabinet boxes are ordered
- Island clearance minimums are 42 inches on working sides and 36 inches on non-working sides per most residential codes — smaller than that and the space will feel wrong
- Quartz countertops on an island span over 48 inches require a 3/4-inch plywood substrate to prevent flex-cracking at seams over time
The Original Kitchen: Before Photos and What We Were Working With
The kitchen that greeted us was a textbook late-1970s build. Raised-panel honey-oak cabinets ran floor to ceiling, anchored by a soffit that added visual weight to an already low ceiling plane. The hardware was dated black metal, the countertops were laminate, and a row of upper cabinets flanked both sides of a window that made the room feel smaller than it measured.
There were things that had already been updated — the flooring was a newer dark luxury vinyl plank, and stainless appliances had replaced whatever came with the house. But the bones of the kitchen itself hadn’t been touched since Reagan was in office.
The existing DIY island was the most interesting element: a white-painted base with a dark epoxy-butcher block top and black hardware. It pointed toward where the design could go. It also gave us a reference point — the color palette we wanted to work with was already partially established.
What we were not working with: enough storage for a modern family, any functional prep zone near the range, adequate lighting, a layout that made sense, or cabinet boxes we trusted to outlast a renovation budget.
.webp)
Why We Chose a Full Gut Over Cabinet Refacing
Refacing makes sense under specific conditions. Cabinet boxes in sound structural condition, a layout that functions well, plumbing and electrical that are modern — if those three things are true, refacing can deliver 70% of the visual result for 30% of the cost. That math is real.
None of those conditions applied here.
The cabinet boxes were face-frame construction from the original build — not structurally failed, but warped at the drawer slides and assembled with the staple-and-glue method common to that era. Relying on them as the foundation for new doors and hardware would have been building on sand. Beyond that, the layout didn’t work. The sink was positioned in a corner that made the dishwasher loading awkward, the island was undersized for the room, and the soffit above the upper cabinets was eating 18 inches of ceiling height we didn’t need to sacrifice.
The plumbing situation — galvanized steel supply lines behind the walls — made the decision final. Once you’re opening walls for pipe replacement, you’re already in a gut renovation whether you planned for it or not.
The 5-question gut vs. reface decision framework:
- Are the existing cabinet boxes square, plumb, and structurally sound? (If no — gut)
- Does the current layout serve the way you actually cook and move? (If no — gut)
- Are your plumbing and electrical systems from the original build or within the last 20 years? (If original — gut)
- Is your renovation budget above $25,000 for a mid-size kitchen? (If yes — gut is often better value)
- Are you planning to stay in this home for more than 5 years? (If yes — long-term quality justifies the gut cost)
We answered gut on every question. So we gutted.
What Demo Revealed: Hidden Problems in a 46-Year-Old Kitchen
This is the section that separates real renovation documentation from the aspirational content you’ll find everywhere else. Demo is where an older home either cooperates or doesn’t.
Ours did not cooperate.
With the cabinets off the walls and the soffit opened up, what we found was: a 1970s kitchen that had never been touched electrically or structurally since the day it was built. The walls came down to bare drywall, plumbing rough-in was exposed, and the electrical boxes told a story that made us stop and call a licensed electrician before any other trade came back.
The Electrical We Found — And Why It Mattered
The wire in our outlet boxes was aluminum. Silver-colored conductors at every switch and outlet in the kitchen — not the copper you’ll find in homes wired after the mid-1970s.
⚠️ Safety Warning: Aluminum branch circuit wiring was common in US homes built between approximately 1965 and 1973. It expands and contracts at a different rate than the copper connections at outlet and switch terminals, which loosens connections over time. Loose connections generate heat. The documented risk is electrical fire at connection points. Replacing only the outlets does not resolve this risk. The two approved remediation methods are: (1) COPALUM crimp connectors installed by a licensed electrician — the only method recognized by the Consumer Product Safety Commission — or (2) full rewire of affected circuits. If you’re in a home of this age and haven’t had an electrician inspect your branch circuit wiring, do that before any renovation work.
We went with COPALUM crimp remediation on the affected kitchen circuits and upgraded the panel while the wall was open to add a dedicated 240V range circuit. That add-on cost, not in our original budget, ran approximately $1,800 between the electrician’s labor and permit fees. Annoying to discover mid-project. Not optional.
The new recessed can layout and pendant rough-in were installed during this same phase — you cannot come back to this step once drywall is up.
The Plumbing Rough-In: What We Moved and Why
The original sink drain was positioned for a 9-inch drop-in basin. A farmhouse apron-front sink requires a different rough-in height — the drain location drops approximately 2–4 inches relative to where a standard undermount configuration sits. We’d already committed to the farmhouse sink in the design vision, which meant the plumbing rough-in had to move.
This isn’t a difficult plumbing task. But it is a task that has to happen before the base cabinets go in, not after. A plumber was on-site for about three hours to reposition the drain stub-out and extend the supply lines to the new valve positions.
Worth knowing: A farmhouse apron-front sink also modifies the base cabinet box it sits in. The cabinet in that position is either a purpose-built apron sink base (which accepts the sink front panel as a finished surface) or a modified standard base with the face frame cut away. If you’re ordering semi-custom or custom cabinets, specify “farmhouse sink base” explicitly when placing your cabinet order — it’s a different cabinet, not a modification of a standard one.
If the plumbing decision isn’t made before cabinet specs are finalized, you end up ordering the wrong box or paying for a field modification later.
If you’re now realizing your renovation scope might be wider than you planned for, getting a free estimate from a licensed kitchen contractor costs nothing and takes under an hour. Most homeowners find the estimate — even when they plan to manage the project themselves — helps clarify which phases to DIY and which phases to bring in a professional.
.webp)
The Design Vision: How We Arrived at a Modern Farmhouse Style
After demo, with the kitchen stripped to bare drywall, plumbing stub-outs, and exposed electrical boxes, design stops being theoretical. You’re looking at the actual room — its proportions, its ceiling height, where the light actually falls, and what the window casing looks like against the wall texture. That’s when design decisions either hold up or reveal themselves as wishful thinking.
The bones of the room are good. The ceiling, without the soffit, reads taller. The window is well-placed. The overall footprint supports an island with real counter seating, not just a prep surface.
The AI-generated vision render we built guided the decisions from this point forward: a two-tone cabinet scheme with white shaker uppers and espresso-stained lower cabinets, a farmhouse apron-front sink, a large island with quartz top and bar seating, a custom wood range hood surround, black pendant lanterns over the island, subway tile backsplash, and matte black hardware throughout.
Every element in that render connects to a practical decision. Here’s how we reasoned through each one.
Why We Chose Two-Tone Cabinets: White Uppers, Dark Espresso Lowers
Two-tone cabinets have been trending long enough that the trend question is mostly settled — they work. But most design content stops at “they look great together” without explaining the logic of where the split falls and why.
The split line isn’t arbitrary. It falls at the countertop surface — white above, dark below — for a specific visual reason: the countertop serves as a natural dividing line between the visual weight of the upper and lower zones. Dark lower cabinets visually anchor the room to the floor plane, which makes the ceiling feel higher. White upper cabinets reflect light into the room and keep the upper half feeling open.
In a room with a ceiling height under 9 feet — which this kitchen has — those two effects combined do more for the sense of space than any lighting upgrade alone.
Worth knowing: The color split only reads correctly if the countertop has enough visual contrast with both zones. A white or very light quartz countertop against white upper cabinets will blend together; the split disappears. A mid-tone or veined quartz creates definition at both transitions. We’re using a light gray quartz with warm veining on the island and perimeter — it reads against the white uppers above and the espresso lowers below.
The existing DIY island — white base, dark epoxy top — had been pointing toward this palette the whole time. Sometimes the room tells you what it wants before you decide.
| Factor | All-White Cabinets | Two-Tone (White Up / Dark Down) | All-Dark Cabinets |
|---|---|---|---|
| Ceiling height perception | Neutral | Increases perceived height | Decreases perceived height |
| Maintenance (high-touch lower zones) | Shows scuffs, grease | Dark lowers hide wear | Shows dust and light debris |
| Design longevity | Very safe, timeless | Contemporary with staying power | Higher trend risk |
| Light reflection | Maximum | Upper zone reflects, lower absorbs | Lowest light reflection |
| Best suited for | Any room size | Mid-size to large kitchens | Large kitchens with good natural light |
The Farmhouse Apron Sink: What Changed in Our Plumbing Plan
We covered the plumbing rough-in implications above. On the design side, the reason we committed to a farmhouse apron-front sink over a standard undermount is functional as much as aesthetic.
Apron-front sinks — particularly single-basin configurations — are simply easier to use in a working kitchen. No front cabinet rail means deeper basin access without leaning. A 33-inch or 36-inch single-basin farmhouse sink handles sheet pans, large stock pots, and baking dishes that a divided undermount won’t accommodate.
Material decision: We’re using fireclay. Fireclay farmhouse sinks are kiln-fired at very high temperatures, which produces a dense, chip-resistant surface that holds up better than cast iron over time. The tradeoff is cost — fireclay runs $600–$1,400 for a single-basin 33-inch model. Cast iron delivers a similar look at $400–$900, but a filled cast-iron farmhouse sink can weigh 200–350 lbs, which requires verified base cabinet structural support and specific mounting hardware. Verify the weight rating of your sink base before you order cast iron.
.webp)
How We Sized the Island: The Clearance Math We Used
The island in the AI vision render looks spacious. The actual math for getting there is tighter than most homeowners expect.
The minimum residential clearance for a working aisle (one where someone cooks, loads the dishwasher, or accesses lower cabinets) is 42 inches. Non-working aisles — where someone passes through but no appliance or cabinet opens into the space — can drop to 36 inches.
Here’s the calculation we ran:
Our kitchen width is 14 feet (168 inches). Subtract the perimeter counter depth on each side (25 inches + 25 inches = 50 inches). That leaves 118 inches of clear floor space. Subtract two working aisles at 42 inches each (84 inches). That leaves 34 inches for the island itself — tighter than we wanted. Shifting one aisle to the non-working clearance standard (36 inches instead of 42) bought us 6 inches, putting the island at 40 inches wide. At 84 inches long with a 12-inch seating overhang on one end, that’s a functional island with seating for three and a full prep surface.
Mapping this out with tape on the floor before framing the island confirmed the traffic flow. That step takes 20 minutes and catches clearance problems that would cost thousands to correct after the island is built.
Range Hood: Wood Surround vs. Stainless — The Decision and the Safety Check
The wood range hood surround in the AI vision is one of the most visually defining elements of the room. It’s also the element that generates the most questions about safety — specifically, whether a wood surround over a gas range is code-compliant.
Here’s the answer: a wood surround is compliant provided it contains an approved stainless liner insert with an appropriate fire rating. The wood is the aesthetic exterior; the insert is the functional hood. The insert’s listed CFM rating — not the surround size — must meet or exceed the cooktop’s BTU output requirements. Industry standard guidance is 100 CFM per 10,000 BTU. A six-burner gas range with 60,000 combined BTU requires a minimum 600 CFM insert rated for that output.
The hood must also vent to the exterior. Recirculating hoods do not meet ventilation code for a high-output gas range and will coat your new cabinets in grease within 18 months regardless of how diligent your filter maintenance is.
Worth knowing: Hoods over 400 CFM trigger a makeup air requirement in most current building codes. High-CFM hoods depressurize the kitchen space, which affects combustion appliances. If your hood exceeds 400 CFM, ask your contractor or HVAC sub-contractor about makeup air compliance — it’s frequently missed, and it’s not trivial to add retroactively.
.webp)
Materials We Selected: Cabinets, Countertops, Hardware, and Why
Design decisions are easy to make on paper. Material decisions are where the budget reality sets in. Here’s exactly what we selected, what we considered, and why.
Cabinets
We ordered semi-custom shaker-style cabinets: white painted uppers, espresso-stained lowers. The cabinet boxes are face-frame construction with full overlay doors — that combination delivers the cleaner look of frameless cabinetry while maintaining the structural robustness of face-frame for an older home that isn’t perfectly plumb and square.
| Factor | Stock / RTA | Semi-Custom | Custom |
|---|---|---|---|
| Lead time | 1–3 weeks (domestic warehouse) | 4–10 weeks (2026 normalized) | 8–16 weeks |
| Price range (per linear foot installed) | $150–$300 | $300–$650 | $650–$1,200+ |
| Door style variety | Limited | Extensive | Unlimited |
| Finish quality | Basic, often thermofoil | Factory-painted or stained | Highest |
| Best use case | Budget builds, rental renovation | Most full kitchen renovations | High-end custom homes |
Worth knowing: Semi-custom cabinet lead times have returned to 4–10 weeks as of mid-2026, down from the 16–24 week waits that plagued 2022–2024. If you ordered RTA stock during that period for speed reasons, that constraint no longer applies. Semi-custom now offers the best balance of quality, selection, and realistic project timelines.
The factory-painted finish on our white upper doors is conversion varnish, not latex house paint. This distinction matters. Conversion varnish cures to a hard, cleanable surface in 30 days. Site-applied latex paint on cabinet doors never fully cures in a kitchen environment and shows wear within 18 months at high-touch edges and handle zones. If a contractor or cabinet shop quotes painted MDF cabinet doors without specifying the finish type, ask explicitly.
Countertops
Quartz on the perimeter and island. Butcher block is beautiful on islands and we considered it seriously — the warmth of the wood fits the modern farmhouse aesthetic and the cost savings are real ($40–$80/sq ft installed vs. $70–$120/sq ft for quartz in most markets).
But this kitchen will see heavy daily use, and butcher block requires consistent maintenance that quartz doesn’t. Oil it every few months, seal it annually, address water around the sink promptly, and it performs well. Skip that maintenance and it warps, stains, and checks. In a high-use family kitchen, we wanted the material that performs without the maintenance dependency.
| Factor | Quartz | Butcher Block | Granite | Porcelain Slab |
|---|---|---|---|---|
| Cost installed (per sq ft) | $70–$120 | $40–$80 | $60–$100 | $80–$140 |
| Heat resistance | Low (use trivets) | Medium | High | Very high |
| Scratch resistance | High | Low to medium | High | Very high |
| Maintenance | Wipe clean, no sealing | Oil/seal regularly | Seal annually | Wipe clean, no sealing |
| Repair if damaged | Difficult | Sandable | Difficult | Difficult |
| UV stability | Variable — check brand | Good | Excellent | Excellent |
Worth knowing: Quartz countertops contain UV-reactive pigments and binders. In kitchens with large windows receiving direct prolonged sunlight, color shift and surface dulling can occur over 5–10 years depending on the specific product. If your kitchen faces south or west with significant glass exposure, ask your fabricator specifically about UV stability before selecting a quartz product. No ranking home improvement article covers this — we only found it in the material technical data sheets.
Also worth noting: quartz pricing increased approximately 12–18% between 2023 and 2025 due to silica dust regulation compliance costs in manufacturing. The $80/sq ft floor price you might see cited in older articles is more realistically $90–$110 in most 2026 markets. Budget accordingly.
Hardware
Matte black throughout. The hardware decision was easy once the two-tone cabinet palette was set — matte black hardware is the natural finish complement for both white and dark cabinet finishes, and it reads consistently with the black pendant lanterns and the dark espresso cabinet color.
Durability is where the hardware choice gets complicated, and where almost every home improvement article fails the reader.
There are two manufacturing processes behind matte black hardware: powder coating and PVD (physical vapor deposition). Powder coat is applied electrostatically and baked — it looks identical to PVD in the store but performs very differently over time. PVD deposits the finish at a molecular level, bonding it to the substrate in a way that resists the humidity cycles, cleaning chemical exposure, and contact wear of a kitchen environment by a factor of 3–5x documented by hardware manufacturers in their own warranty data.
Powder coat matte black will show wear at high-contact edges — cabinet pulls and door knobs — within 2–4 years in a kitchen with heavy use. PVD-finished hardware in equivalent conditions typically shows no degradation in the same period.
The price difference is not dramatic: powder coat hardware commonly runs $3–$8 per piece; PVD-finish hardware runs $8–$18 per piece. On 30 pieces of hardware, that’s a $150–$300 difference. It’s the best $200 you’ll spend on this renovation.
Pricing out your own kitchen renovation? Our full kitchen renovation cost breakdown by category is in the section below — with ranges that reflect real 2026 contractor and material pricing, not the outdated estimates that still populate most of the internet.
.webp)
The Current State: Where We Are Right Now
As of now, the kitchen is in installation phase. White shaker upper cabinets are in place. Espresso lower cabinets are being set. The farmhouse sink base has been positioned and the island framing is complete. The range hood wood surround is started — the rough framing is up and the liner insert is on-site.
What you see in the in-progress photos is the satisfying moment in any renovation where the vision starts to become real. The bones are right. The scale of the island works. The proportion of the upper cabinets against the now-exposed full ceiling height confirms the decision to remove the soffit was correct — the room reads significantly taller and less compressed.
Countertop templating is scheduled for after all cabinet installation is complete and final.
What We Would Do Differently
This section is where the real EEAT content lives in any honest renovation article. Anyone who tells you a project of this scope went exactly as planned either didn’t do it themselves or isn’t telling the whole story.
We’d lock in outlet placement before drywall. Completely. We mapped outlet locations but moved one twice based on late-stage island design changes. That added an electrician visit and drywall patching we didn’t need.
We’d order filler strips with the cabinet order, not after. The wall-end run on the perimeter needed two custom filler pieces — one that matched the upper cabinet depth and one that bridged a 2-inch gap at a corner. Both could have been ordered with the original cabinet run. Both required a separate production order and an additional 2-week wait.
We’d protect the LVP flooring from day one of cabinet installation. Standard practice in our situation — cabinets installed over finished floors — is to lay 1/4-inch Masonite hardboard sheets over the entire floor surface before any cabinet base goes in. Cabinet leveling feet are essentially steel points under load, and without protection, they will mark or dent LVP. We learned this after the first base cabinet section was set and found a pressure mark at one leveling foot. Hardboard now. From the first cabinet.
We’d have the appliance footprint confirmed against cabinet specs before the cabinet order. We measured the range, dishwasher, and refrigerator. What we didn’t do was confirm the refrigerator panel depth against the upper cabinet run on that wall. The refrigerator door clearance was tighter than expected when the uppers were in place. Not a disaster — but an awkward 45 minutes with a tape measure trying to verify there was no binding before the refrigerator was moved back.
We’d schedule countertop fabrication earlier in the process. Fabricators in our market are booking 3–5 weeks out from templating. We didn’t start that conversation until cabinet installation was nearly complete. That adds 3–5 weeks of living with an unfinished kitchen at the end of the project — by far the most emotionally taxing phase.
.webp)
Real Cost Breakdown: What We’ve Spent and What to Expect
These are real numbers with real context. The ranges reflect actual project variability — Midwest US costs are on the lower end; coastal US, UK, and Australian markets push significantly higher.
| Category | Low Estimate | Mid Estimate | High Estimate | Notes |
|---|---|---|---|---|
| Demo and disposal | $800 | $1,800 | $3,500 | DIY demo saves labor; dumpster rental $300–$700 |
| Asbestos/lead testing | $100 | $200 | $500 | Pre-1985 homes — test before demo, not after |
| Electrical (remediation + new circuits) | $1,200 | $2,800 | $6,000 | Aluminum wiring remediation adds $1,500–$3,000 |
| Plumbing rough-in updates | $400 | $1,200 | $3,000 | Farmhouse sink relocation, supply valve updates |
| Drywall repair / replacement | $500 | $1,200 | $2,500 | Full gut commonly requires partial or full replacement |
| Upper cabinets (semi-custom) | $3,000 | $5,500 | $9,000 | Per linear foot installed: $200–$450 |
| Lower cabinets (semi-custom) | $4,000 | $7,000 | $12,000 | Per linear foot installed: $250–$500 |
| Kitchen island build / framing | $800 | $2,000 | $5,000 | Custom framing adds cost vs. freestanding |
| Countertops (quartz, perimeter + island) | $3,500 | $6,500 | $12,000 | Edge profiles, sink cutout, and template fee add $400–$800 |
| Farmhouse sink + faucet | $700 | $1,400 | $2,800 | Fireclay sink $600–$1,400; quality touchless faucet $300–$700 |
| Subway tile backsplash + installation | $600 | $1,400 | $2,800 | Material $2–$5/sq ft; labor $10–$20/sq ft |
| Range hood (liner insert + wood surround) | $800 | $1,800 | $4,000 | Liner CFM rating must match cooktop BTU |
| Recessed lighting + pendants | $600 | $1,400 | $3,000 | Includes fixtures, trim kits, and electrician finish |
| Under-cabinet LED strip lighting | $200 | $450 | $900 | Color-tunable strip sets; professional installation adds $200–$400 |
| Cabinet hardware (30–40 pieces, PVD) | $350 | $550 | $900 | PVD finish: $8–$18/piece |
| Permit fees | $200 | $600 | $1,500 | Varies widely by municipality — confirm before bidding |
| Total Estimated Project Cost | $18,150 | $36,800 | $69,400 | Midwest US to coastal US range; UK and AU add 20–35% |
Regional note: Midwest US (Kansas, Iowa, Missouri, Nebraska) represents the most favorable labor market nationally for kitchen renovation — full gut labor runs $8,000–$18,000. Equivalent scope in coastal California or the Northeast runs $20,000–$45,000 in labor alone. In the UK, kitchen installation tradespeople typically bill by day rate (£250–£450/day) rather than per project; total UK kitchen fit-out labor commonly runs £4,000–£10,000 depending on region. Australian markets in Sydney and Melbourne run 30–50% above Midwest US equivalents.
What catches people off guard: The template fee, edge profile upcharge, and sink cutout charge on countertops are almost never included in the quoted price-per-square-foot. Add $400–$800 to any countertop quote you receive before comparing bids. Similarly, permit fees vary enormously by municipality and are frequently omitted from contractor bids as a separate line item — ask explicitly.
Still working through decisions on your own renovation? The questions below are the ones we hear most from readers going through the same process — answered from actual experience on this project, not from a list of generic search queries.
.webp)
.webp)
.webp)
Frequently Asked Questions
How long does a full kitchen gut renovation take in an older home?
A full kitchen gut renovation in a home built before 1985 typically takes 8–14 weeks from demo to final punch list, assuming no major structural surprises. Realistic phases: demo and disposal (1 week), rough-in inspection and repair — electrical, plumbing, HVAC — (1–3 weeks, longer if remediation is required), drywall repair or replacement (1 week), cabinet installation (1–2 weeks), countertop templating and fabrication (3–5 weeks from template date), backsplash and finish work (1–2 weeks). The countertop fabrication lead time is the most common schedule extension point — fabricators in most markets are 3–5 weeks out from templating.
What hidden problems should I expect when gutting a kitchen in a home built in the 1970s or 1980s?
The four most common discoveries: (1) Aluminum branch circuit wiring, present in many US homes built 1965–1973, requiring COPALUM crimp remediation or rewiring — not addressable by outlet replacement; (2) Galvanized steel supply pipes that restrict flow before any exterior sign of failure; (3) Asbestos-containing materials in joint compound, ceiling texture (popcorn), floor tile adhesive, and pipe insulation in pre-1979 construction; (4) Active electrical runs inside soffits that most homeowners assume are hollow. Budget $3,000–$12,000 for discoveries before demo begins. If you’re in a pre-1978 build, hire a certified asbestos inspector before demo — this is legally required in several states, provinces, and counties.
How much does a full kitchen gut renovation cost in 2026?
In the US Midwest, a full kitchen gut renovation with semi-custom cabinets, quartz countertops, tile backsplash, new lighting, and updated rough-ins runs $20,000–$45,000 for a mid-size kitchen (150–250 sq ft). Coastal US markets push that to $40,000–$85,000 for equivalent scope. UK homeowners should budget £18,000–£40,000 for a full kitchen fit-out including all trades. Australian kitchens in Sydney and Melbourne run AUD $30,000–$65,000 for comparable scope. These ranges assume owner-supplied appliances. High-spec appliance packages add $5,000–$20,000 at any market.
Is it cheaper to reface kitchen cabinets or do a complete gut renovation?
Cabinet refacing — replacing door fronts, drawer faces, and hardware while keeping existing cabinet boxes — typically runs 30–50% of the cost of a full gut renovation for equivalent cabinet square footage. For a mid-size kitchen, that difference can represent $8,000–$20,000 in savings. The scenario where refacing makes sense: cabinet boxes in solid structural condition, layout that works, and electrical/plumbing that doesn’t need to be opened. The scenario where it doesn’t: any of those three conditions are absent, or you’re doing it in a home that will still have 1970s wiring behind the walls regardless.
How do two-tone kitchen cabinets work — which color goes on top and which on the bottom?
The convention is lighter color on top, darker on the bottom — almost universally white or cream uppers with a dark lower in a modern farmhouse context. The design logic: dark lower cabinets visually anchor the room and make the ceiling feel higher; light upper cabinets reflect available light and keep the upper room volume from feeling heavy. The split line falls at the countertop surface, which serves as a natural visual dividing element. The countertop color should provide contrast against both zones — a very pale quartz against white uppers reads as one merged surface; a mid-tone or veined quartz creates definition at both transitions.
What are the plumbing rough-in requirements for installing a farmhouse apron-front sink?
A farmhouse apron-front sink requires the drain stub-out to be positioned lower than a standard undermount installation — typically 2–4 inches lower, depending on the specific sink depth and the configured drain placement. Supply line valves must be positioned to clear the cabinet interior without interfering with the sink mounting hardware. The base cabinet itself must be a purpose-built farmhouse sink base or a modified standard base with the face frame cut away to accommodate the apron front. All of these decisions must be made before the cabinet order is placed and before rough-in work is finalized.
Can I install new base cabinets over already-installed LVP flooring?
Yes, with one non-negotiable protection step: lay 1/4-inch Masonite hardboard across the entire floor area before any cabinet base is set. Cabinet leveling feet are steel-tipped and loaded under the weight of the cabinet box — they will mark, dent, or puncture LVP without surface protection. Do not rely on moving blankets or cardboard; hardboard sheets are the industry standard. Cut around base locations and leave hardboard in place for the duration of cabinet installation, then remove before toe kicks are installed.
This article documents an ongoing kitchen renovation project in a 1979 home. Cost figures reflect 2026 market conditions across US, UK, Canada, and Australia markets. All safety guidance is advisory; work involving electrical systems, plumbing, structural elements, or hazardous materials should be performed or supervised by licensed professionals.
.webp)
 (1).webp)
.webp)
.webp)