.webp)
Most bathroom renovation delays and budget overruns don’t come from bad materials or a bad contractor. They come from doing things in the wrong order — tiling before an inspection, ordering a vanity before the plumbing rough-in is locked in, or paying to close up walls that then have to be opened again. Getting the sequence right the first time is the single biggest lever homeowners have over cost and timeline.
Quick answer: The correct order for a bathroom renovation is: plan and budget, finalize design and materials, pull permits, demolish the old bathroom, complete plumbing and electrical rough-in, pass a rough-in inspection, waterproof the wet areas, tile, install fixtures (tub, vanity, toilet, tapware), finish with paint and hardware, then pass a final inspection.
Quick Takeaways
- The order exists because of trade dependencies — plumbing and electrical must be inspected before anything covers them up.
- A mid-range full renovation typically runs 4–8 weeks once demolition starts, not counting the planning phase.
- Homes built or last renovated before roughly 1990 should be checked for asbestos-containing materials before demolition begins.
- DIY is realistic for demolition, painting, and hardware. Plumbing, electrical, and waterproofing usually need a licensed trade.
- Reordering steps to “save time” is the most common cause of rework and cost overruns in bathroom projects.
.webp)
The Full Order of Steps (At a Glance)
- Plan, budget, and set a realistic timeline
- Finalize the design and order materials
- Pull permits and confirm your trades
- Demolition
- Plumbing and electrical rough-in
- Rough-in inspection
- Waterproofing
- Tiling
- Fixture and vanity installation
- Paint, trim, and hardware
- Final inspection and punch list
Each of those sounds simple as a list. In practice, several of them are multi-day processes with their own internal sequence, and skipping ahead on any one of them is where most of the pain happens. Here’s why the order is fixed, and what actually happens at each stage.
Why the Order Actually Matters
A bathroom renovation isn’t one job — it’s four or five trades working in a small, wet room, each one depending on the last. The plumber needs the framing finished before running pipe. The electrician needs to know where fixtures land before roughing in wiring. The tiler can’t start until waterproofing has cured, and waterproofing can’t go on until an inspector has signed off on what’s behind the wall.
Reorder any of that, and one of two things happens: the inspector makes you rip out finished work to see what’s underneath, or a problem gets sealed inside a wall where it won’t surface until there’s water damage months later. Most published renovation guides list the stages without explaining this part, which is exactly why homeowners (and sometimes inexperienced contractors) get the sequence wrong.
Phase 1: Planning, Budgeting & Timeline
This is the phase people rush, and it’s the one that determines whether the rest of the project stays on budget.
Start with a realistic number, not an aspirational one. Contractors commonly recommend building in a 10–20% contingency on top of your working budget — bathrooms are one of the rooms most likely to reveal hidden problems once the walls come off, especially subfloor damage or outdated plumbing.
Set your timeline around trade availability, not around when you’d like to be finished. Licensed plumbers, electricians, and tilers in most markets book several weeks out, and a good renovation schedules them well before demo day, not after.
Practical steps for this phase:
- Decide whether this is a full gut renovation or a fixture/finish refresh
- Set a total budget with a contingency buffer
- Identify a rough timeline, including lead time for custom materials
- Decide early whether you’re managing trades yourself or hiring a general contractor
Phase 2: Design & Material Selection
This step has to be finished — genuinely finished, not “mostly decided” — before demolition starts. Plumbing and electrical rough-in depend on knowing exactly where the vanity, shower, and toilet will sit. Changing the layout after rough-in is one of the most expensive mistakes in a renovation.
Current bathroom renovations lean toward a few consistent choices: wall-hung (floating) vanities with vessel basins, matte black or brushed tapware, frameless glass shower screens, built-in wall niches for storage instead of a caddy, and freestanding tubs where space allows. None of that is required — but whatever you choose, lock it in now, because it determines where every pipe and wire goes.
Common mistake: Ordering a vanity or tub online before confirming it fits the finalized plumbing rough-in dimensions. Measure against the actual rough-in spec, not the showroom floor sample.
Material selection checklist:
- Tile style, size, and finish (confirm lead time — custom or imported tile is a frequent cause of delay)
- Vanity style and exact rough-in dimensions
- Tub or shower configuration
- Tapware finish and placement
- Ventilation fan capacity for the room’s size
- Lighting plan, including any vanity or mirror lighting
.webp)
Phase 3: Permits & Hiring Trades
Permit requirements vary by country, state, and even municipality, so the only universal advice is: check with your local building authority before demo, not after. That said, most jurisdictions across the US, UK, Canada, and Australia require a permit when a renovation involves moving plumbing, altering electrical circuits, or changing the room’s structure — and most do not require one for a cosmetic refresh (new paint, new tile over an existing waterproof membrane, fixture swaps in the same location).
Electrical and plumbing work near water sources is regulated for a reason. In the US this typically falls under local adoption of the National Electrical Code and IPC; the UK works under Part P and Part G of the Building Regulations; Canada follows the National Building Code plus provincial plumbing/electrical codes; Australia uses the National Construction Code alongside AS/NZS 3500. The details differ, but the underlying safety logic — GFCI/RCD protection near water, correctly rated circuits, proper drainage falls — is consistent everywhere.
This is also the point to lock in your trades. A plumber and electrician need to be booked before demo day, because an empty, opened-up bathroom sitting idle for two weeks waiting on a tradesperson is one of the more common (and avoidable) causes of project delay.
Phase 4: Demolition
Demolition looks simple — rip everything out — but two things are worth doing properly before the sledgehammer comes out.
First, confirm the water is shut off at the isolation valve, not just at the fixture. Second, if the home was built or last renovated before roughly 1990, get the tile, adhesive, and any wall sheeting checked for asbestos before disturbing it. This applies across the US, UK, Canada, and Australia — it’s one of the most commonly skipped safety steps in older-home renovations, and it’s not something to test for yourself; a professional inspection is the appropriate step if the home’s age puts it in that window.
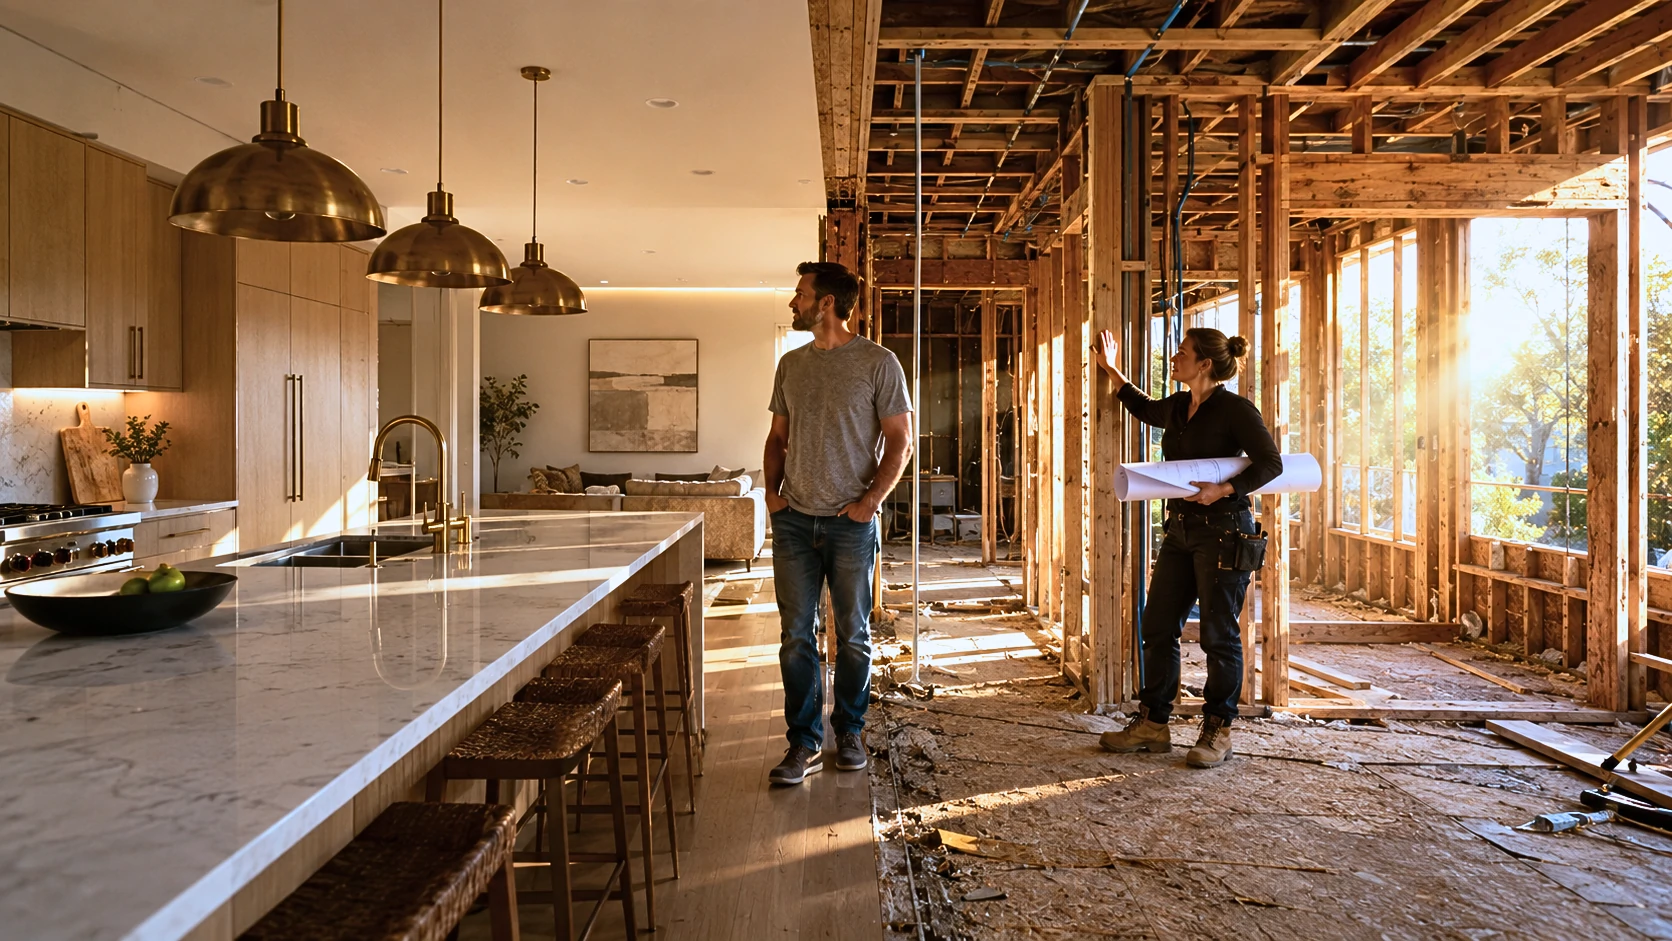
Once demo starts, this is also when hidden problems surface: soft or rotted subfloor around the tub or shower base, corroded galvanized pipe, or outdated wiring that doesn’t meet current code. Budgeting a contingency in Phase 1 is what makes this discovery manageable instead of a crisis.
⚠️ Safety note: Never assume old tile adhesive or vinyl flooring is safe to disturb in a pre-1990s home without checking first. This is a genuine, well-documented risk in older housing stock across all four regions.
Phase 5: Plumbing & Electrical Rough-In
With the room stripped to studs and subfloor, the plumber runs supply and drain lines to their new locations, and the electrician runs circuits for lighting, the exhaust fan, and any GFCI/RCD-protected outlets. This is also when in-floor heating cable or a niche framing gets installed, if included.
This stage is the clearest line between DIY-friendly and trade-only work. Moving or adding plumbing and electrical circuits requires licensed trades in most jurisdictions, and for good reason — undersized drain lines, incorrect venting, or unprotected circuits near a wet room are the kind of mistakes that don’t show up until months later, usually as a leak or a tripped breaker that shouldn’t have been live in the first place.
What typically happens in this phase:
- Supply and drain lines repositioned to match the new layout
- Shower/tub valve and drain set to the correct height and location
- Electrical circuits run for lighting, exhaust fan, and outlets
- Exhaust fan ducting routed to the exterior (not just into the attic space)
Phase 6: Rough-In Inspection
This is the step most homeowner guides skip entirely, and it’s arguably the most important one in the whole sequence.
Before drywall, cement board, or waterproofing goes up, an inspector checks the plumbing and electrical work while it’s still visible. If it passes, the project moves forward. If it doesn’t, whatever needs fixing gets fixed before it’s sealed behind a wall — which is dramatically cheaper than discovering a problem after tile is installed.
Skipping this inspection to save a week is the single most expensive sequencing mistake in bathroom renovations. If a plumbing or electrical fault is found after the wall is tiled, the fix usually means demolishing finished tile work to get back to it — paying for the same labor and materials twice.
.webp)
Phase 7: Waterproofing
Once rough-in passes inspection, the wet areas — shower walls, shower floor, and often the area around the tub — get a waterproof membrane over cement backer board. This layer is what actually keeps water inside the shower and out of the subfloor and framing; tile itself is not waterproof, grout lines especially.
This is a step where corner-cutting doesn’t show up immediately. A poorly waterproofed shower can look completely fine for a year or more before slow leaks cause subfloor rot or mold growth inside the wall cavity — problems that are far more expensive to fix than doing the waterproofing correctly the first time.
Phase 8: Tiling
With waterproofing cured, tiling starts — typically floor first in a walk-in shower, then walls, then the room’s floor. Corner niches, if included in the design, get their surrounding tile set at this stage too.
Tile lead times are a frequent, underestimated source of delay. Custom, imported, or large-format tile can take weeks to arrive, and ordering it late — after demo has already started — is a common reason bathrooms sit half-finished longer than planned. Order tile during Phase 2, not after demo begins.
Phase 9: Fixture & Vanity Installation
Now the room starts looking like a bathroom again. The general order is: tub or shower base and glass screen, then vanity, then toilet, then tapware and any wall-mounted fixtures. Wall-hung vanities in particular need to be anchored into blocking that should have been placed during rough-in — another reason the design has to be finalized before Phase 5, not after.
This is also when a frameless shower screen gets fitted — it’s typically templated after tiling is complete, since it needs to be cut to the exact finished dimensions of the enclosure.
.webp)
Phase 10: Finishing — Paint, Trim & Ventilation
Paint, trim, mirror, towel bars, and any final hardware go on last, once tile and fixtures are set and any risk of damaging them from other work has passed. This is also when the exhaust fan gets its final cover and gets tested.
Ventilation is worth taking seriously rather than treating as an afterthought. An undersized or poorly vented exhaust fan is one of the most common causes of mold and peeling paint in a newly renovated bathroom — the fan needs to be sized to the room and ducted to the outside, not just into the ceiling cavity.
Phase 11: Final Inspection & Punch List
The final inspection confirms the completed room meets code — different from the rough-in inspection, which only covered what was hidden behind the walls. After that, walk the room yourself (or with your contractor) and note anything that needs touching up: caulk lines, grout consistency, drawer alignment, water pressure at each fixture. This punch list is normal, not a sign something went wrong.
Printable Bathroom Renovation Checklist
- Set budget with 10–20% contingency
- Set realistic timeline, accounting for trade and material lead times
- Finalize layout and material selections
- Order tile, vanity, and tub/shower (confirm lead times)
- Confirm permit requirements with local building authority
- Book plumber and electrician
- Shut off water at the isolation valve
- Test for asbestos if the home is pre-1990 and being demolished
- Complete demolition
- Complete plumbing rough-in
- Complete electrical rough-in
- Pass rough-in inspection
- Install waterproof membrane
- Install tile (floor, walls, niche)
- Install tub/shower base and glass screen
- Install vanity and toilet
- Install tapware and fixtures
- Paint and install trim
- Install mirror, hardware, and fan cover
- Pass final inspection
- Complete punch list touch-ups
Realistic Cost Breakdown by Phase
Exact figures vary widely by region, so this table shows cost as a share of total budget, which holds up regardless of whether you’re renovating in the US, UK, Canada, or Australia.
| Phase | Typical Share of Budget | Notes |
|---|---|---|
| Planning & design | 3–5% | Often skipped, but poor planning drives cost elsewhere |
| Demolition & disposal | 5–8% | Higher if hazardous material testing/removal is needed |
| Plumbing rough-in | 10–15% | Higher if the layout is moving, not just refreshing in place |
| Electrical rough-in | 5–8% | Higher with added lighting circuits or heated flooring |
| Waterproofing | 5–7% | Not a place to cut cost — failure here is expensive later |
| Tile & materials | 20–30% | The widest-swinging category; custom tile pushes this up fast |
| Fixtures (tub, vanity, toilet, tapware) | 20–30% | Freestanding tubs and vessel sinks sit at the higher end |
| Finishing (paint, hardware, fan) | 5–8% | Smallest phase but easy to underestimate |
| Labor contingency | 10–20% | Covers hidden subfloor/plumbing issues found during demo |
.webp)
DIY vs Professional: Task by Task
| Task | DIY-Realistic? | Notes |
|---|---|---|
| Demolition | Yes | Wear PPE; confirm no asbestos risk first |
| Plumbing rough-in | No | Licensed trade required in most jurisdictions |
| Electrical rough-in | No | Licensed trade required in most jurisdictions |
| Waterproofing | Sometimes | Product-dependent; many manufacturers require licensed installation for warranty |
| Tiling | Sometimes | Doable with experience; a poor job affects waterproofing performance |
| Fixture installation | Sometimes | Toilet and tapware swaps are common DIY; wall-hung vanities need proper blocking |
| Painting & trim | Yes | Lowest-risk DIY phase |
| Ventilation/exhaust fan wiring | No | Electrical work near a wet room |
.webp)
Common Sequencing Mistakes
Tiling before the rough-in inspection. The most expensive mistake on this list. If plumbing or electrical fails inspection after tile is up, the tile often has to come out.
Ordering fixtures before finalizing the layout. A vanity or tub ordered against a “probably final” plan frequently doesn’t match the actual rough-in once it’s set.
Skipping the permit step. Beyond the legal risk, unpermitted plumbing/electrical work can complicate a home sale later, since it may need to be disclosed or corrected.
Underestimating tile lead time. Ordering tile after demo starts is a common reason bathrooms sit unfinished for weeks waiting on materials.
Treating waterproofing as a formality. It’s the layer that actually stops water damage — cutting corners here doesn’t show up until much later, usually as a costly repair.
Post-Renovation Maintenance
| Task | Frequency |
|---|---|
| Re-caulk shower/tub seams | Every 1–2 years, sooner if cracking or discoloring |
| Reseal grout (porous tile) | Every 12–18 months |
| Clean/inspect exhaust fan | Every 6 months |
| Check under-sink supply lines for slow leaks | Every 6 months |
| Test GFCI/RCD outlets | Every few months |
A bathroom is one of the highest-maintenance rooms in a home simply because of constant moisture exposure. Skipping re-caulking and grout sealing is a common way a well-executed renovation starts showing water damage within a few years — not because the original work was poor, but because these seals wear down and need refreshing.
.webp)
.webp)
FAQ
What is the correct order of steps for a bathroom renovation?
Plan and budget, finalize design and materials, pull permits, demolish, complete plumbing/electrical rough-in, pass rough-in inspection, waterproof, tile, install fixtures, finish with paint and hardware, then pass final inspection.
Do you tile before or after installing the vanity?
Tile first. The vanity is installed after tile so it sits cleanly against the finished wall and floor.
Should plumbing rough-in happen before or after framing changes?
After. Framing needs to be finalized first so the plumber knows exactly where walls, doorways, and fixture locations sit.
What is a rough-in inspection, and why can’t you skip it?
It’s an inspection of plumbing and electrical work while it’s still exposed, before walls are closed up. Skipping it risks having to demolish finished tile or drywall later if a problem is found.
How long does a full bathroom renovation take?
Most mid-range full renovations take 4–8 weeks once demolition starts, not counting the planning phase, which can add several more weeks depending on material lead times.
Can you legally do bathroom demolition yourself?
Generally yes, demolition itself isn’t usually restricted, but check for asbestos risk first in older homes and confirm you’re not disturbing plumbing or electrical connections you’re not qualified to handle.
Bathroom Remodeling Planning & Budgeting
- How to Plan a Bathroom Layout on Paper Before You Renovate
- Bathroom Renovation Mistakes to Avoid: A Homeowner’s Real-World Guide
- Do You Need a Permit to Renovate a Bathroom? (US, UK, Canada & Australia Rules Explained)
- Full Gut Renovation vs. Partial Remodel: How to Choose the Right Bathroom Renovation Plan
- Bathroom Renovation Timeline by Phase: What Happens Each Week
- How Long Does a Bathroom Renovation Take? A Real DIY Timeline, Week by Week
- Bathroom Renovation Checklist: The Correct Order of Steps From Demo to Finish
.webp)
.webp)
.webp)
.webp)