The Painting Prep Step Most DIYers Skip (And Regret)
-
 Olivia Reed
 - 25 Jun, 2026
The short answer: The most effective interior painting tricks center on thorough surface prep, matching your roller nap to your wall texture, maintaining a wet edge while rolling, and applying two thin coats instead of one thick one. Remove painter’s tape while the paint is still slightly tacky — not after it has fully dried.
Quick Takeaways:
- Prep work determines roughly 80% of the final result — technique matters less than most guides suggest
- Roller nap thickness is matched to wall texture, not preference: 3/8 in. for smooth walls, 1/2 in. for standard drywall, 3/4 in. for textured surfaces
- “Paint + primer in one” works on previously painted walls in good condition; it does not replace primer on bare drywall, stained surfaces, or high-gloss finishes
- Lap marks are caused by rolling over a dried edge — not by the paint brand; understanding the mechanics prevents them
- Low-VOC paints have closed the performance gap with conventional formulas; they’re a genuine first choice now, not a compromise
Introduction
The difference between a paint job that looks professional and one that looks like a weekend project usually isn’t the paint brand. Most of the time, it’s something that happened before the first can was even opened.
Prep work is where most DIY paint jobs go sideways — not during the rolling. The frustrating part is that the damage from skipping or rushing prep doesn’t always show up immediately. Sometimes it takes a few weeks, or one humid summer, before bubbling or peeling starts. By then, the drop cloths are in a closet and the receipts are gone.
This article covers the techniques that actually separate smooth, even walls from streaky, amateur-looking results — starting with what goes wrong in prep, moving through tool selection and product choices, and finishing with the execution techniques most guides describe without really explaining.
Why Most DIY Paint Jobs Look “Off”

The honest answer isn’t glamorous: most DIY paint problems come down to structural impatience.
Not the visible kind — most people work carefully enough with a brush. The impatience is in how the project gets planned. Homeowners spend their mental energy choosing the color, budget some time for the rolling, and treat everything before that as an inconvenient delay. The prep — the part that doesn’t look like progress — gets rushed.
Paint doesn’t adhere well to dirty walls. It won’t bond reliably to glossy surfaces that haven’t been scuffed. It can’t bridge cracks that weren’t filled. And even a well-executed rollout falls apart if the wet edge isn’t maintained across the full height of the wall.
The other pattern that shows up consistently: applying one thick coat to finish faster. That approach looks fine for the first hour. Then drips appear, sheen becomes uneven, and the roller texture shows through in a way that a second coat can’t easily correct.
Understanding why these problems happen is more useful than a list of rules. Once you understand the mechanics, you can troubleshoot as you go — not after the paint has cured.
The Tricks That Actually Make a Difference
Before diving into technique, it helps to orient around which tricks genuinely move the needle. There are plenty of hacks that make painting marginally easier. Fewer of them directly affect the quality of the finished wall.
The ones that matter most:
- Prep the surface properly — fill holes, clean walls, and degloss any glossy surface before any paint touches them
- Match your roller nap to your wall texture — this single detail affects coverage, texture, and how much paint ends up on the floor
- Cut in first, then roll — not the other way around
- Maintain a wet edge — work wall sections without stopping mid-surface, and reload the roller consistently
- Apply two thin coats — with proper dry time in between
- Remove tape at the right moment — too early smears; too late tears clean paint off with it
That’s the skeleton. Each of these has real depth behind it, and the sections below explain not just what to do but why it matters and what specifically goes wrong when it’s skipped.
If you’re painting a specific room — bathroom, bedroom, kitchen, or a high-traffic hallway — the approach shifts in a few important ways. The principles here apply everywhere, but room-specific guides cover the variables that change depending on moisture levels, lighting, and traffic.
Prep Work: The Step That Decides Everything

Here’s a scenario worth visualizing: two homeowners paint the same type of room with the same paint in the same color. One finishes in a weekend. The other spends an extra half-day on prep. Eighteen months later, the rushed job has visible crazing near the window, a bubble forming behind the light switch, and a worn scuff near the door that has exposed the previous color. The other wall still looks like it was painted last month.
That extra half-day is the most valuable time in the entire project.
Room Prep Checklist
Work through these in sequence — skipping ahead creates problems that compound:
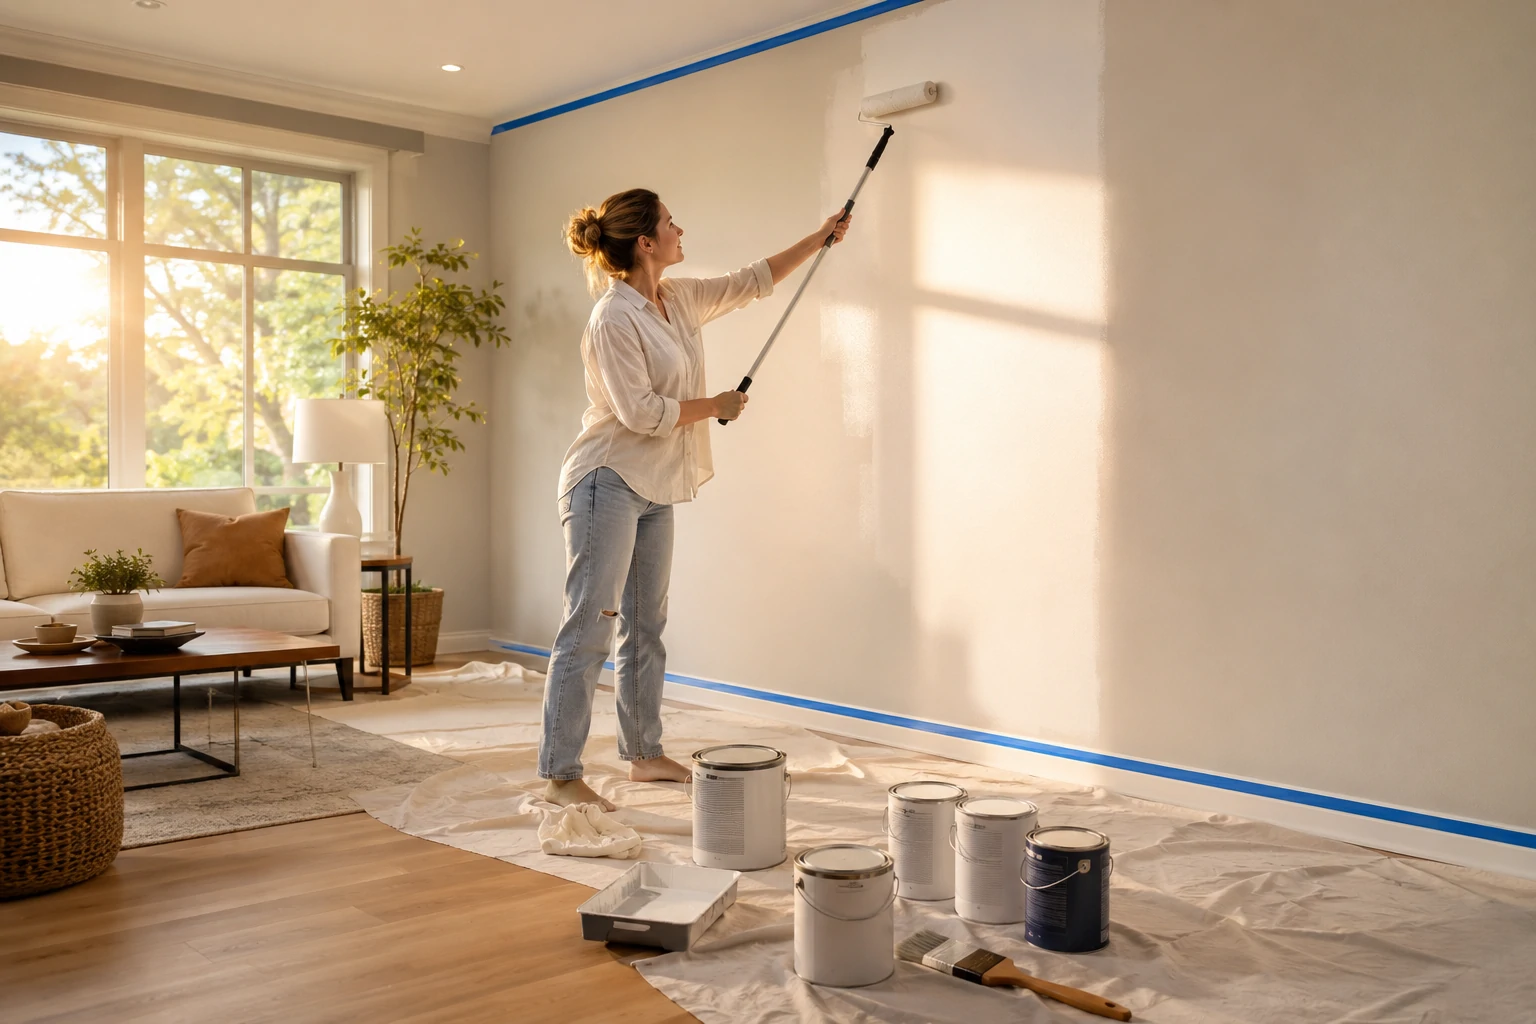
- Clear the room or move furniture to the center and cover with drop cloths (canvas over hardwood; plastic works over carpet but tends to shift underfoot)
- Remove switch plates, outlet covers, and vent covers — painting around them always looks amateur and creates paint bleed issues
- Inspect walls under angled lighting — a handheld work light held at a low angle to the surface reveals dents and texture imperfections that overhead lighting completely hides
- Fill holes and cracks with lightweight spackling compound; allow to dry fully (usually 2–4 hours depending on depth and temperature)
- Sand patched areas smooth with 120–150 grit sandpaper, then feather the edges so patches don’t create a raised ridge visible through the paint
- Clean walls with a damp sponge or diluted TSP cleaner (sugar soap in the UK and AU) — kitchen and bathroom walls especially carry grease and soap film that actively blocks adhesion
- Scuff-sand any glossy surfaces if painting over existing semi-gloss or gloss trim or walls — 220 grit is enough; the goal is to add surface tooth, not remove the coating
- Apply painter’s tape to trim, the ceiling line, and any edges you’re protecting; use delicate-surface tape near fresh plaster or previously wallpapered surfaces
- Lay drop cloths over all flooring and tape the cloth edges where floor meets baseboard — drips travel further than most people expect, and a roller loaded too heavily can splatter several feet
- Apply primer where the surface needs it (the primer decision section below covers when this is necessary and which type to use)
⚠️ Lead Paint Warning: In US homes built before 1978, and UK, Australian, and Canadian homes built before approximately 1960, layers of lead-based paint may exist beneath the current surface. Do not sand or abrade surfaces in these homes without testing first. Lead test swabs are available at most hardware stores for $5–$15. A color change on the swab indicates lead. If results are positive, consult a certified lead-safe contractor for guidance on remediation — sanding lead paint without proper containment is a genuine health risk, not a precautionary footnote.
Choosing the Right Roller and Brush
“Use quality tools” is the kind of advice that sounds useful and isn’t. Here’s what quality actually means in practice.
Roller Nap Guide
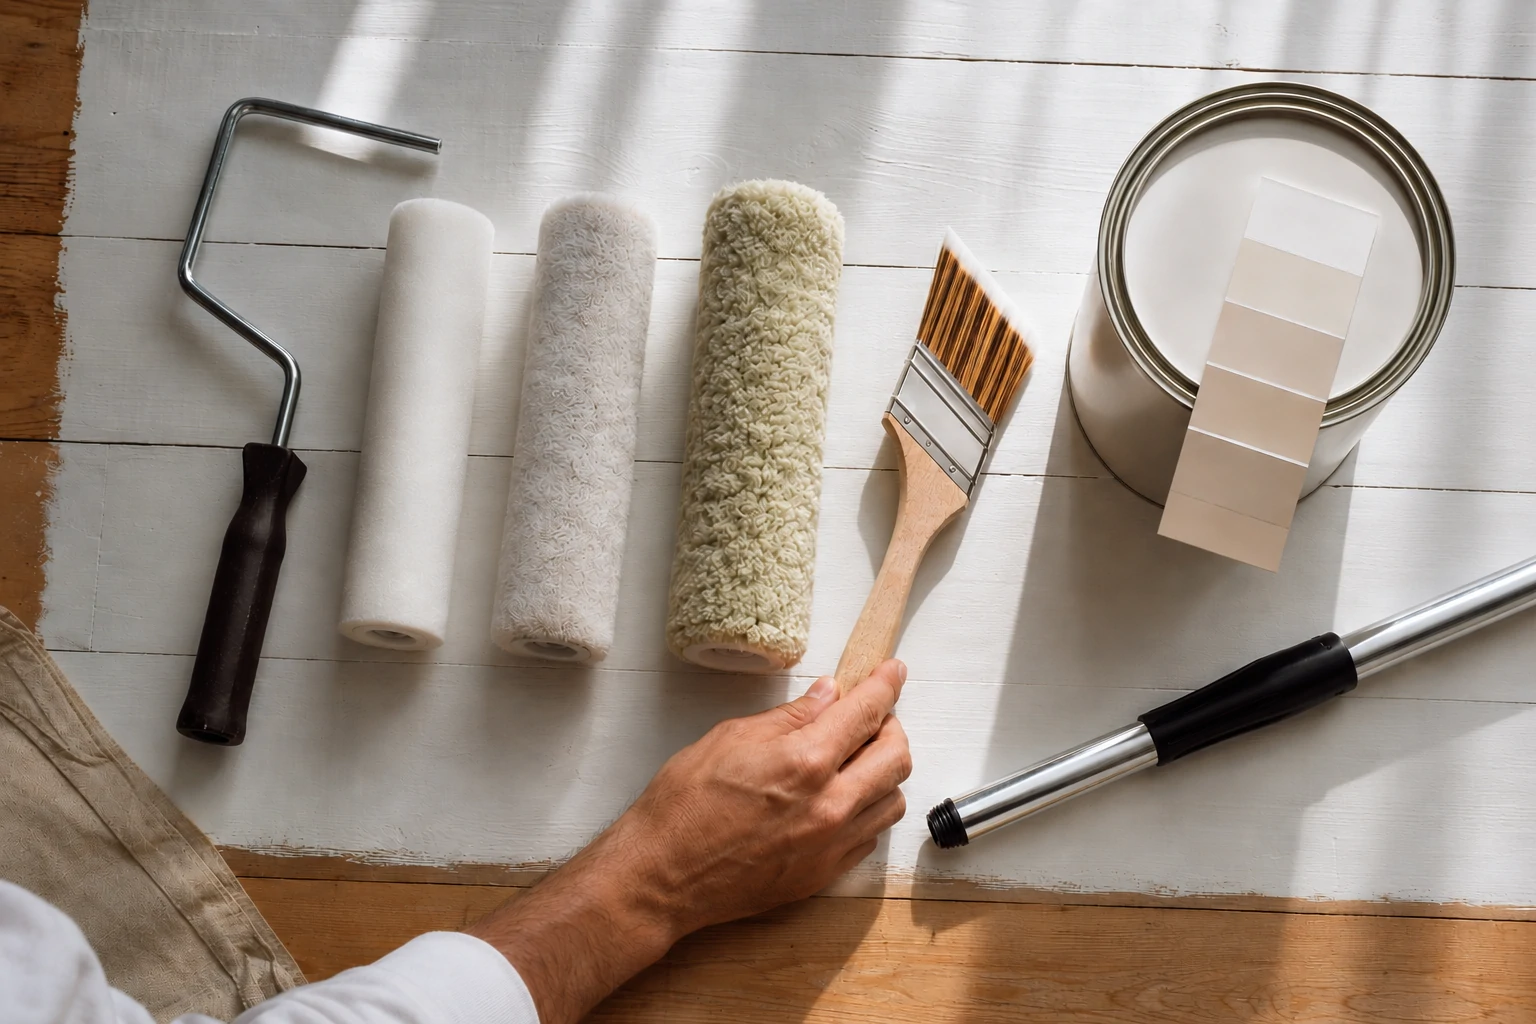
The nap — the depth of the fabric sleeve on the roller — determines how much paint the roller holds, how it releases onto the surface, and what texture it leaves behind. Using the wrong nap for your wall type is one of the most common and least discussed reasons a DIY rollout looks uneven.
| Wall Surface | Recommended Nap | Why It Matters |
|---|---|---|
| Smooth drywall or plaster | 3/8 in. (9mm) | Thinner nap prevents the roller texture from showing in the finished coat on flat surfaces |
| Standard drywall (most interior walls) | 1/2 in. (12mm) | Balanced coverage and paint release for typical painted surfaces |
| Textured, knockdown, or orange peel walls | 3/4 in. (18mm) | Thicker nap fills the texture valleys and distributes paint into surface detail |
| Heavy texture, brick, or masonry | 1 in. (25mm) | Full-depth nap is needed to coat rough surfaces without dry spots |
The other detail worth knowing: cheap roller cores absorb paint and release it unevenly as they compress. A roller with a phenolic (solid plastic) core holds its shape across a full project. It’s worth the extra few dollars, especially for a room requiring two coats.
What to Look for in a Brush
For cutting in edges, an angled sash brush does what a straight-cut brush can’t — it allows you to draw a clean line while keeping your grip at a natural angle. The size most rooms call for is 2 to 2.5 inches.
Flagged bristle ends are the detail that separates a cutting-in brush that works from one that frustrates. Flagged bristles split into fine tips at the end, which holds more paint and releases it more evenly along the edge than unflagged ones. It’s a manufacturing difference that’s difficult to see through the packaging but shows up immediately in how the paint flows from the brush. Look for packaging that says “tipped and flagged” — these cost a bit more but make the cutting-in process noticeably easier.
One other rule: avoid natural bristle brushes for latex paint. They absorb water, swell, and lose their shape mid-project. Synthetic (polyester or nylon) bristles are the correct choice for any water-based paint.
Paint and Primer: What to Buy and When
The question most homeowners ask before a project is whether they need separate primer, or whether “paint and primer in one” products are good enough. The honest answer depends entirely on what the paint is going over.
When Paint + Primer Actually Works (And When It Doesn’t)
| Situation | What to Use | Notes |
|---|---|---|
| Previously painted walls in good condition (no stains, no exposed repairs, no gloss) | Paint + primer hybrid | Performs comparably to a two-product system in this specific scenario |
| Bare drywall — new construction or post-wallpaper removal | PVA drywall primer, then paint | Hybrid products do not seal raw drywall effectively; the paper face absorbs unevenly, and you’ll use far more paint to get coverage |
| Water stains, smoke damage, or tannin bleed from wood knots | Oil-based stain-blocking primer | Water-based stain blockers often fail on heavy stains within 6–12 months; oil-based is the reliable choice |
| High-gloss surfaces (existing semi-gloss or gloss coatings) | Bonding primer, or scuff-sand then prime | Skip this and the new coat may peel within months — especially on trim and doors |
| Fresh plaster | Diluted mist coat (paint cut with water 10%) first, then full coats | Fresh plaster is highly alkaline and absorbent; standard primer and paint soak in unevenly and the finish shows it |
Worth knowing: The performance gap between paint-and-primer hybrids and separate primer systems has genuinely narrowed in current formulations. For a standard repaint on clean, previously painted walls, hybrid products now perform comparably to separate products in most cases. The exceptions — bare drywall, stained surfaces, glossy finishes, fresh plaster — are real exceptions, not marketing caveats.
Sheen Guide: Which Finish for Which Room
Sheen affects more than aesthetics. It determines how easy the surface is to wipe down, how much texture or wall imperfections show under light, and how the paint holds up to moisture, traffic, and cleaning over time.
| Room | Recommended Sheen | Why | Cleanability |
|---|---|---|---|
| Living room | Eggshell or satin | Hides surface imperfections under most lighting; easy to wipe; holds up to moderate daily contact | Good |
| Bedroom | Flat or matte | Soft visual quality; low light reflection; appropriate for low-traffic surfaces | Poor — not wipeable without leaving marks |
| Kitchen | Satin or semi-gloss | Resists moisture, grease, and regular wiping without degrading | Excellent |
| Bathroom | Satin or semi-gloss | Moisture resistance is the priority; easy to clean without damaging the paint film | Excellent |
| Hallways and stairs | Satin | Balance of durability and lower-sheen appearance | Good |
| Ceilings | Flat or ceiling-specific | Hides roller texture; non-reflective reduces glare | Not typically needed |
| Trim, baseboards, and doors | Semi-gloss or gloss | Durability, cleanability, and visual contrast with wall finish | Excellent |
Worth knowing: Flat paint on walls is a legitimate design choice — but one that comes with a real maintenance trade-off. Any mark from scuffing, smudging, or everyday contact is nearly impossible to remove without leaving a visible cleaned patch. If you like the low-sheen look but the room sees daily use, matte or eggshell gives a similar visual quality with significantly better durability. Flat finish is best reserved for ceilings and low-contact feature walls.
Still deciding between a separate primer and a paint-and-primer product? Our guide on when primer actually matters covers which surfaces genuinely need it, which ones can skip it, and exactly what happens when you guess wrong on bare drywall.
The Painting Techniques That Separate Good from Great

Surface prepped. Tools selected. Paint and primer chosen. Now the execution itself.
Cutting In: How to Get Clean Edges
Cutting in — applying a clean painted line at ceiling corners, trim edges, and door frames — is done before rolling, not after. Rolling over a freshly cut-in edge while it’s still wet blends the two seamlessly. Trying to cut in around a dried rolled section creates a visible edge where the two applications meet.
The technique, step by step:
- Load the brush so it holds paint without dripping — about two-thirds full, wiped lightly on the rim of the can
- Start approximately half an inch from the edge and draw one smooth stroke toward it; don’t attempt the clean line with a heavily loaded brush on the first pass
- Refine the edge using just the bristle tips, with light pressure and strokes nearly parallel to the surface
- Work in 2–3 foot sections; don’t try to cut in the entire wall before the first section dries
- Keep a slightly damp cloth within reach for immediate smear corrections — wet paint lifts cleanly; dried paint does not
Worth knowing: Painter’s tape is helpful but not infallible on textured walls. Paint bleeds under tape on rough surfaces almost regardless of pressure. A less obvious trick: apply a thin coat of the existing wall color along the tape edge first. It seals the gap with paint that blends in — so any bleed from the new color is invisible. Let that dry, then apply the new color.
Rolling Without Lap Marks
Lap marks are the most common visible sign of a DIY paint job, and they’re almost never caused by the paint brand. They’re caused by one specific thing: rolling over paint that has started to dry at the edge.
Here’s what’s happening mechanically: latex paint begins to form a skin within a few minutes, especially in dry or warm conditions. When you roll over a section where the edge has started to dry, the dried film gets pressed and sealed into the surface — creating a visible ridge where two paint films meet at different stages of cure.
Preventing this requires maintaining what painters call a “wet edge”:
- Work in complete, floor-to-ceiling strips roughly 3–4 feet wide
- Finish each strip completely before starting the next one; don’t load new sections out of sequence
- Keep the roller consistently loaded — underloaded rollers drag, dry faster, and leave thinner coverage at the edges
- Use an extension pole so you can complete full-height passes without stopping mid-wall to reposition
- In dry or warm conditions — low humidity, summer, or with heating running in winter — use a paint extender additive to increase the open time by 10–20 minutes
Worth knowing: Season matters more than most guides acknowledge. Spring and autumn are genuinely the best times for interior painting — moderate humidity extends open time and makes maintaining a wet edge much more manageable. Peak summer with air conditioning (very low humidity) and winter with forced-air heat (also low humidity) both increase the risk of lap marks. If you’re painting in either of those conditions, work faster or use an extender.
Two Coats vs. One: Why It Matters More Than Paint Brand
“One coat” claims on paint labels are technically accurate in some narrow conditions and practically misleading in most real-world situations.
One coat may cover adequately when going from a similar white to another white on a wall in excellent condition. For almost any other scenario — covering a dark existing color, painting over repairs, handling a significant color change, or covering stained areas — two coats minimum is the only reliable path to even coverage and consistent sheen.
The issue isn’t just opacity. A single thick coat takes longer to dry, is more prone to drips and sagging while wet, creates an uneven paint film that shows as inconsistent sheen, and doesn’t bond as well to the surface as two thinner applications layered properly. Two thin coats are more durable than one thick one.
Allow full dry time between coats. “Dry to touch” (usually 1–2 hours with most latex paints) is not the same as “ready to recoat” (typically 4 hours minimum, though humidity and temperature affect this — check the label). Recoating too early traps solvent beneath the surface, which creates adhesion issues and uneven sheen that shows up a few days later rather than immediately.
Common Mistakes and How to Avoid Them
Most of these happen for understandable reasons — not carelessness. Knowing the root cause helps you recognize and stop them mid-project rather than discovering them after the fact.
| Mistake | Why It Happens | How to Avoid It |
|---|---|---|
| Skipping or rushing surface prep | Prep is unglamorous; the consequences aren’t visible until problems appear weeks or months later | Treat prep as the first and most important phase of the project, not a preamble to the real work |
| Painting over high-gloss surfaces without deglossing | The problem isn’t obvious until the new coat peels, sometimes months later | Scuff-sand any glossy surface with 220 grit, or use a bonding primer before painting |
| Applying one thick coat | Feels more efficient; “one coat” claims on packaging reinforce this | Two thin coats with proper dry time between them — every time |
| Not maintaining a wet edge | Stopping mid-wall, or working in conditions where paint dries faster than expected | Work in complete sections, keep the roller loaded, use paint extender in dry or warm conditions |
| Removing painter’s tape after paint fully dries | The tape feels easier to handle when dry — but the dried paint film bonds to it and lifts off with it | Pull tape at a 45-degree angle while the second coat is still slightly tacky, not fully dry |
| Using flat paint on high-traffic walls | Chosen for the look; the maintenance problem only becomes clear over time | Choose eggshell minimum for any wall that sees regular contact — same visual quality, meaningfully better durability |
| Touch-ups applied with a brush over a rolled surface | The brush texture doesn’t match the roller texture, so the touch-up shows | Use a small foam roller for touch-ups to replicate the original texture |
| Starting paint too close to the wall edge with a loaded brush | Paint bleeds past the intended line on the first stroke | Start half an inch back, draw toward the edge, then refine — don’t try to place a sharp line with a full-load brush |
Worth knowing: Touch-ups almost never match the existing wall exactly — even from the same paint can. Sheen degrades naturally as walls are cleaned and handled over months and years, so the existing surface reflects light differently than a fresh coat does. A single touch-up spot, even with identical paint, tends to stand out. For high-visibility areas, a full wall repaint from corner to corner is the only way to truly reset the surface.
Touch-Ups, Tape Removal, and Cleanup
The last 10% of a paint job is where a surprising amount of DIY results get quietly undermined.
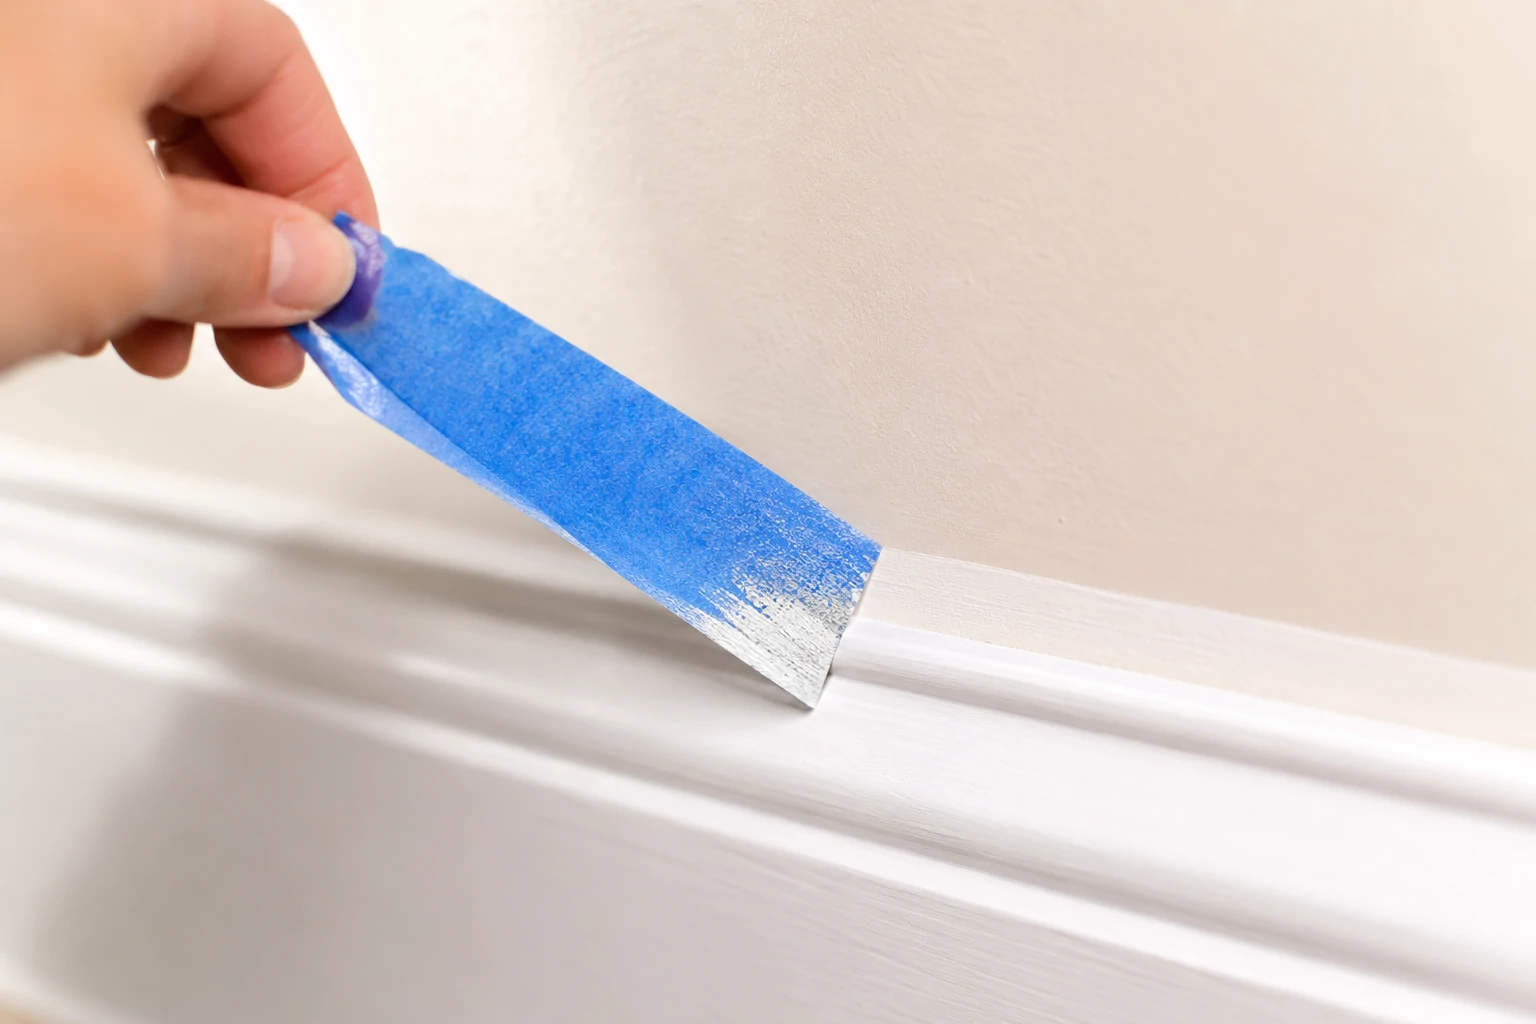
Tape removal timing is the variable most guides handle incorrectly. The rule: remove painter’s tape while the second coat is still slightly tacky — not fully dry, and not immediately after rolling while it’s wet and smearable. Pull slowly, at a 45-degree angle back over itself, away from the painted surface.
⚠️ Tape Removal Warning: If the tape has been left on until the paint has fully cured — typically 24 hours or more after the final coat — the paint film has bonded to the tape edge. Peeling it at this point can tear clean paint away in strips. The fix: use a sharp utility blade or artist’s knife to score along the tape line first, cutting just through the paint film. Pull slowly after scoring. This separates the two paint sections cleanly rather than tearing.
Brush and roller cleanup with latex paint is straightforward if done promptly. Warm water within 30 minutes of finishing is enough. After that, dried latex requires a brush cleaner or spinner tool. For oil-based primer, mineral spirits are needed.
Overnight storage trick for multi-day projects: wrap brushes and rollers tightly in plastic wrap and store in the refrigerator overnight. They stay workable without cleaning and are ready to use the next morning with no prep.
Room reoccupation: allow the room to dry for at least 24 hours before moving furniture back in. High-sheen paints (satin, semi-gloss) need 5–7 days to fully cure before objects are pushed against the walls — furniture, picture frames hung with adhesive strips, or door hardware all require a fully cured surface to avoid marks.
A Note on VOCs and Indoor Air Quality
This section used to be a precautionary footnote in most painting guides. In 2025–2026, it belongs in the main discussion.
VOCs — volatile organic compounds — are the chemicals that evaporate as paint dries and continue to off-gas for a period afterward. In a poorly ventilated room, elevated VOC concentrations cause headaches, dizziness, and respiratory irritation. For households with children, pets, or anyone with asthma or chemical sensitivities, this is a real consideration — not a theoretical one.
Low-VOC and zero-VOC paints have genuinely closed most of the performance gap with conventional formulas over the past several years. Earlier versions had real drawbacks in coverage and durability. Current formulations from major manufacturers largely match conventional products on both counts. If indoor air quality is a priority in your household, choosing a low-VOC or zero-VOC product is no longer a compromise — it’s a straightforward decision.
Practical ventilation guidance regardless of paint type:
- Open windows and run fans to create cross-ventilation while painting and for at least 48–72 hours after the final coat
- Keep children and pets out of freshly painted rooms until odor has clearly dissipated
- In winter, resist the instinct to close the house completely — some ventilation is still needed for off-gassing, even at the cost of brief heat loss
- Most off-gassing occurs in the first 24–72 hours; residual VOC levels drop substantially after the first week for most interior latex paints
Still have a specific question before you pick up a brush? The section below covers what most first-time painters ask right before they start — including a few that don’t come up in most basic guides but catch people off guard mid-project.
Frequently Asked Questions
What is the single most important step in a DIY paint job?
Surface prep, without question. Clean, smooth, properly primed walls are the foundation every other technique depends on. Skilled technique on a poorly prepped wall still produces a poor result. Average technique on a well-prepped wall produces a finish that looks professional. The two are not interchangeable.
How do I avoid streaks and lap marks when rolling paint?
Maintain a wet edge throughout. Work in complete floor-to-ceiling strips roughly 3–4 feet wide, and don’t stop mid-wall. Lap marks happen when the roller hits a section that has started to dry at the edge. Load the roller consistently and keep moving at a steady pace. In dry or warm conditions, a paint extender additive slows the drying time enough to make the wet edge much more manageable.
Do I always need to prime before painting?
Not always. On previously painted walls in good condition — no stains, no bare areas, no glossy sheen — a paint-and-primer hybrid product performs comparably to a separate primer coat. You do need a dedicated primer on bare drywall (PVA drywall primer), over water stains or smoke damage (oil-based stain blocker), over any high-gloss surface (bonding primer), and on fresh plaster (a diluted mist coat first). Guessing wrong on bare drywall is one of the most common and costly product mistakes in a DIY repaint.
What roller nap should I use for smooth walls vs. textured walls?
3/8 in. (9mm) for smooth plaster or drywall. 1/2 in. (12mm) for typical interior drywall. 3/4 in. (18mm) for textured, knockdown, or orange peel surfaces. Using a thin nap on a textured wall leaves dry spots in the texture valleys. Using a thick nap on a smooth wall leaves visible roller texture in the dried finish — sometimes called “nap stipple” — that can’t be rolled out after the fact.
How many coats of paint does a room actually need?
Almost always two. One-coat products can work when going from a very similar color on a wall in good condition with no repairs. For any significant color change, coverage over patched areas, or painting over a dark existing color, two coats is the minimum for even sheen and full coverage. There’s no reliable shortcut here.
How long should I wait between coats of interior paint?
A minimum of 4 hours for most latex paints under normal conditions — longer in high humidity or cooler temperatures. “Dry to touch” (1–2 hours) is not the same as ready to recoat. Check the label; formulations differ. Recoating too early traps solvent beneath the new film, which creates adhesion problems and uneven sheen that sometimes doesn’t show until a few days after the project is finished.
What’s the best technique for cutting in along edges and ceilings?
Load the brush about two-thirds full, start half an inch back from the intended edge, and draw toward it in one controlled stroke. Then refine the line using just the bristle tips with light pressure. Always cut in before rolling — not after — so the wet cut-in edge can blend into the rolled section while both are still workable.
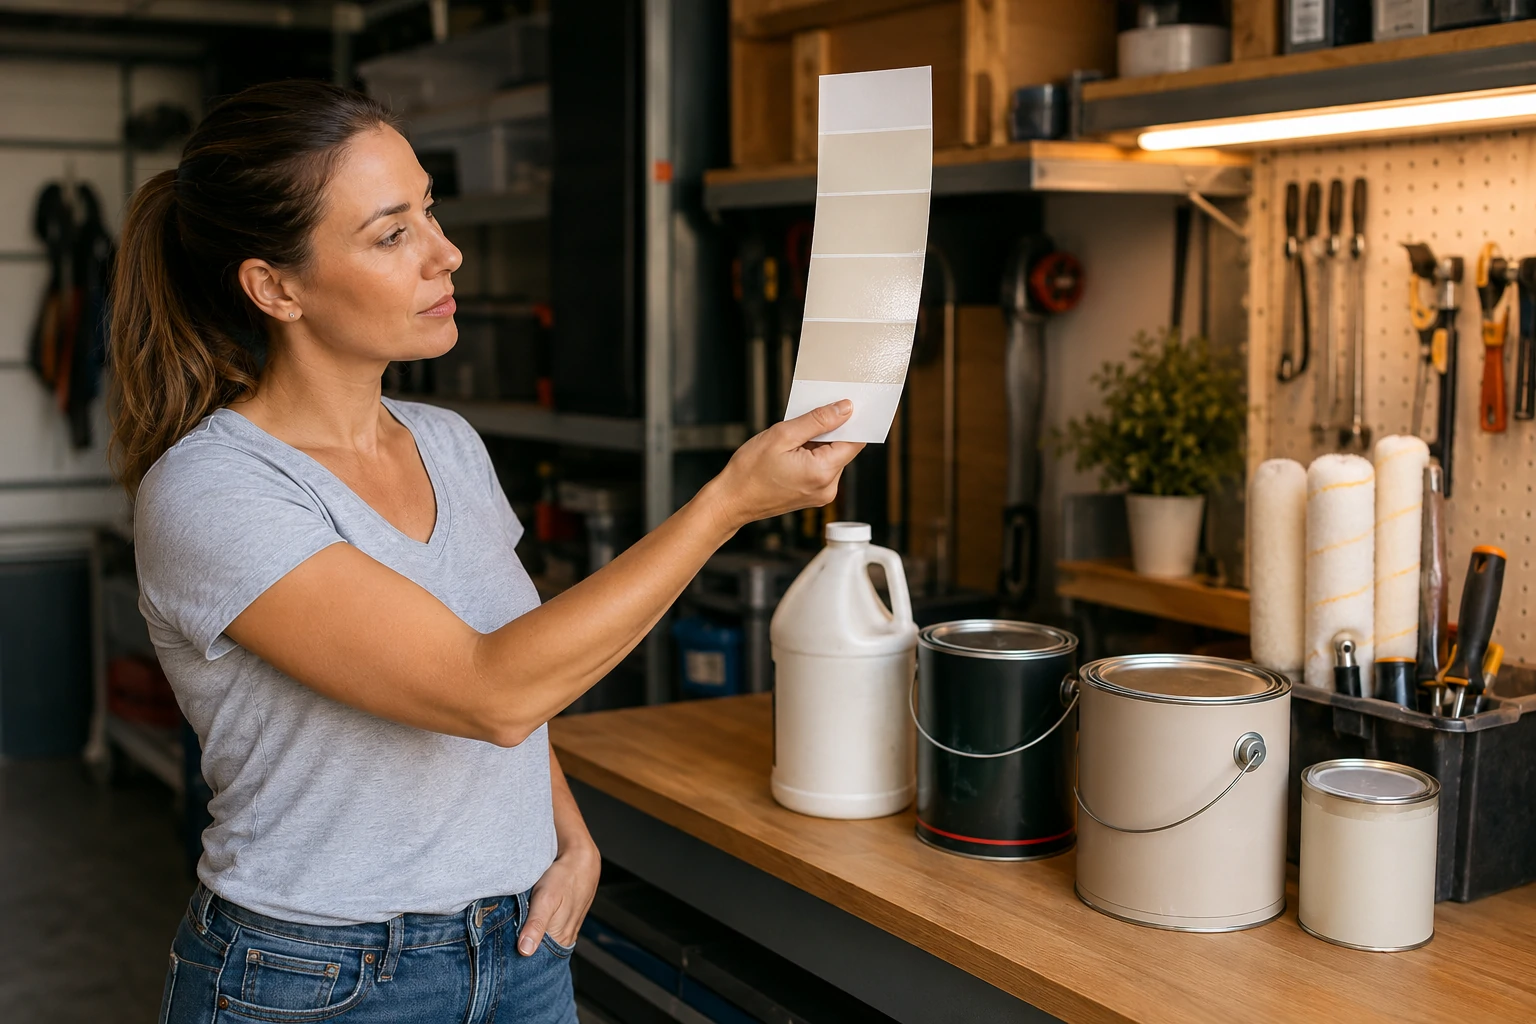
Why does my paint color look different once it dries?
Most latex paints dry slightly darker and more saturated than they appear wet. Color also shifts under different light sources — warm incandescent light, cool LED, and natural daylight all change how the same color reads on the wall. This is called metamerism. Always assess paint samples under the actual lighting conditions of the room, and check at different times of day before committing to a full project.
Can I paint over old paint without sanding or priming?
On previously painted surfaces in good condition — no peeling, no glossy finish, no significant staining — cleaning thoroughly and using a paint-and-primer hybrid is usually sufficient. You should not skip preparation on glossy surfaces or any surface with loose or flaking paint. If there’s any doubt, scuff-sanding with 220 grit takes 20 minutes and eliminates most adhesion concerns before the first coat goes on.
What happens if you skip the primer on bare drywall?
The paper face of bare drywall absorbs paint unevenly, creating an effect called flashing — a mottled, patchy finish where some sections look shiny and others look flat regardless of how carefully you roll. Repaired patches show through more obviously. You’ll use significantly more paint trying to compensate, and the end result still won’t look even. PVA drywall primer seals the paper face and gives the paint a consistent surface to bond to — it’s not optional on bare drywall.
Is paint-and-primer-in-one really as effective as using separate products?
For previously painted walls in good condition, yes — current hybrid formulations perform comparably in most cases. For bare drywall, stained surfaces, high-gloss finishes, or fresh plaster, no — these surfaces require specific primer types that a hybrid product doesn’t replicate. The product category has genuinely improved; the exceptions are real surface-chemistry issues, not marketing fine print.
What paint finish should I use in a bathroom or kitchen?
Satin or semi-gloss in both rooms. These sheens resist moisture, clean easily without degrading the paint film, and hold up to steam and grease. Flat or matte finishes absorb moisture, can grow mold behind the paint film in high-humidity conditions, and are nearly impossible to wipe without leaving visible damage.
How do I remove painter’s tape without pulling off the paint?
Pull while the paint is still slightly tacky — not wet, and not fully dried. Use a 45-degree angle, pulling the tape back over itself slowly and steadily. If you’ve left tape on until the paint has fully cured, score along the tape line with a utility knife first to separate the paint films before peeling. Going slowly matters more than going carefully — quick pulls increase tearing risk.
How do I know if there’s lead paint in my home before I start sanding?
Lead test swabs are available at most hardware stores for $5–$15. Swab the surface you’re planning to sand or scrape; a color change indicates the presence of lead. US homes built before 1978 should be treated as potentially containing lead-based paint until tested. UK, Australian, and Canadian homes built before approximately 1960 have similar risk profiles. If results are positive, consult a certified lead-safe contractor before disturbing the surface — sanding lead paint without proper containment is a genuine health hazard.
How much does it cost to paint a room yourself vs. hiring a professional?
DIY typically runs $150–$400 in materials for an average-sized bedroom — paint, primer, roller covers, brushes, tape, drop cloths, and any wall repair materials — depending on room size, paint quality tier, and what tools you already own. In current US markets (2025–2026), professional painting for the same room typically runs $400–$1,200 depending on prep requirements, surface condition, regional labor rates, and finish quality. The DIY savings are real. Factor in your time, any costs from mistakes that need correction, and honestly whether the prep work — patching, cleaning, priming — is something you’re set up to handle.
Regional paint pricing reference (2025–2026): US: Premium interior paint $55–$90/gallon; contractor-grade $30–$50/gallon UK: Premium emulsion £25–£45/2.5L; trade-grade £15–£28/2.5L AU: Premium interior paint AUD $75–$120/4L; mid-range AUD $45–$75/4L CA: Premium interior paint CAD $55–$95/gallon; regional variation between provinces is notable
Article covers: interior painting tricks, painting hacks, DIY paint job, roller technique, cutting in, wet edge, lap marks, primer vs paint and primer, paint sheen guide, VOC, low-VOC paint, painter’s tape removal, lead paint safety