HOROW T38 Smart Toilet Installation Cost: What You'll Actually Pay (And What No One Tells You)
-
 Olivia Reed
 - 17 Jun, 2026
The HOROW T38 lists at $999. That’s the number on the product page. What that page won’t tell you is what happens between “add to cart” and actually using the thing — and that gap is where most of the real costs live.
This guide covers the full picture: unit price, plumbing labor, electrical work, and the parts that aren’t in the box. Whether you’re planning to DIY or hire out, you’ll leave with a realistic total and a clear sense of which path fits your bathroom.
Quick Answer: How Much Does HOROW T38 Installation Cost?
The HOROW T38 unit costs $999 (verify current pricing before purchase — it changes). If your bathroom already has a grounded, GFCI-protected outlet within reach and your floor flange is in good shape, a capable DIYer can install it with minimal added cost.
Hiring professionals? Expect to add $300–$1,500 depending on your home’s electrical setup. A full professional installation — plumber plus electrician when a new circuit is required — typically totals $1,300–$2,200.
Quick takeaways:
- HOROW T38 unit: $999
- DIY install with existing compatible outlet: near zero added cost
- New dedicated GFCI/20-amp circuit: $150–$700+, more for panel work or long cable runs
- Plumber labor (toilet set + T-valve): $150–$500
- Full professional install: ~$1,300–$2,200
- Blackout-flush battery pack: sold separately, ~200 flushes per pack
- Category-wide smart toilet install range: $1,200–$3,500+
Buy HOROW T38 Smart Toilet & Download Installation Manual (PDF)
Is Your Bathroom Compatible? Check This Before You Order
The single most expensive mistake people make with the T38 is ordering it before confirming their bathroom can actually support it. A few checks now prevent a mid-project stall — or worse, discovering the problem after the old toilet is already in the dumpster.
Pre-purchase compatibility checklist:
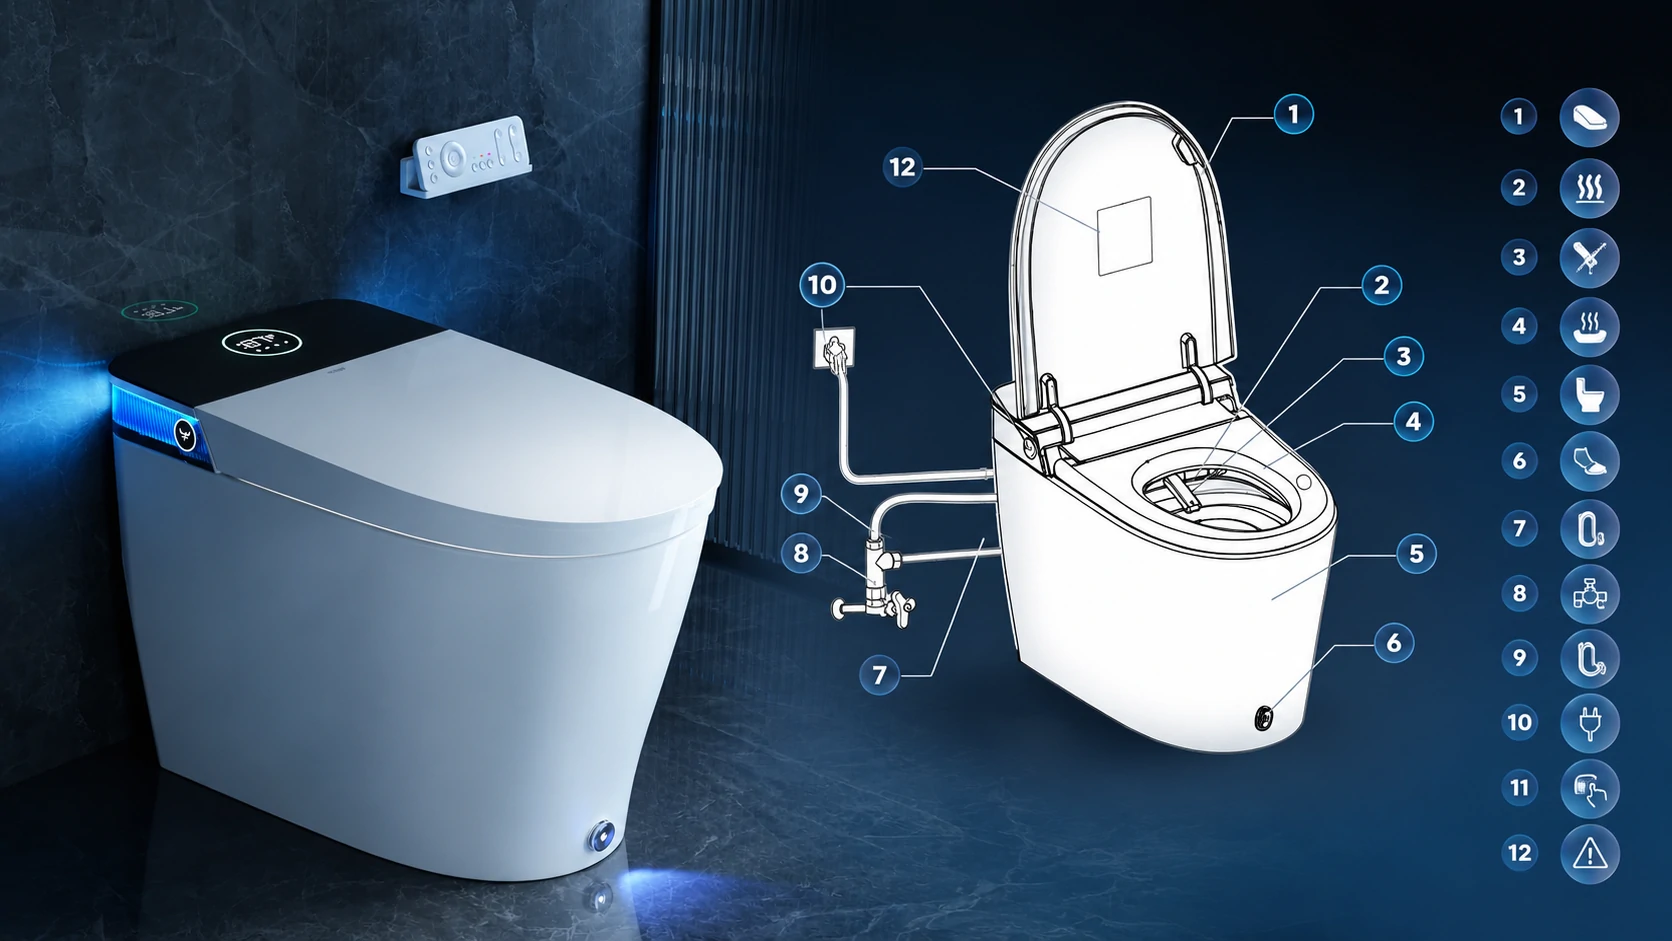
- Rough-in distance is 12 inches — Measure from the center of the floor drain to the finished back wall. The T38 requires a standard 12” rough-in. Some older homes have 10” or 14” configurations; those don’t work here without significant modification.
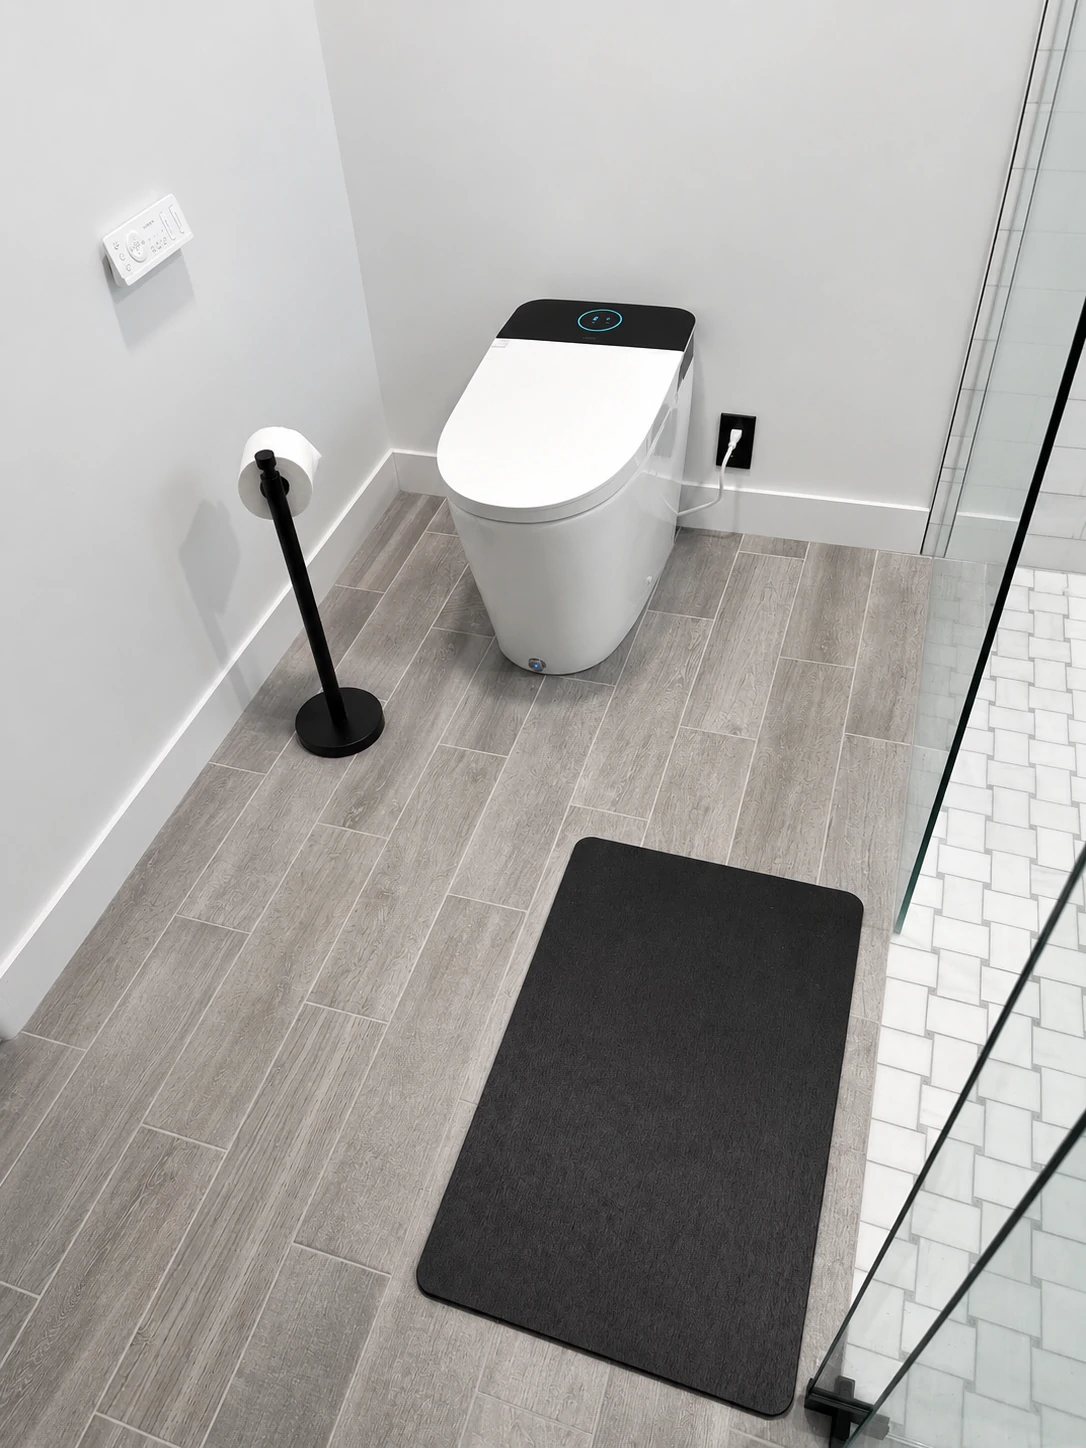
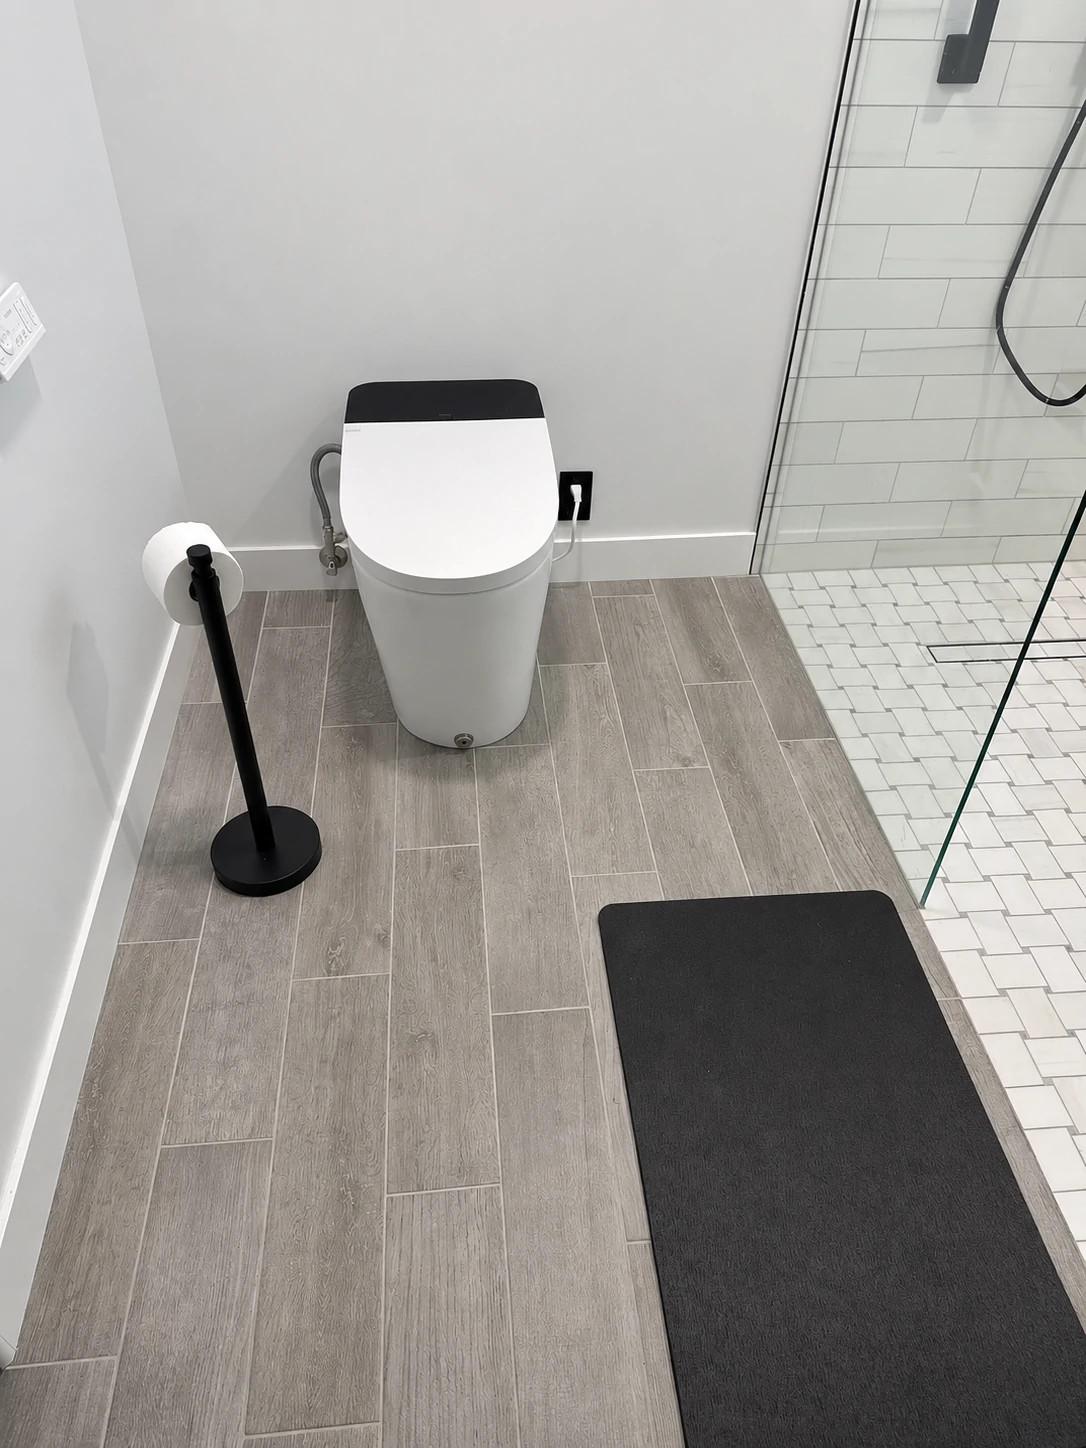
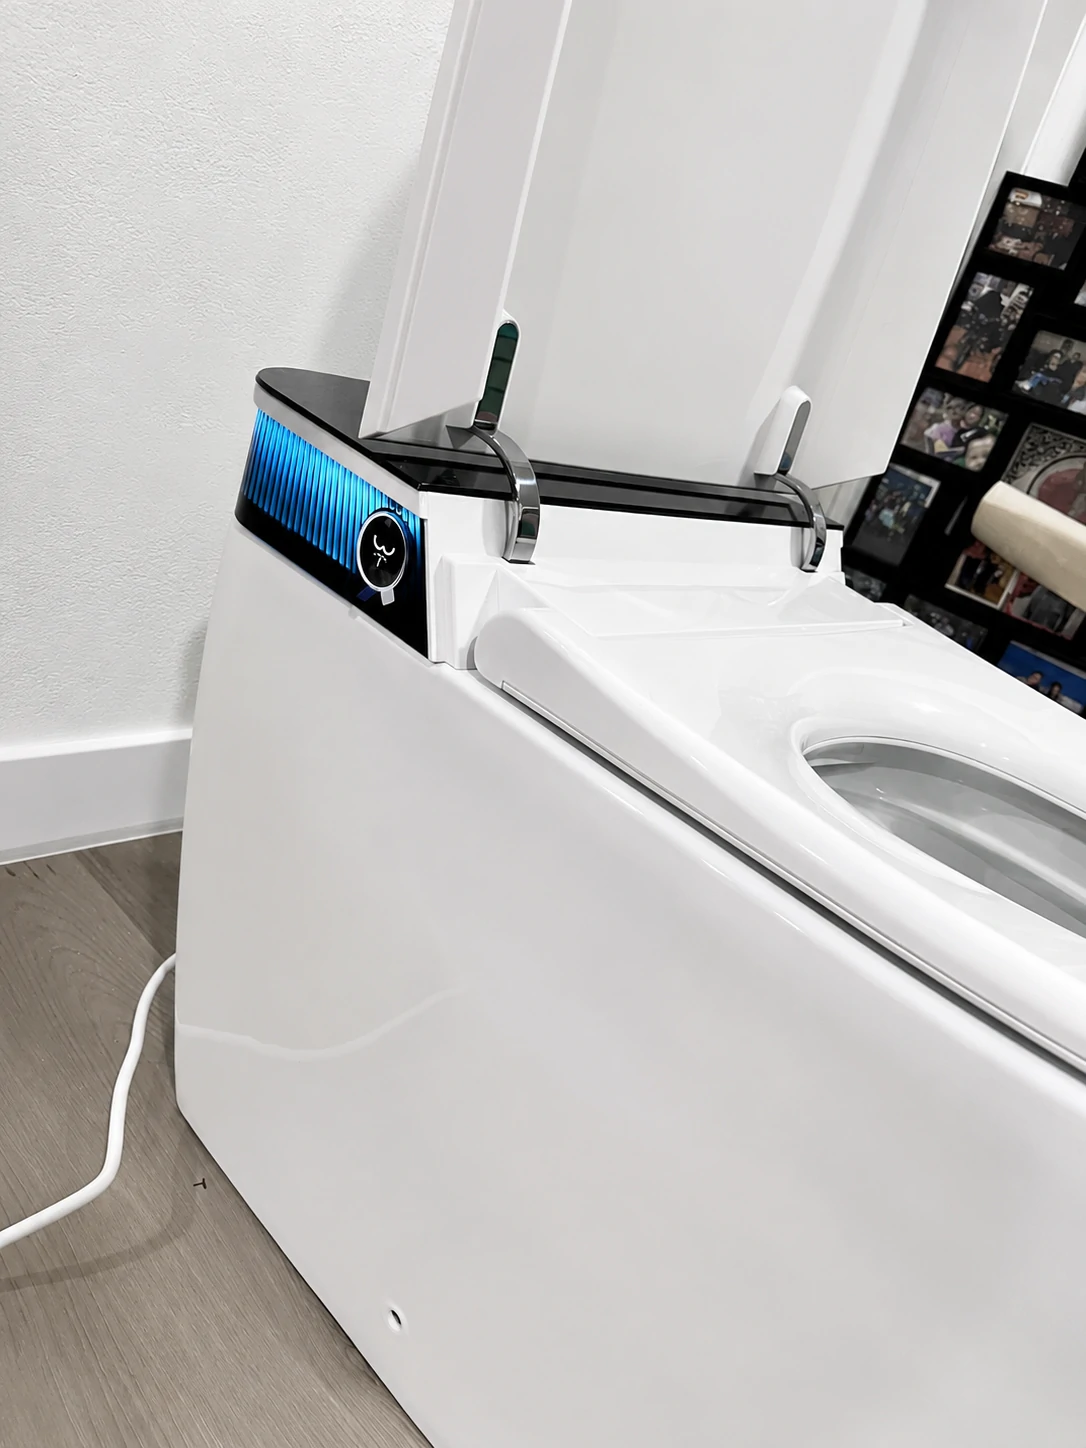
- A grounded GFCI outlet exists within ~3 feet — The T38’s power cord is approximately 35-7/16” long. It needs a nearby dedicated, grounded outlet. Extension cords are not an acceptable workaround.
- Outlet is rated for a 16-amp load — Most bathroom outlets are on 15-amp circuits. The T38 draws 16A continuously. This mismatch is the most common installation surprise. (More on this in the electrical section below.)
- Water supply valve is correctly positioned — The manual recommends the supply valve be 8–11 inches from the toilet centerline for easy T-valve clearance.
- Household water pressure is between 11.6 and 108 psi — Below 11.6 psi, bidet wash performance degrades. Above 108 psi risks internal component damage. Older homes and upper-floor bathrooms are the most common pressure outliers. A basic pressure gauge from any hardware store costs under $15 and answers this question in two minutes.
- Floor flange is in good condition — This one often can’t be confirmed until the old toilet is pulled. If your existing toilet wobbles or rocks slightly, or your bathroom has older plumbing, budget for potential flange repair.
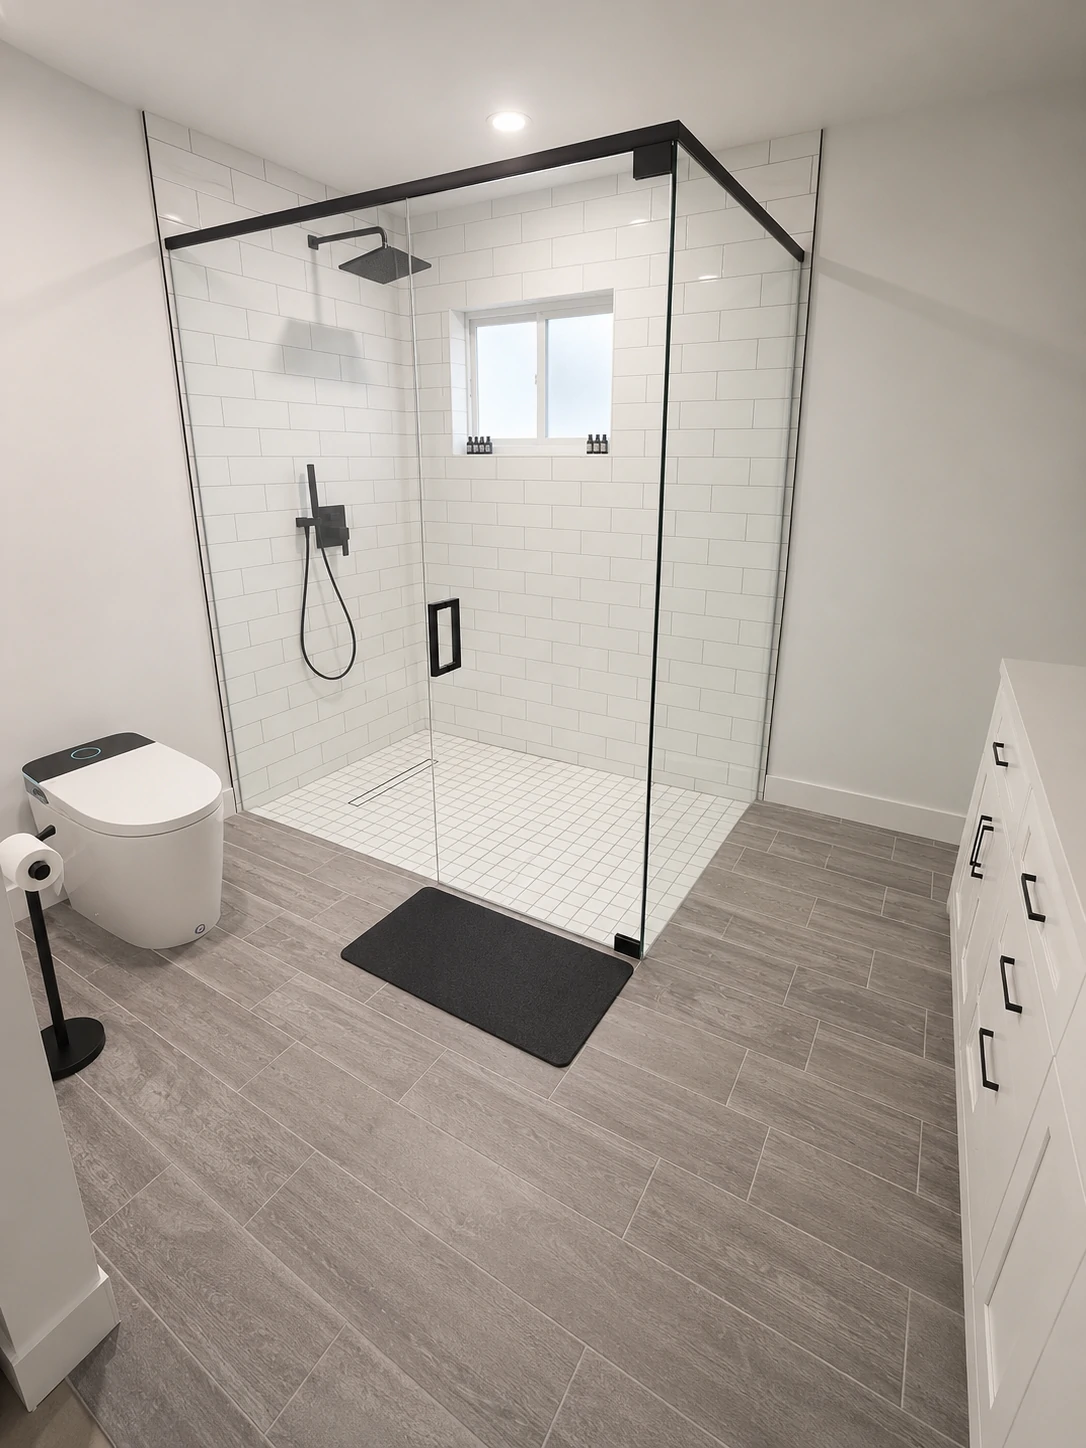
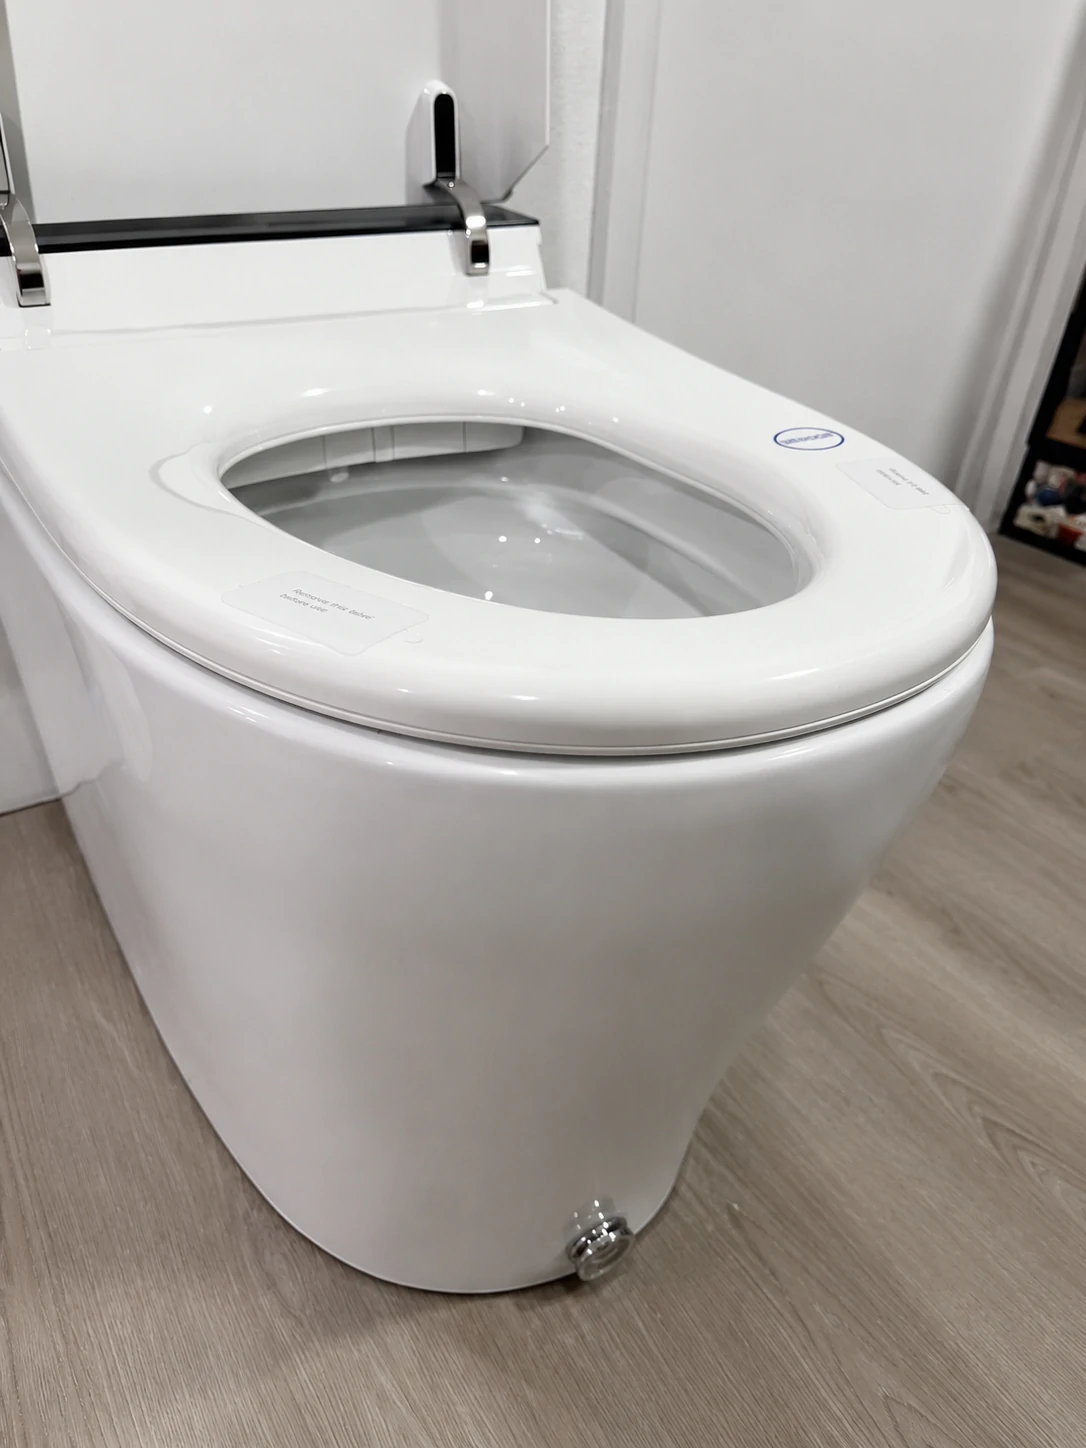
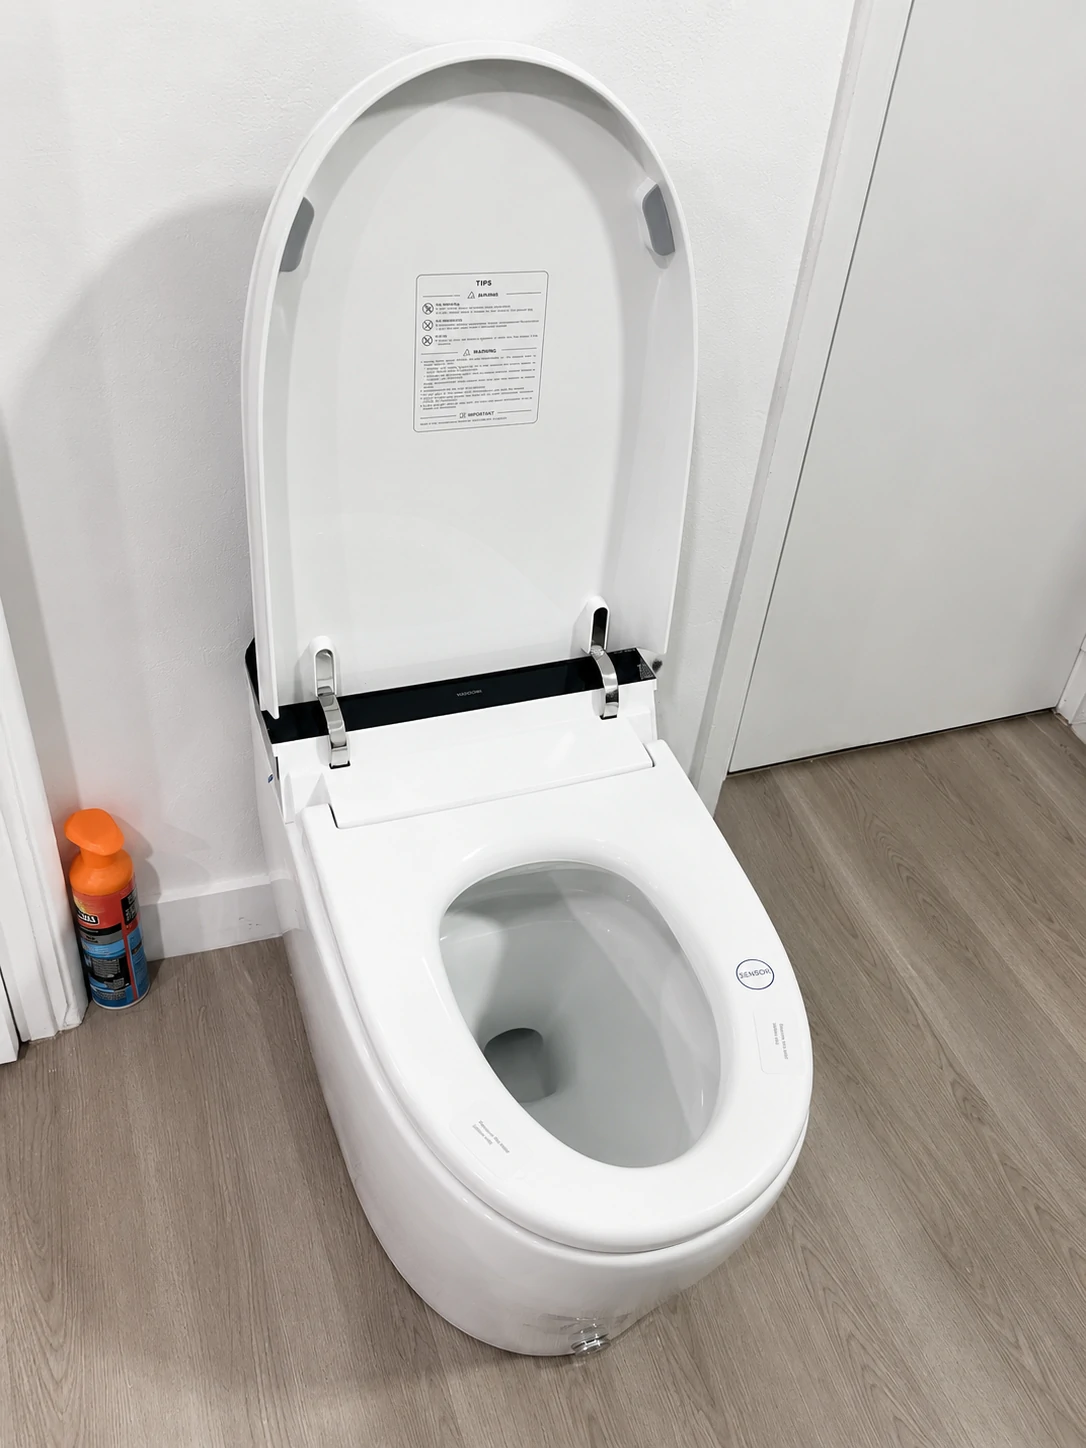
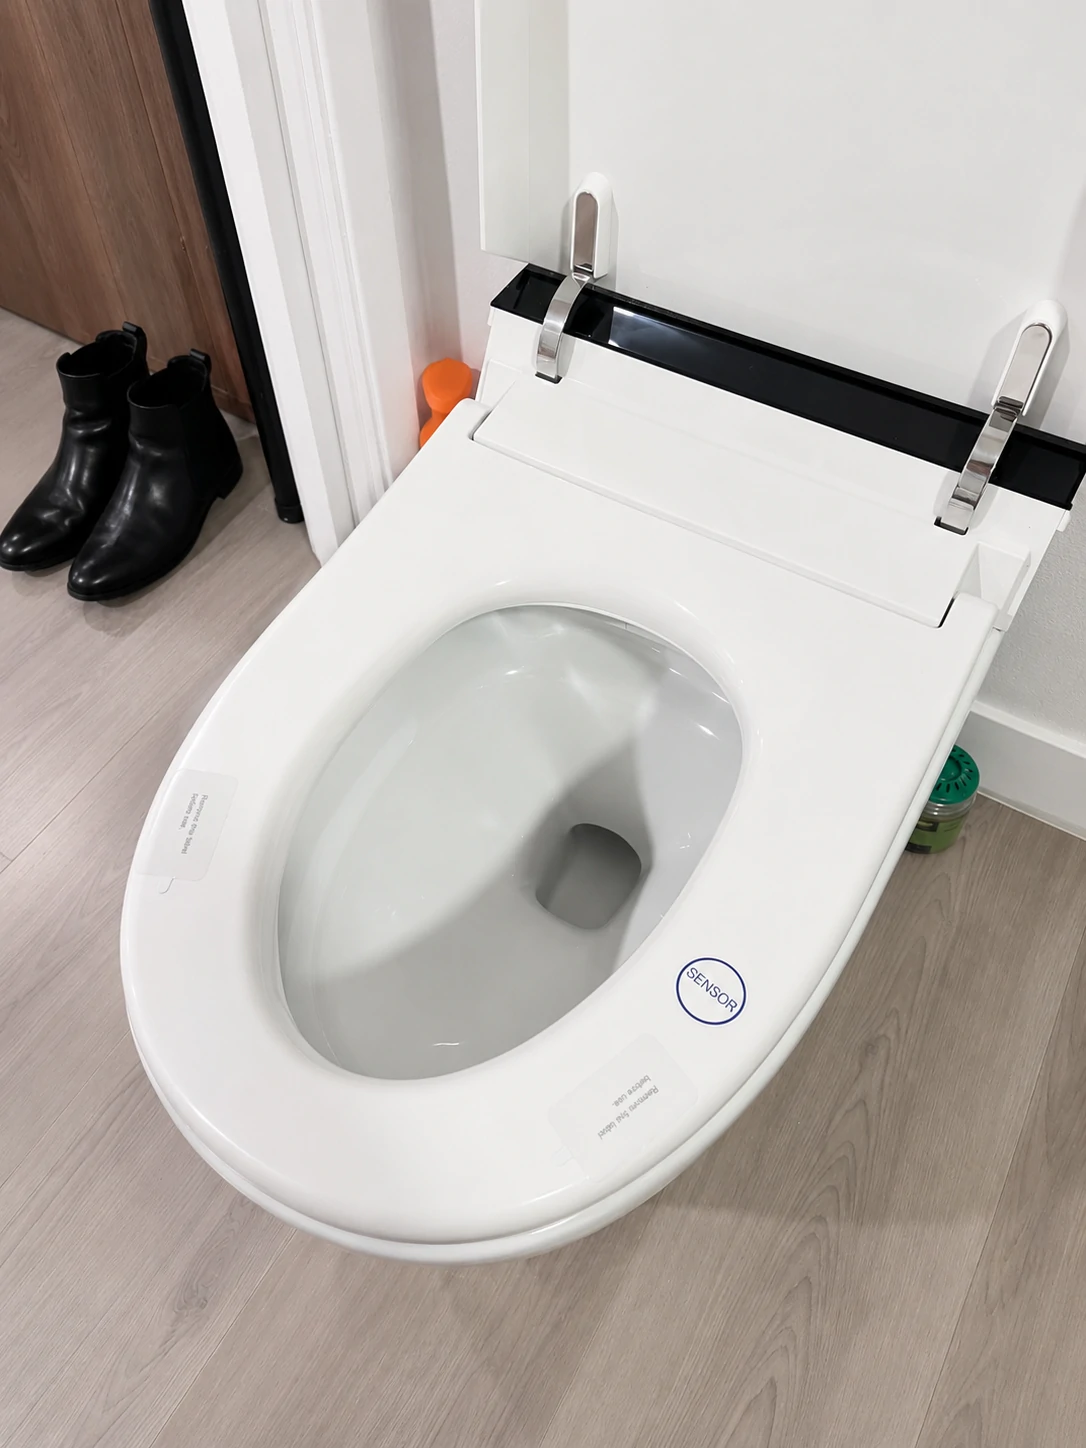
- Adequate clearance for lid operation — The T38 measures 27-7/16” (L) × 15-7/16” (W) × 18-11/16” (H). Confirm nothing behind or above the toilet blocks the lid from opening fully.
If any of these items is uncertain, resolve it before the unit ships. Returning a 92-pound ceramic smart toilet is not a casual errand.
Total Cost Breakdown: Unit, Labor, and Hidden Extras
This is where the actual numbers come together. The table separates fixed costs from variable ones — the variable column is what catches most buyers off guard.
| Cost Component | DIY | Professional | Notes |
|---|---|---|---|
| HOROW T38 unit | $999 | $999 | Verify current pricing — it moves |
| Plumbing labor (set + T-valve) | $0 | $150–$500 | Higher end for complex bathrooms or corroded flanges |
| New dedicated 20A GFCI circuit | $0–$200 (parts only) | $150–$700+ | Rises with distance from panel or finished-wall routing |
| Flange repair (if needed) | $20–$80 parts | $150–$400 labor + parts | Often unknown until old toilet is pulled |
| Blackout-flush battery pack | ~$30–$60 | Same | Sold separately; ~200 flushes/pack; degrades even unused |
| Silicone sealant | $5–$10 | Typically included in labor | Applied after the test run |
| Wax ring | Included in box | Included | No added cost |
| Remote batteries (2× AAA) | Included in box | Included | Already in the package |
| Total — DIY, existing compatible outlet | ~$999–$1,100 | — | Only viable if outlet meets the 16A/20A spec |
| Total — full professional install | — | ~$1,300–$2,200 | Higher if panel upgrades are needed |
What most cost guides miss: the battery pack situation. HOROW’s own manual states the blackout-flush battery pack is not included and must be purchased separately. One pack handles approximately 200 flushes before it needs replacing. The manual also notes that the battery naturally degrades over time — even when it isn’t being used. If power outages are a regular occurrence where you live, factor this into the ongoing cost picture from day one, not as an afterthought.
DIY vs. Professional Installation: Which Fits You?
The decision isn’t just about skill level. It’s about what’s already in your bathroom, what you’re willing to own if something goes wrong, and what the warranty situation means for your specific risk profile.
Decision framework — answer these three questions:
- Does your bathroom have a GFCI-protected, grounded outlet within ~3 feet of the toilet location on a 20-amp dedicated circuit? If yes, electrical work is likely off the table.
- Have you installed a toilet before — including wax ring seating and water line work? If yes, the plumbing side is within reach.
- Is your existing floor flange confirmed to be undamaged? If uncertain, having a plumber pull the old toilet first lets them flag problems before you’re committed.
If you answered yes to all three, DIY is a reasonable path. If any answer is no, hiring at least one trade is the smarter call — and often the cheaper one once you account for a potential do-over.
| Factor | DIY | Professional |
|---|---|---|
| Direct cost | Unit + parts only | $300–$1,500 added |
| Time | 3–6 hours (experienced) | 2–4 hours (plumbing); electrical is a separate visit |
| Electrical safety risk | High if existing outlet isn’t rated correctly | Eliminated |
| Warranty protection | At risk if installation deviates from manual | Stronger — HOROW recommends a licensed plumber |
| Flange damage response | DIYer must identify and resolve independently | Plumber flags and prices it immediately |
| Error recovery | Fully out-of-pocket | Contractor’s responsibility |
On the warranty: HOROW explicitly recommends installation by a licensed, professional plumber, and the one-year limited warranty does not cover damage from improper installation. Competent DIY that follows the manual doesn’t automatically void coverage — but if something goes wrong, the burden of proving correct installation falls entirely on you.

Tools and Parts You’ll Need
Everything below is either inside the box or available at any hardware store. Nothing requires specialty sourcing.
Included in the box:
- Wax ring
- Floor flange
- T-valve (with 9/16” adapter pre-installed)
- Flush water hose (smaller, wire-braided)
- Clean water hose (larger, nylon-braided)
- Mounting accessory kit: expansion bolts (4), screws (4), washers (6), mounting blocks (2), bolts (2), fixing sleeves (2), nuts (2), decorative caps (2), toilet screws (2)
- Remote control with holder, mounting screws, wall anchors
- Two AAA batteries
- Installation template
- Installation & User Manual
Tools you need to supply:
- Drill with 1/4” and 3/8” bits
- Adjustable spanner (15/16”–1” range)
- Caulk gun
- Screwdriver (flat and Phillips)
- Measuring tape
- Teflon tape
- Utility knife
- Marking pen
- Hammer (for remote holder wall anchors)
Smart extras to have on hand:
- Silicone sealant (not in the box; applied after the test run)
- Extra Teflon tape — use more than you think you need
- Old towels and a bucket for disconnecting the existing water line
- A second person — the manual requires two people for lifting throughout the process
One practical note before starting: the T38’s power cord is 35-7/16” long. Measure the actual distance from your outlet to where the plug will land once the toilet is positioned. That distance check takes 30 seconds and eliminates a common mid-install surprise.
Step-by-Step Installation Walkthrough
Before anything: shut off the water supply valve and unplug any electrical connections in the work area. The manual is explicit — this applies during installation, disassembly, repair, and maintenance.
Step 1: Unbox Carefully — This Requires Two People
The T38 weighs 92.59 lbs. The manual calls for two people to lift and move the ceramic unit at multiple points — this isn’t a suggestion. Solo attempts risk cracking the bowl and personal injury.
Unpack the unit right-side up. Remove accessories first. Lower the toilet gently to the floor.
Step 2: Use the Installation Template to Mark Mounting Holes
Align the included paper template with the centerline of your floor drain outlet. The rough-in should measure exactly 12 inches from the drain center to the finished back wall.
Use the marking pen to mark four mounting hole locations per the template. Also trace the toilet outline — this gives you a positioning reference when you lower the unit later.
Step 3: Install the Floor Flange
Drill four 3/8” (10mm) holes at the marked locations. Insert the expansion bolts. Position the flange over the drain pipe outlet, align its four holes with the drilled holes, insert washers and screws, and tighten.
If an existing flange is already in place and in solid condition, skip this step. The included flange is a replacement option — using the existing one is fine.
This is also the moment where hidden flange damage becomes visible. A cracked, corroded, or improperly set flange must be addressed now. Covering it up with a new toilet is how slow subfloor leaks go unnoticed for months.
Step 4: Install the Mounting Blocks
Assemble the mounting blocks with bolts. Position one on each side of the flange, secure with washers and nuts. These are the anchor points the toilet ultimately locks to — tighten them properly, as no amount of bolt-tightening later compensates for loose mounting blocks.
Step 5: Install the Wax Ring and Lower the Toilet
Press the wax ring firmly onto the drain hole at the bottom of the ceramic bowl. Center it flat.
With your second person, lift the toilet and slowly lower it onto the flange — guiding the drain outlet directly over the drain opening. Once aligned, press down firmly and evenly.
Don’t rock or reposition the toilet once the wax ring has made contact with the flange. Repositioning breaks the seal. If alignment is off, you need a new wax ring — not a slight adjustment.
Insert the screws through the fixing sleeves and into the mounting blocks. Tighten evenly by alternating sides. Overtightening cracks the ceramic base. Snug and even is the goal. Place decorative caps over the fixing sleeves.
Step 6: Connect the T-Valve and Water Hoses
Turn off the angle valve. Disconnect the existing supply hose (have a towel ready — water will drain).
Determine your valve size: if it has a 9/16” outer diameter (3/8” outlet), connect the T-valve directly using the pre-installed adapter. If it’s 11/16” (1/2” outlet), remove the adapter first, then connect.
Apply Teflon tape to every threaded connection before assembly. Wrap clockwise, 3–4 passes. This step gets skipped more than any other, and it’s directly responsible for the slow drip at the T-valve that seeps into the subfloor for weeks before anyone notices.
Connect the smaller wire-braided flush water hose to its designated T-valve port. Connect the larger nylon-braided clean water hose to the other port. The manual’s diagrams show which is which — swapping them causes wash function failures that can appear to be a defective unit.
Step 7: Electrical Connection
Confirm the outlet is grounded, GFCI-protected, and on a circuit capable of handling a 16-amp continuous load. Plug in the power cord. No extension cords, no adapters.
See the dedicated electrical section below before plugging anything in — this is where the most common pre-install mistake lives.
Step 8: Install the Battery Pack (If Purchased)
Locate the connecting cable, remove the protective cap, insert the waterproof DC power plug from the battery pack, and tighten the waterproof cap securely. Place the pack in an accessible location per the manual diagram. If you haven’t purchased it yet, this step is optional — but the toilet will not flush during a power outage without it.
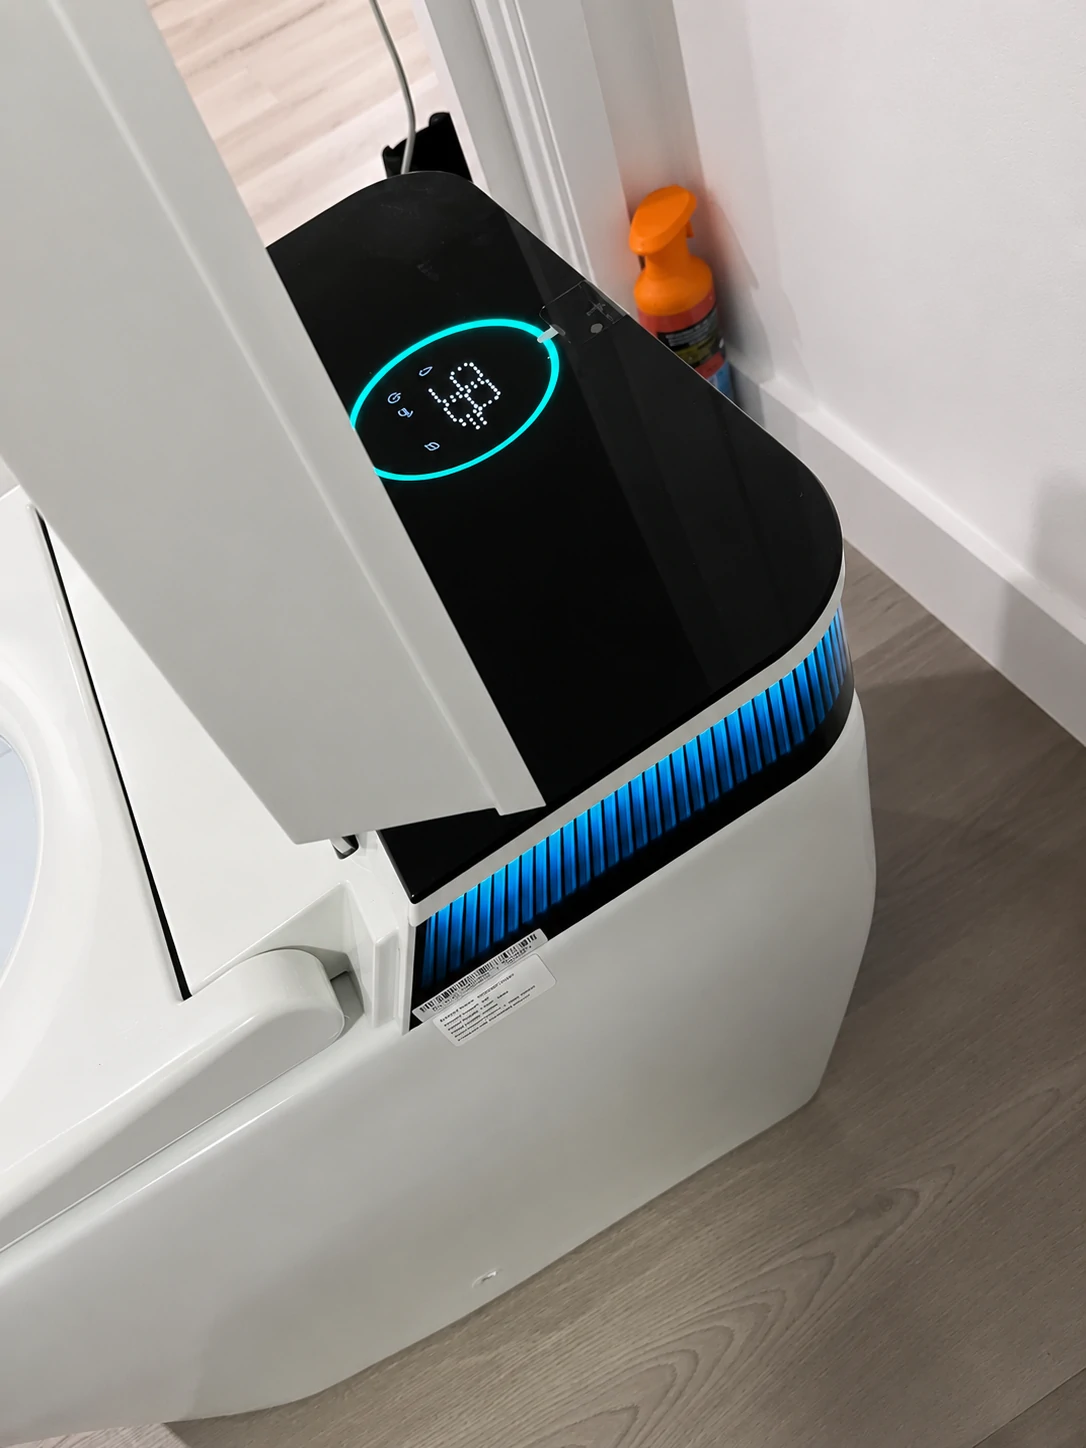
Step 9: Mount the Remote Control Holder
Drill two 1/4” (6mm) holes, roughly 1-3/4” deep. Knock anchors in with a hammer. Secure the holder with the included screws.
Mount it within arm’s reach from the seat, away from the bidet’s spray path, and with a clear line of sight to the toilet unit (blocked signal causes pairing issues). Install the two AAA batteries and place the remote in the holder — it comes pre-paired from the factory.
Step 10: Test Run and Final Sealing
Covered in full in the section below. Don’t apply sealant until after the test.
Electrical Requirements: Why a Standard Outlet Often Isn’t Enough
This is the detail most smart toilet articles gloss over — and it’s the one most likely to stop an install mid-project.
The HOROW T38 draws 16 amps at AC 120V, 60Hz. Standard bathroom circuits in many homes — especially anything built before the 1990s — are 15-amp shared circuits. Under standard residential electrical practice, a 15-amp circuit has a safe continuous-load ceiling of around 12 amps. Running a 16-amp appliance on a 15-amp circuit isn’t a minor mismatch; it’s a fire and shock risk.
This is why licensed electricians typically spec a dedicated 20-amp, GFCI-protected circuit for this type of installation. A 20-amp circuit handles a 16-amp continuous load within safe margins, and GFCI protection is a code requirement for bathroom electrical in most U.S. and Canadian jurisdictions.
⚠️ If your bathroom only has a shared 15-amp circuit, you need an electrician before the T38 can be installed safely. This isn’t a DIY judgment call — it’s an electrical code conversation.
The cost of running a new dedicated circuit falls between $150 and $700 in most cases, depending on distance from the panel and whether the cable run goes through finished walls. Panel upgrades push that higher.
Check with a licensed electrician about your bathroom’s current circuit rating before the unit ships. Discovering the problem after the old toilet is already removed is a much worse moment to have that conversation.
Connecting the Water Supply and T-Valve
Post-installation leaks most commonly trace back to these connections. The T-valve adds two new threaded joints, and both need to be correct.
- Close the angle valve fully.
- Disconnect the existing supply hose. Have a towel ready — water will drain from the line.
- Identify valve size: 9/16” OD = 3/8” outlet (use adapter as-is); 11/16” OD = 1/2” outlet (remove adapter before connecting).
- Wrap Teflon tape clockwise around all male threads — 3 to 4 wraps each.
- Thread the T-valve onto the angle valve. Hand-tighten first, then snug with a spanner. Don’t overtorque plastic fittings.
- Attach the smaller wire-braided flush hose to the appropriate T-valve port.
- Attach the larger nylon-braided clean water hose to the other port.
- Slowly open the angle valve. Inspect every connection point for drips. If you see one: close the valve, dry the fitting, re-apply Teflon tape, reconnect.
⚠️ Most common mistake: connecting the two hoses to the wrong T-valve ports. The manual diagrams are specific about which is which. Cross-connecting them produces wash function failures that look like a defective unit — and can lead to unnecessary warranty claims or replacements.
Testing, Sealing, and First Use
Don’t apply silicone sealant until after the full test run. Sealing first means starting over if anything needs adjustment.
Full test sequence:
- Open the angle valve to its maximum position.
- Inspect all water connection points for drips. If any appear, close the valve, refasten the connection, recheck.
- Confirm electrical requirements are met: 16A at AC 120V, 60Hz.
- Plug in the power cord.
- Press the side button to power on and run a test flush.
- Work through every remote function: Posterior Wash, Feminine Wash, Warm Dryer, Water Temperature, Air Temperature, Seat Temperature, Nozzle Position, Nozzle Clean, Night Light.
- Approach the toilet from the front to test microwave auto-open lid (detection range is up to ~15-3/4” at the default level 2 setting; adjustable in Engineering Settings Mode).
- Tap the kick control to confirm lid and seat raise.
- Verify the LED digital display is functioning.
- Sit briefly to confirm seat occupancy sensor activates correctly.
Once everything checks out, apply silicone sealant around the base perimeter. Leave a gap at the rear where access covers meet the floor — sealing those points traps moisture if a slow drip ever develops and can lead to undetected subfloor damage over time.
Common Mistakes That Void the Warranty
HOROW’s one-year limited warranty covers defects in materials and workmanship under normal use. It does not cover a broad list of situations homeowners often don’t think about until it’s too late.
| Mistake | Warranty Impact |
|---|---|
| Not following the manual’s installation instructions | Voids warranty |
| Moving the toilet from its original installed location | Voids warranty |
| Modifying the unit in any way | Voids warranty |
| DIY repair or disassembly | Voids warranty |
| Using harsh chemicals (bleach, alcohol, concentrated acids) for cleaning | Voids warranty |
| Damage from improper installation | Not covered; HOROW explicitly disclaims responsibility |
| Damage from misuse, accident, or excessive chemical exposure | Not covered |
What the warranty does cover: Defective materials or workmanship discovered during normal use within the first year. HOROW will provide replacement parts at no charge for qualifying claims.
What the warranty does not cover: Removal costs, reinstallation labor, freight, lost time, or any consequential damages — regardless of cause.
The warranty documentation also explicitly recommends installation by a licensed professional plumber. That recommendation affects your legal footing if a warranty dispute ever arises. Professional installation creates a clearer paper trail; a DIY install that deviates from the manual in any way shifts all liability to the homeowner.
Buying and Installing Outside the US
Canada: The T38 runs at 120V/60Hz — the same standard used throughout Canada. The unit is sold through mainstream Canadian retailers, and the installation process is identical to the US. Electrical code specifics follow the Canadian Electrical Code rather than the NEC, but the core requirement — a dedicated 20-amp, GFCI-protected circuit — applies in both countries.
United Kingdom and Australia: This is where the picture changes fundamentally. Both markets run 230–240V at 50Hz. The T38 is designed for 120V/60Hz and is currently not sold through mainstream UK or Australian retailers. It reaches those markets only via cross-border resellers.
Using the T38 in a 230–240V country requires a step-down voltage transformer rated for sustained 16-amp use — not the compact travel converters available at electronics stores, but a heavier-duty unit capable of continuous load. The added cost, complexity, and safety considerations of that setup are meaningfully different from a North American installation. International buyers in 230–240V markets should verify transformer specifications with a local licensed electrician before ordering.
Troubleshooting After Installation
These are the issues most likely to emerge in the first few days of use.
| Problem | First Check | Solution |
|---|---|---|
| Unit won’t power on | Plug loose or circuit issue | Confirm outlet is live and rated correctly; press and hold the side button to power on |
| No water from wash nozzle | Angle valve not fully open | Open valve to maximum; check the SUS filter for blockage |
| Weak wash pressure | Low pressure or clogged filter | Test household water pressure; clean inlet filter mesh; confirm inlet hose isn’t kinked |
| Water not heating | Temperature setting too low | Adjust via remote; note the first few seconds may run cool during the heating cycle |
| Lid not auto-opening | Sensor range or signal interference | Confirm microwave induction is enabled in Settings Mode; use Engineering Settings Mode to adjust detection distance (level 3 = up to 23-5/8”) |
| Remote not responding | Dead batteries or pairing lost | Replace AAA batteries; re-pair: unplug unit, hold Stop button on remote, reconnect power |
| Drips at T-valve connections | Teflon tape missing or insufficient | Shut off water, dry fittings, re-wrap with 3–4 passes of Teflon tape, reconnect |
| Won’t flush during power outage | Battery pack not installed or depleted | Install the separately purchased blackout-flush battery pack; replace if near or past ~200 flushes |
| Remote interference from nearby units | Multiple same-brand units nearby | Manually re-pair the remote to the specific toilet using the pairing procedure |
For persistent solenoid valve failures or seat occupancy sensor malfunctions, HOROW’s manual directs users to contact their customer service team rather than attempting self-repair. Internal disassembly voids the warranty.
HOROW customer service: (+1) 209-200-8033, support@horow.com, Monday–Friday.
Frequently Asked Questions
How much does it cost to install a HOROW T38 smart toilet, including labor?
A full professional install — plumber plus electrician for a new circuit — typically totals $1,300–$2,200. If a compatible GFCI outlet already exists, costs drop to roughly $1,150–$1,500 (unit plus plumber labor).
Can I install the HOROW T38 myself, or do I need a professional?
DIY installation is possible if you have a correctly rated electrical outlet already in place and prior experience with toilet installation. The plumbing steps are within reach for a confident DIYer. The electrical side is not something to improvise. HOROW’s warranty documentation recommends a licensed professional plumber.
Does the HOROW T38 require a dedicated electrical circuit?
The T38 draws 16 amps continuously, which typically calls for a 20-amp dedicated, GFCI-protected circuit. Many bathroom outlets are on shared 15-amp circuits — those are undersized for this unit. Consult a licensed electrician before the toilet ships if you’re not sure about your bathroom’s current setup.
Will installing the T38 myself void the warranty?
Competent DIY that follows the manual’s instructions doesn’t automatically void coverage. But any damage attributable to improper installation is explicitly excluded, and the warranty recommends professional installation. The practical risk: if something fails and there’s any question about how the unit was installed, the burden of proof falls on you.
What rough-in size does the HOROW T38 need, and what if mine doesn’t match?
The T38 requires a standard 12-inch rough-in. Most North American bathrooms are 12”. Some older homes have 10” or 14” configurations. If yours doesn’t match, the T38 won’t align with the existing drain — the installation isn’t viable without significant modification.
Is the HOROW T38 sold in Canada, the UK, or Australia?
Canada — yes, with no electrical compatibility concerns (120V/60Hz). The UK and Australia run 230–240V/50Hz; the T38 reaches those markets only through cross-border resellers and requires a step-down transformer rated for continuous 16-amp use. That’s a meaningfully different and more complex path than a standard North American purchase.
What’s the minimum water pressure required, and does low pressure block installation?
The minimum is 11.6 psi. The T38 includes a built-in water tank and booster pump, so low household pressure doesn’t prevent the flush from working — it mainly affects bidet wash intensity. The maximum is 108 psi. High-pressure systems should be checked before connecting.
What parts aren’t included in the box but are still needed for installation?
The blackout-flush battery pack is not included. Silicone sealant and Teflon tape are not in the box. A new electrical circuit — if your bathroom needs one — is a separate cost entirely.
How heavy is the HOROW T38, and is a two-person lift really necessary?
The unit weighs 92.59 lbs. The manual requires two people for lifting at multiple points during installation. A solo attempt risks both personal injury and ceramic damage.
How long does a HOROW T38 installation typically take?
An experienced DIYer with a compatible outlet and clean flange: 3–6 hours. A professional plumber familiar with smart toilet installation: 2–4 hours for the plumbing portion. If a new electrical circuit is needed, that’s a separate electrician visit, often scheduled separately.
What happens if the wax ring doesn’t seal properly after setup?
A failed seal causes water to leak at the base with each flush. Early signs include musty odor, soft flooring near the toilet, or moisture around the base. Remedying it requires pulling the toilet and installing a fresh wax ring — starting the installation process over from step 4. This is why the “press firmly, don’t reposition once contact is made” instruction is not optional.
Does the HOROW T38 flush during a power outage without the optional battery pack?
No. Without the separately purchased lithium battery pack, the toilet has no emergency flush capability. The pack provides approximately 200 emergency flushes and degrades over time even when idle. If your area experiences frequent outages, purchase the pack at the same time as the unit — not as an afterthought six months later when you actually need it.