16 Easy Home Improvement Ideas You Can Actually Finish This Weekend
-
 Olivia Reed
 - 06 Jun, 2026
Quick Answer: The best weekend home improvement ideas combine quick visible wins — like swapping cabinet hardware or installing smart bulbs — with longer-payoff upgrades like smart thermostats, water leak detectors, and energy monitors. Most can be done in under four hours with basic tools.
Saturday morning hits differently when you’ve been staring at the same kitchen handles for three years. You know something needs to change. You’ve got 48 hours, a moderate budget, and absolutely no desire to tear out a wall.
Here’s the thing most lists won’t tell you: you don’t need all 16 of these projects this weekend. Pick three, do them right, test them, and actually enjoy the result. The goal isn’t a completed checklist — it’s a home that works better by Sunday evening.
After testing smart home devices across dozens of setups, dealing with C-wire nightmares, and discovering that “30-minute install” means something very different at 9pm versus 9am, this guide is built on what actually happens — not what the product box promises.
What you’ll learn in this guide:
- 16 realistic weekend home improvement projects — no contractor required for most
- Which ideas actually save money on energy bills vs. which just look nice
- Smart home upgrades that beginners can install in under an hour
- Honest time and cost estimates for every project
- The three upgrades most homeowners wish they’d done sooner
- What to skip if you’re renting or have HOA restrictions
All 16 Projects at a Glance
| # | Project | Difficulty | Time | Cost | Saves Energy? | Renter-Friendly? |
|---|---|---|---|---|---|---|
| 1 | Replace cabinet hardware | ⭐ Easy | 1–2 hrs | $30–$80 | No | ✅ Yes |
| 2 | Install smart LED bulbs | ⭐ Easy | 30–60 min | $40–$120 | ✅ Yes (~$8/mo) | ✅ Yes |
| 3 | Smart plugs + energy monitoring | ⭐ Easy | 20–30 min | $20–$60 | ✅ Yes (variable) | ✅ Yes |
| 4 | Under-cabinet LED strip lighting | ⭐ Easy | 30–60 min | $30–$90 | ✅ Minor | ✅ Yes |
| 5 | Install a video doorbell | ⭐⭐ Moderate | 1–2 hrs | $80–$250 | No | ⚠️ Check lease |
| 6 | Smart lock upgrade | ⭐⭐ Moderate | 30–90 min | $100–$300 | No | ⚠️ Check lease |
| 7 | Motion sensor exterior lighting | ⭐⭐ Moderate | 30–60 min | $20–$80 | ✅ Yes | ⚠️ Check lease |
| 8 | Smart thermostat | ⭐⭐ Moderate | 1–3 hrs | $80–$250 | ✅ Yes ($150–$300/yr) | ⚠️ Check lease |
| 9 | Water leak detectors | ⭐ Easy | 10 min/unit | $25–$50/unit | ✅ Prevention | ✅ Yes |
| 10 | Energy automation routines | ⭐ Easy | 1–2 hrs | $0 | ✅ Yes (up to 23%) | ✅ Yes |
| 11 | Whole-home energy monitor | ⭐⭐ Moderate | 2–4 hrs | $150–$300 | ✅ Yes (insight) | ❌ Usually No |
| 12 | Wi-Fi network audit + upgrade | ⭐ Easy | 1 hr | $0–$200 | No | ✅ Yes |
| 13 | Smart switches (high-traffic rooms) | ⭐⭐⭐ Advanced | 30–60 min/switch | $15–$60/switch | ✅ Yes | ❌ Usually No |
| 14 | Smart smoke + CO detector | ⭐⭐ Moderate | 15–30 min | $100–$130 | No | ⚠️ Check lease |
| 15 | Smart irrigation controller | ⭐⭐ Moderate | 1–2 hrs | $80–$200 | ✅ Yes (water bill) | ❌ Usually No |
| 16 | Smart garage door opener/retrofit | ⭐⭐⭐ Advanced | 2–4 hrs | $100–$200 | No | ⚠️ Check lease |
🏠 The Weekend Home Improvement Reality Check Most “easy home improvement” lists were written by people who have never installed a smart thermostat at 9pm and discovered the HVAC wiring doesn’t match the diagram. The projects in this guide have been chosen because they’re genuinely completable in a weekend — and because they make a real, measurable difference. Start with smart plugs and an energy audit if savings are your motivation. Start with cabinet hardware and lighting if you want the fastest visible result.
How to Pick the Right Projects for Your Weekend (and Your Home)
Most people open a list like this, feel overwhelmed by option 4, and end up doing nothing. Let’s skip that part.
Start With Your Biggest Pain Point
Three categories cover most homeowner frustrations. Find yours:
If energy bills are climbing: Start with projects 8, 3, and 10 — smart thermostat, smart plugs, and automation routines. These three together can realistically cut $150–$300 off your annual electricity costs. The thermostat alone pays for itself in under a year on most heating/cooling setups.
If security keeps you up at night: Projects 5, 6, and 7 form a natural package — video doorbell, smart lock, and motion lighting. You don’t need all three this weekend. The doorbell makes the biggest visible difference first.
If you want the fastest transformation: Projects 1 and 2. Replace cabinet hardware and swap your bulbs. You’ll be surprised how different a kitchen or bathroom feels after just a few hours. These cost almost nothing by comparison and deliver instant visual results.
Renter vs. Homeowner — Know Before You Start
This is the section most guides skip entirely. If you’re renting, you’re not locked out of this list — but you do need to know which projects require approval before you begin.
| Project | Renters | Notes |
|---|---|---|
| Smart plugs, LED bulbs | ✅ No approval needed | Fully removable, no modification |
| Under-cabinet LED strips | ✅ Usually fine | Use adhesive strips — avoid screws |
| Wi-Fi audit + upgrade | ✅ No approval needed | Your network, your call |
| Water leak detectors | ✅ No approval needed | Battery-powered, no installation required |
| Automation routines | ✅ No approval needed | Software only |
| Video doorbell (battery) | ⚠️ Ask first | Some leases prohibit doorbell changes |
| Smart lock | ⚠️ Ask first | Lock replacement is typically prohibited without permission |
| Smart thermostat | ⚠️ Ask first | May need landlord to verify wiring |
| Smart switches | ❌ Usually not without approval | Involves electrical modifications |
| Whole-home energy monitor | ❌ Requires electrical panel access | Always landlord territory |
HOA households: Exterior changes — including video doorbells, motion lights, and certain door hardware — may require approval. Check your CC&Rs before buying anything that mounts to an exterior wall.
What You Can Realistically Do in Two Days
Here’s an honest weekend plan. These time blocks assume you’ve already ordered supplies. Add 2–3 hours if you’re shopping Saturday morning.
| Time Block | Activity | Notes |
|---|---|---|
| Saturday 8–10am | Unbox, read instructions, gather tools | Don’t skip instructions — most failed installs start here |
| Saturday 10am–12pm | Quick wins: bulbs, plugs, cabinet hardware | Build confidence with easy projects first |
| Saturday 12–1pm | Lunch + measure and plan any wiring work | Don’t rush electrical projects |
| Saturday 1–4pm | Intermediate installs: doorbell, thermostat | Best done in daylight with a helper nearby |
| Saturday 4–6pm | Test everything installed so far | Fix issues before Sunday while it’s fresh |
| Sunday 9–11am | Advanced projects: switches, energy monitor | Fresh eyes, rested — electrical work deserves this |
| Sunday 11am–2pm | App setup and automation routines | The most underrated step that most people rush |
| Sunday 2–4pm | Review, troubleshoot, document | Photograph your wiring and panel for future reference |
The Quick Wins — Projects That Take Under an Hour
These four projects can all be done before lunch on Saturday — and two of them will visually change your home today.
1. Replace Cabinet Hardware (1–2 Hours, $30–$80)
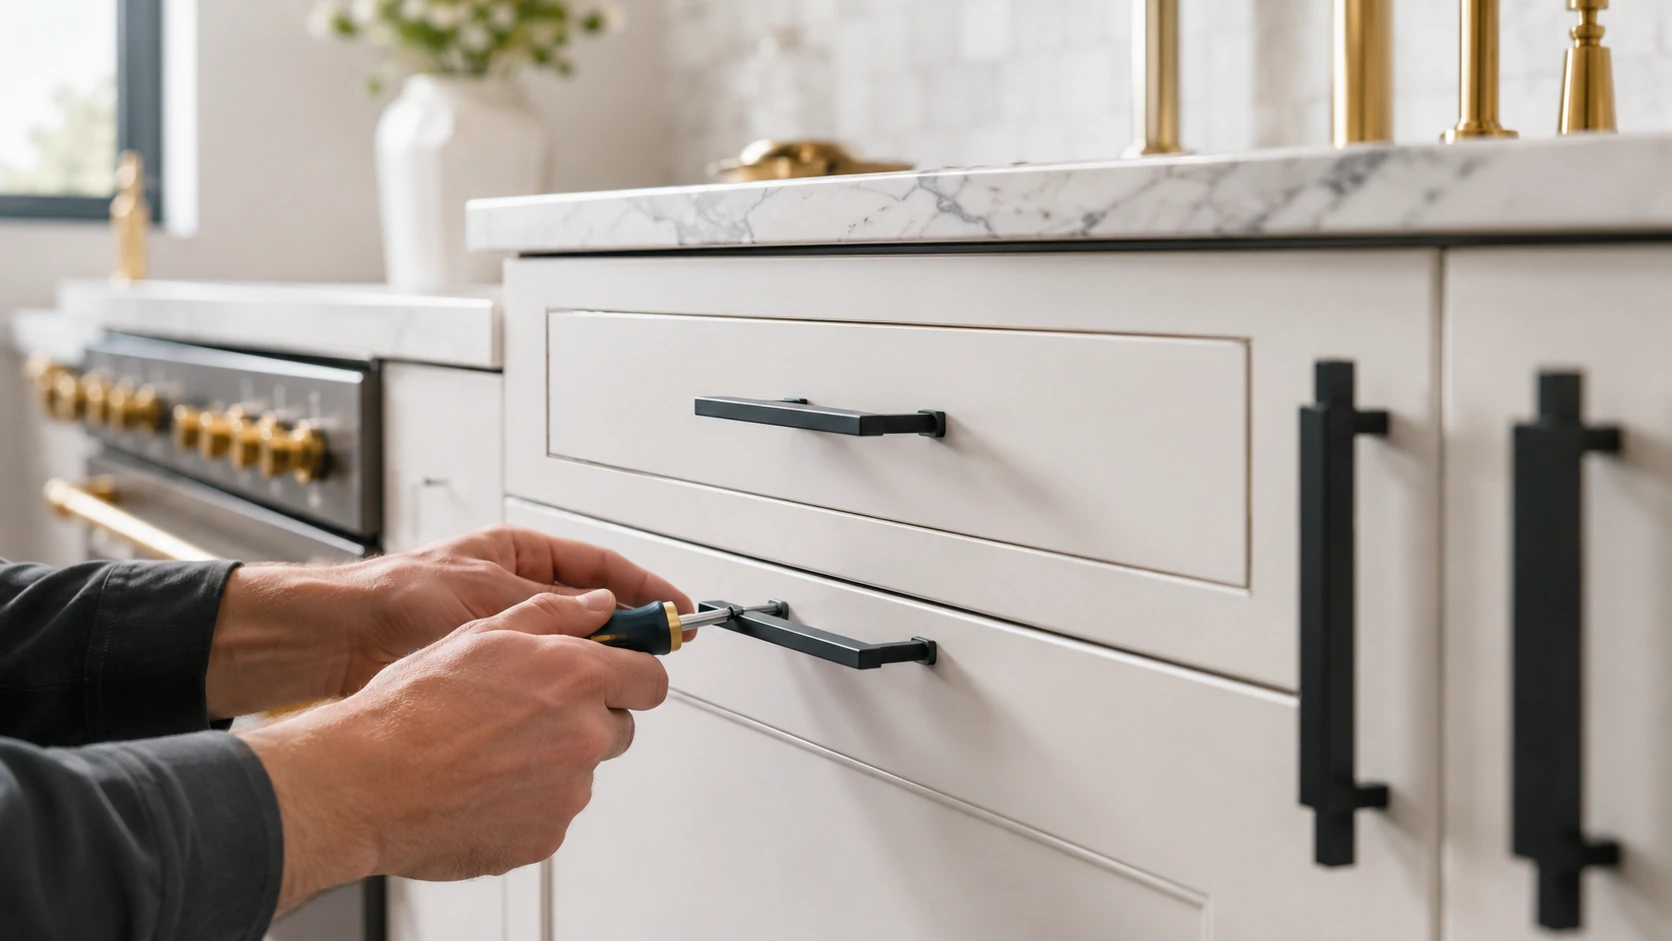
This is, dollar for dollar, the fastest visual transformation in any kitchen or bathroom. New handles and pulls shift the entire feel of a room — and most people dramatically underestimate how much old hardware was holding the space back.
The only trap to avoid: measure your existing hole spacing before ordering anything. Cabinet pulls use two mounting holes. The center-to-center distance varies — typically 3”, 3.75”, or 5”. Buy pulls that match your current spacing, or you’ll be drilling new holes. That’s a 20-minute project that becomes a 90-minute one.
Practical tip: Brushed nickel and matte black are both versatile and widely available. Knobs are faster to install than pulls but handles tend to look more substantial. If you’re mixing kitchen and bathroom hardware, buying the same line in each room creates visual cohesion without requiring a renovation.
Trade-off: Cabinet hardware is a reversible change, but the screw holes stay. If you drill new holes to fit a different spacing, the originals need to be filled before you sell. Keep the originals in a labeled bag.
2. Swap Every Old Bulb for Smart LED Bulbs (30–60 Minutes, $40–$120)
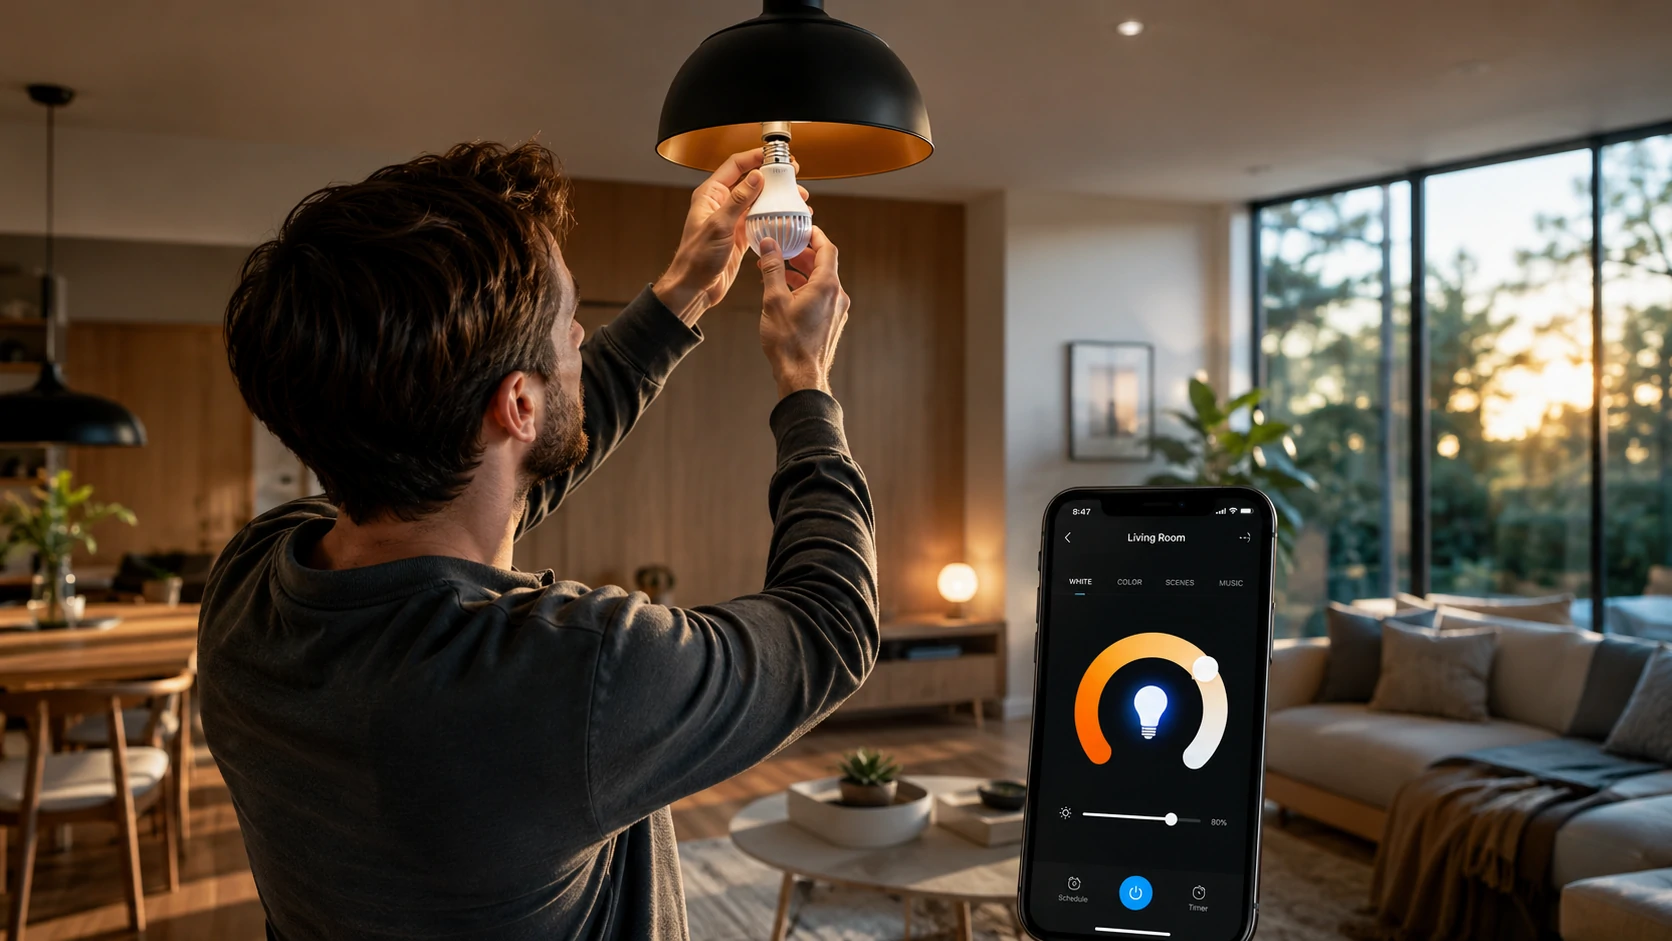
Sixty-watt incandescent bulbs draw 60W. An equivalent LED draws 8.5W. In a room with six bulbs running four hours a day, that’s a measurable difference on your monthly bill — roughly $8–$12 per month in heavily used spaces.
Smart LED bulbs go one step further: they’re dimmable via app, change color temperature on a schedule, and integrate with Alexa, Google Home, or Apple HomeKit without any hub. They’re also one of the most renter-friendly smart home upgrades — screw in, screw out, take them when you leave.
The smart bulb vs. smart switch debate starts here. This matters more than most beginners realize. Smart bulbs are easy and immediately gratifying. But they have a quirk: if someone turns off the light switch at the wall, the bulb loses power and becomes unresponsive to the app. Smart switches solve this permanently — but they require wiring work. More on that in Project 13.
For now: if everyone in your home is willing to stop using the wall switches and control lights via app or voice, smart bulbs work great. If that sounds like a recipe for household conflict, bookmark Project 13.
Setup tip: When you first open the bulb app, name your rooms properly. “Living Room Lamp 1” is not a room name. Take the five minutes to label things intuitively — it makes every automation you build later much cleaner.
⚠️ Safety note: Smart bulbs are not compatible with most traditional dimmer switches. If you put a smart bulb in a socket that’s controlled by an old dimmer, you’ll get flickering, buzzing, or shortened bulb life. Either replace the dimmer with a standard switch or buy bulbs that list explicit dimmer compatibility.
3. Install Smart Plugs and Actually Check the Data (20 Minutes, $20–$60)
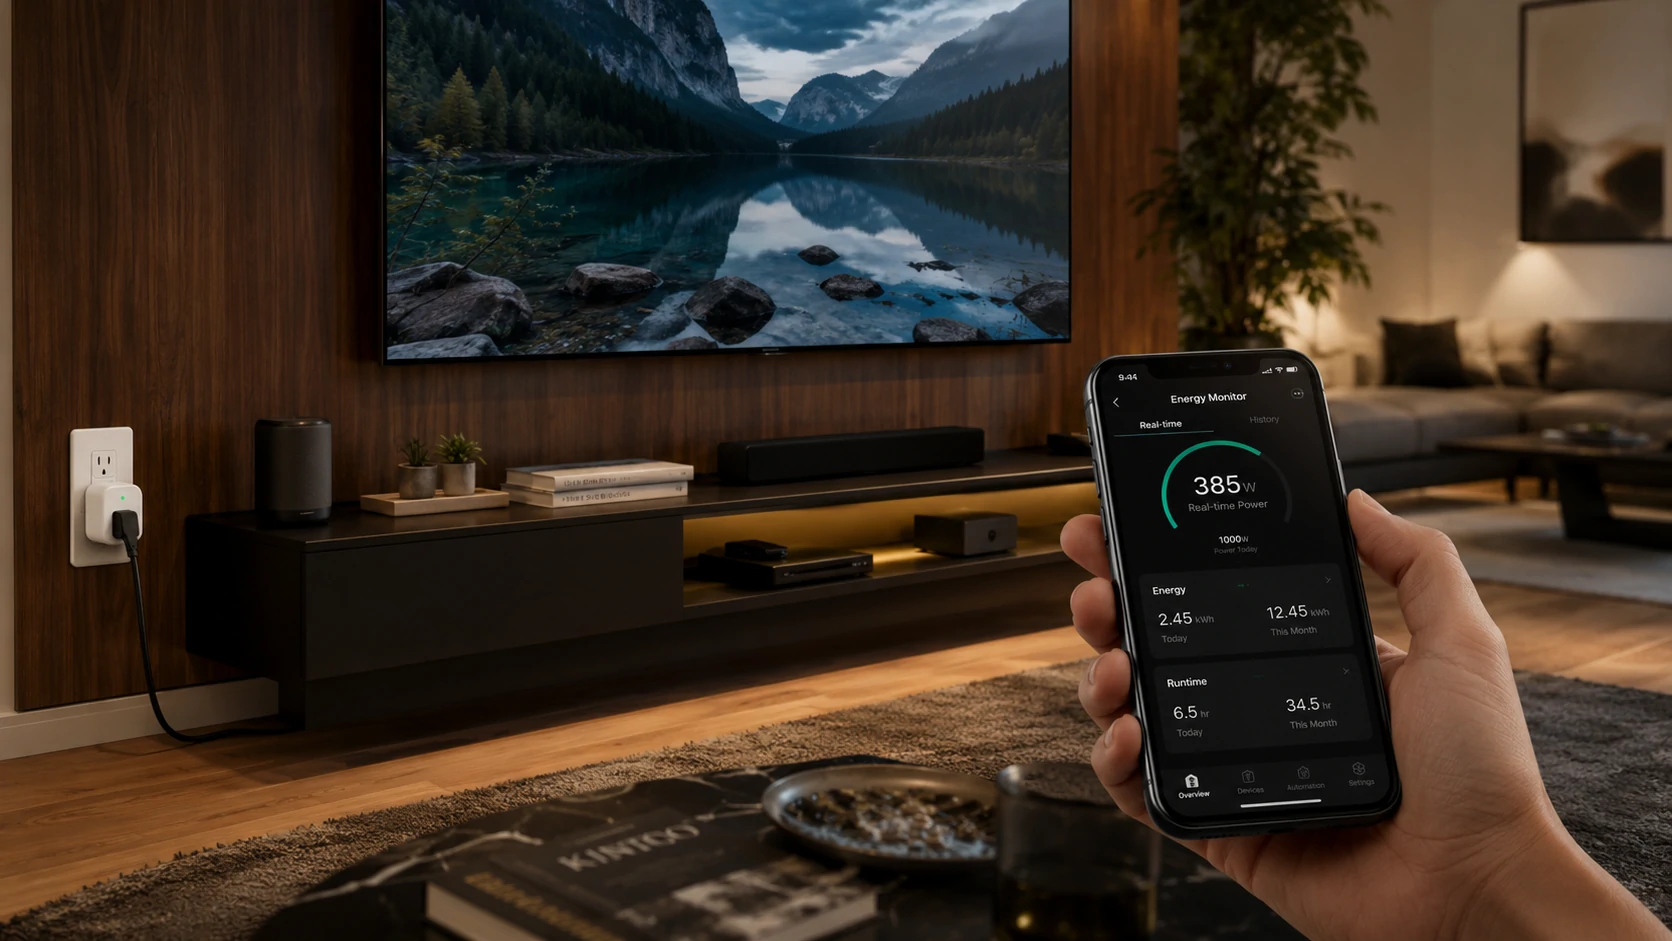
The remote on/off feature is the part that gets advertised. The energy monitoring is the part that changes behavior.
Most people install a smart plug, confirm it turns on and off from the app, and never look at the energy data again. That’s like getting a fitness tracker and never checking your steps. The data is where the value lives.
Plug in a smart plug on your TV, gaming setup, coffee maker, or any device that runs daily. Then check the energy monitoring app after one week. What you’ll typically find:
- A gaming PC or console in standby: 150–250W (that’s $13–$22/month for a “turned off” device)
- An older flat-screen TV: 40–80W standby
- A coffee maker with a clock display: 3–5W 24/7 — not huge, but it’s always on
The average US household wastes around $165 per year powering devices that appear to be off. Smart plugs let you find and eliminate those draws selectively.
💡 Real Talk: Most smart home “starter kits” are a bad value. You’re buying 5 devices from one ecosystem at a bundle price — but your home might only need 2 of them. Buy plugs first. Use the data to decide what to address next.
⚠️ Safety warning: Only purchase UL-listed (US), CE-marked (UK/Europe), or SAA-approved (Australia) smart plugs. A $25 plug from an unknown brand with no certification markings is a documented fire risk. This isn’t theoretical — counterfeit plugs have caused fires. Spend an extra $5–$10 for a brand that’s been tested.
4. Add Under-Cabinet LED Strip Lighting (30–60 Minutes, $30–$90)
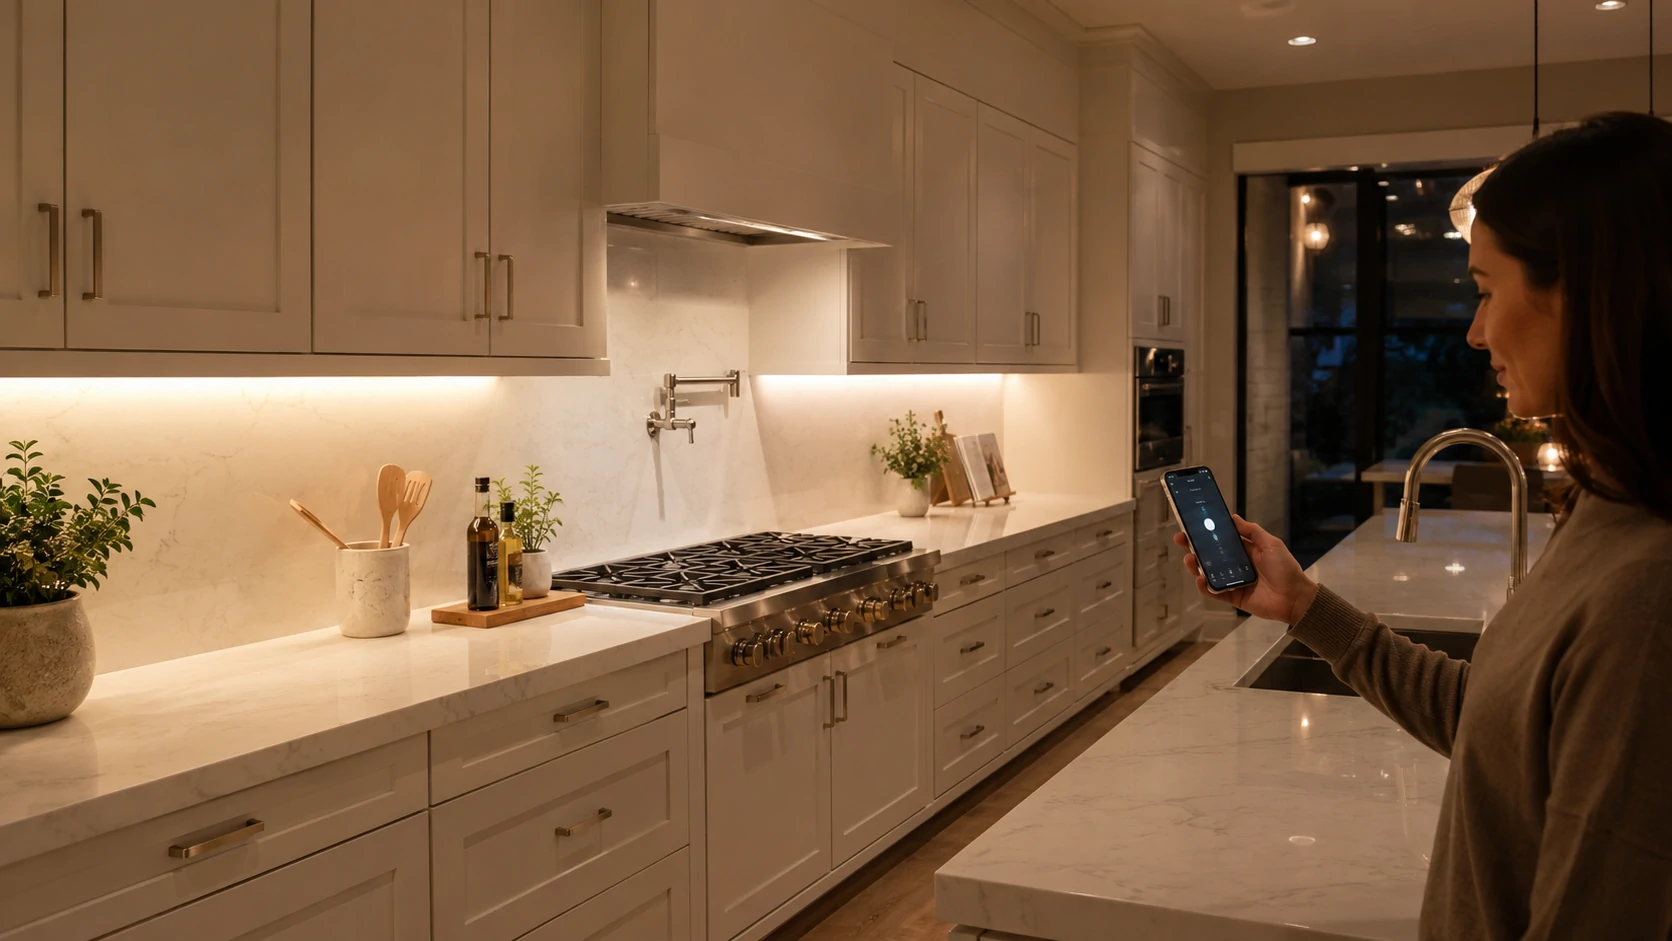
This is the most underrated kitchen upgrade on this list. Under-cabinet lighting eliminates the shadow your upper cabinets cast on your countertop — the shadow that makes food prep harder and the kitchen feel darker than it is.
Plug-in vs. hardwired: For a weekend project, plug-in strip lights win without question. They take 30 minutes to install, use adhesive mounting, and require zero electrical work. Hardwired looks cleaner but needs a cabinet that already has an outlet inside or an electrician to add one.
Color temperature matters here more than most people realize:
- 2700K (warm white): Cozy, amber-toned — great for living areas, not ideal for task lighting
- 3000K: A good kitchen balance — warm enough to feel comfortable, bright enough to see what you’re doing
- 4000K (cool white): Clinical, bright — excellent for detail work, less pleasant for everyday use
Many smart-enabled strip lights let you adjust this from an app. Worth the $10–$20 premium if you use the kitchen in the evening.
Renter note: Adhesive-mount strips work well and leave minimal residue on clean cabinet surfaces. Test on an inconspicuous area first, and store the original mounting template if your strip lights came with one.
Smart Security Upgrades That Actually Work
Here’s an uncomfortable truth: most smart home security articles skip the most important part of making a smart lock actually secure.
5. Install a Video Doorbell This Afternoon (1–2 Hours, $80–$250)

Studies consistently show that visible security tech — cameras, doorbells, motion lights — deters opportunistic burglars. A video doorbell doesn’t just tell you who’s at the door. It creates a visible deterrent, logs delivery confirmations, and gives you a permanent record of porch activity.
Wired vs. battery-powered: Wired doorbells connect to your existing low-voltage doorbell wiring and never need charging. Battery-powered units are far easier to install and work in homes without existing doorbell wiring — but you’ll recharge them every 1–6 months depending on traffic and settings. If your home has existing doorbell wires and you’re willing to do basic wiring, go wired. If not, battery is a fully capable alternative.
What actually matters in specs:
- 1080p resolution is sufficient for facial recognition and package identification — 4K is marketing for doorbell cameras
- Two-way audio is genuinely useful, not a gimmick
- Local vs. cloud storage: Cloud storage often requires a monthly subscription ($3–$10/month). Check this before buying — it affects the real cost
Common mistake: Buying a video doorbell before checking if it works with your existing chime. Some battery doorbells bypass the chime entirely; others require a compatible mechanical or digital chime. Check the compatibility list for your specific model before purchasing.
⚠️ Privacy note for UK and Australia residents: Some budget video doorbells route footage through overseas servers and have unclear data retention policies. Under UK GDPR and Australian Privacy Act obligations, check where your footage is stored and what the provider’s data sharing policy covers before purchasing.
6. Upgrade to a Smart Lock (30–90 Minutes, $100–$300)
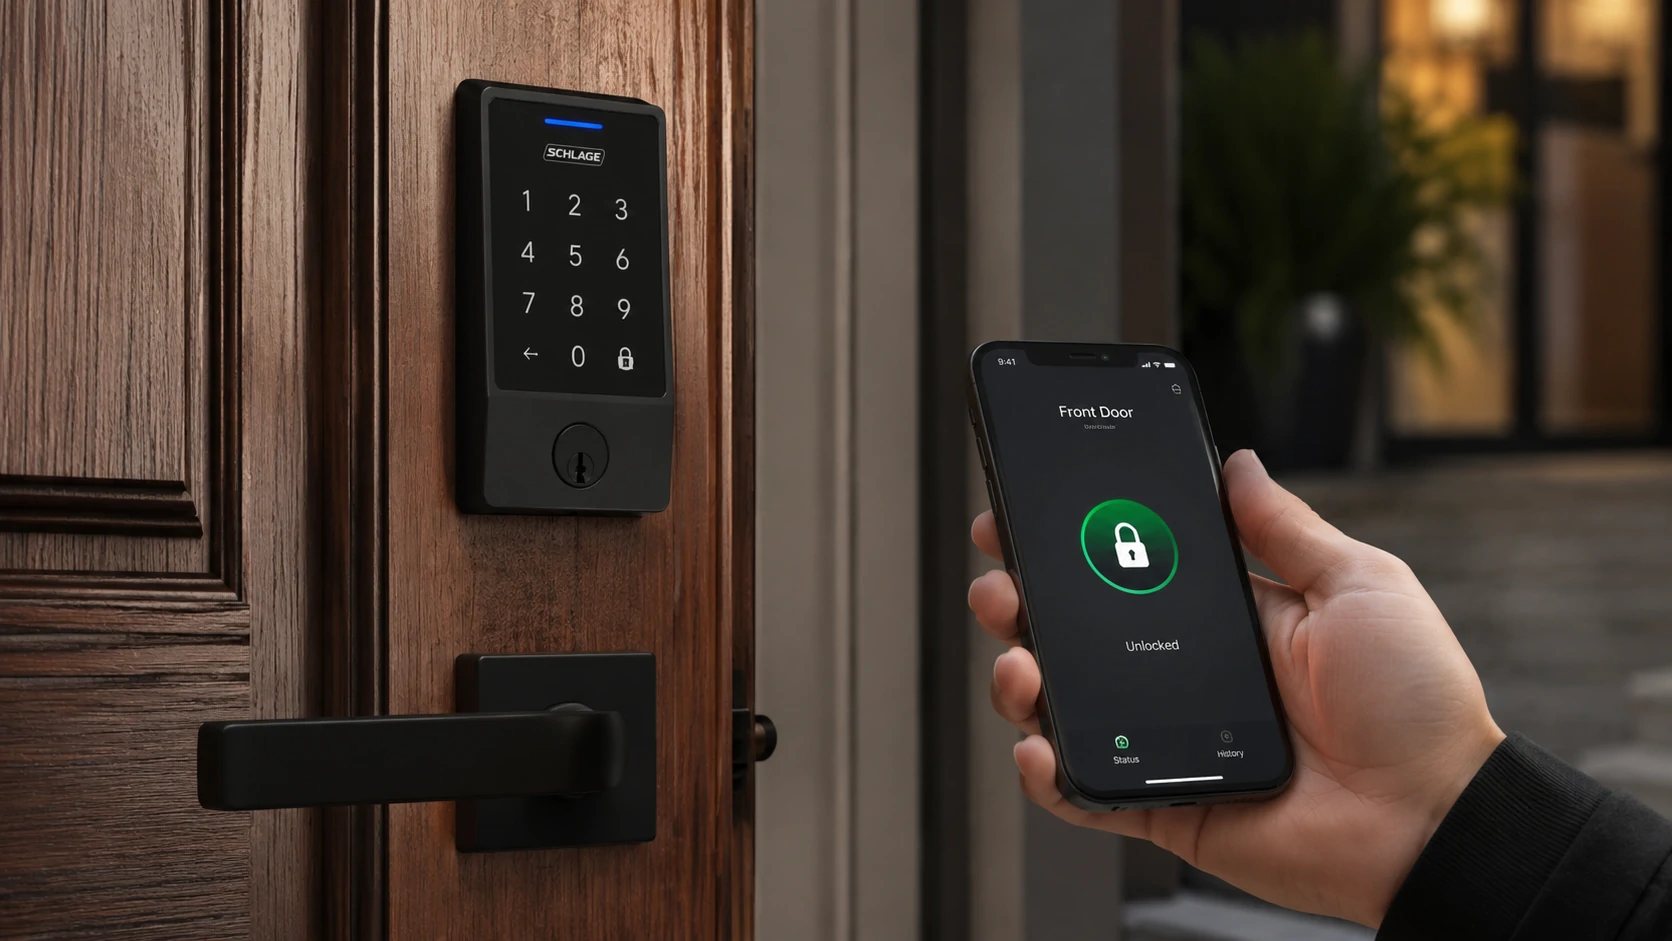
Guest access codes. No more hiding keys under a rock. A log of who entered and when. Smart locks deliver genuine, everyday convenience that’s hard to go back on once you have it.
Deadbolt replacement vs. retrofit: Deadbolt replacements swap your entire existing deadbolt for a new smart one — they’re the cleanest solution and work with almost any door. Retrofit models clip over your existing deadbolt’s thumb turn and don’t require replacing the lock cylinder — useful if you want to keep your keyed hardware. Retrofit models are typically faster to install (15–30 minutes) but bulkier.
Check your door backset before ordering. The backset is the distance from the edge of the door to the center of the lock hole. Most doors use either a 60mm (2-3/8”) or 70mm (2-3/4”) backset. The wrong size won’t fit. Measure before you order.
Keep a physical key. This should be obvious, but every year people get locked out because their phone died, the app had an outage, or the Wi-Fi went down. The app is the convenience layer — the key is the backup. Store one somewhere smart, not the same spot where everyone hides a spare.
🔴 Expert Warning: Smart locks are only as secure as your Wi-Fi network. A smart lock on a compromised network with a default router password is worse than a standard deadbolt. Before installing any smart lock, complete Project 12 (Wi-Fi security audit) first.
Modern smart locks with 256-bit AES encryption are genuinely secure — more tamper-resistant than most standard deadbolts. The vulnerability isn’t the lock hardware. It’s the network it runs on.
7. Add Motion Sensor Exterior Lighting (30–60 Minutes, $20–$80)
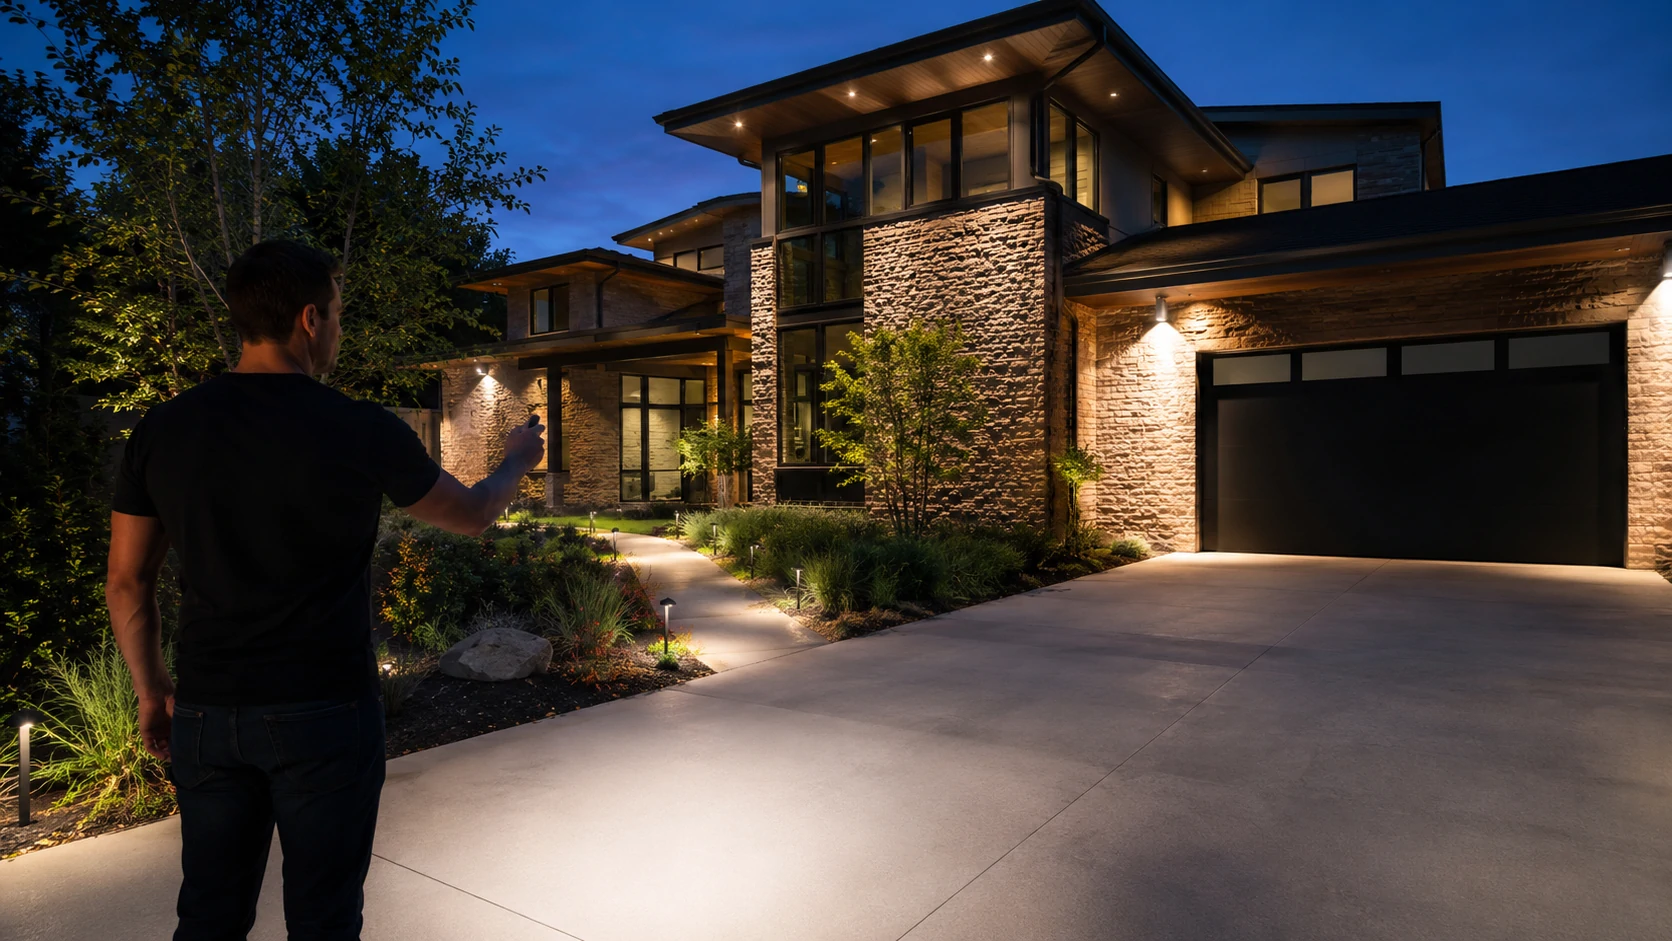
Motion-activated lighting is one of the highest-value security upgrades per dollar on this list. It startles, it illuminates, and it’s visible evidence that the property is actively monitored.
Wired replacement vs. battery stick-up lights: Replacing an existing exterior light fixture with a motion-sensor version takes 30–45 minutes, requires the circuit breaker off, and delivers a permanent, weatherproof result. Battery-powered stick-up lights (like the Blink or Ring floodlight models) require zero wiring and can be mounted on almost any exterior surface — ideal for renters and for spots without existing wiring.
Lumen output guide:
- 500–700 lumens: Subtle, accent-style — enough to notice, not blinding
- 1,000–2,000 lumens: Standard security coverage — this is what you want for driveways and garage areas
- 3,000+ lumens: Strong deterrent, commercial-feel — appropriate for larger properties
Smart motion lights can trigger your phone when they activate — useful for verifying whether that 2am alert was a raccoon or something worth calling about.
Cost-to-Payback Summary: The Energy-Focused Projects
| Project | Avg. Cost | Annual Savings | Payback Period |
|---|---|---|---|
| Smart thermostat | $80–$250 | $150–$300/yr | 5–18 months |
| Smart LED bulbs (6 bulbs) | $40–$120 | $60–$90/yr | 8–24 months |
| Smart plugs (4 units) | $60–$100 | $30–$120/yr | 6–30 months (varies by device) |
| Smart irrigation controller | $80–$200 | $50–$150/yr (water bill) | 12–36 months |
| Automation routines | $0 | Up to $200/yr (with devices) | Immediate |
| Whole-home energy monitor | $150–$300 | $120–$240/yr (behavioral) | 12–24 months |
Savings figures based on US average energy rates and EPA WaterSense data. UK/Canada/Australia results vary with local utility pricing.
Smart Home Myth vs. Reality
| Myth | Reality |
|---|---|
| ”Smart home devices are complicated to set up” | Most Matter-compatible devices pair in under 3 minutes |
| ”Smart thermostats work with all HVAC systems” | Single-stage systems: yes. Multi-stage, heat pump, or radiant heat: check compatibility first |
| ”Smart plugs save significant energy by themselves” | They save standby draw — meaningful for TVs and gaming rigs, negligible for phone chargers |
| ”You need a hub to start” | No — most 2026 devices run natively on Wi-Fi or Matter without a proprietary hub |
| ”Smart locks aren’t secure” | Modern smart locks with AES-256 encryption are more tamper-resistant than most standard deadbolts |
| ”You have to set everything up at once” | The most effective smart homes were built device by device, not kit by kit |
The Energy-Saving Upgrades That Pay for Themselves
Standby power costs US households approximately $165/year on devices that appear to be off. That’s just standby. Add poor thermostat scheduling and unmanaged irrigation, and the number climbs quickly.
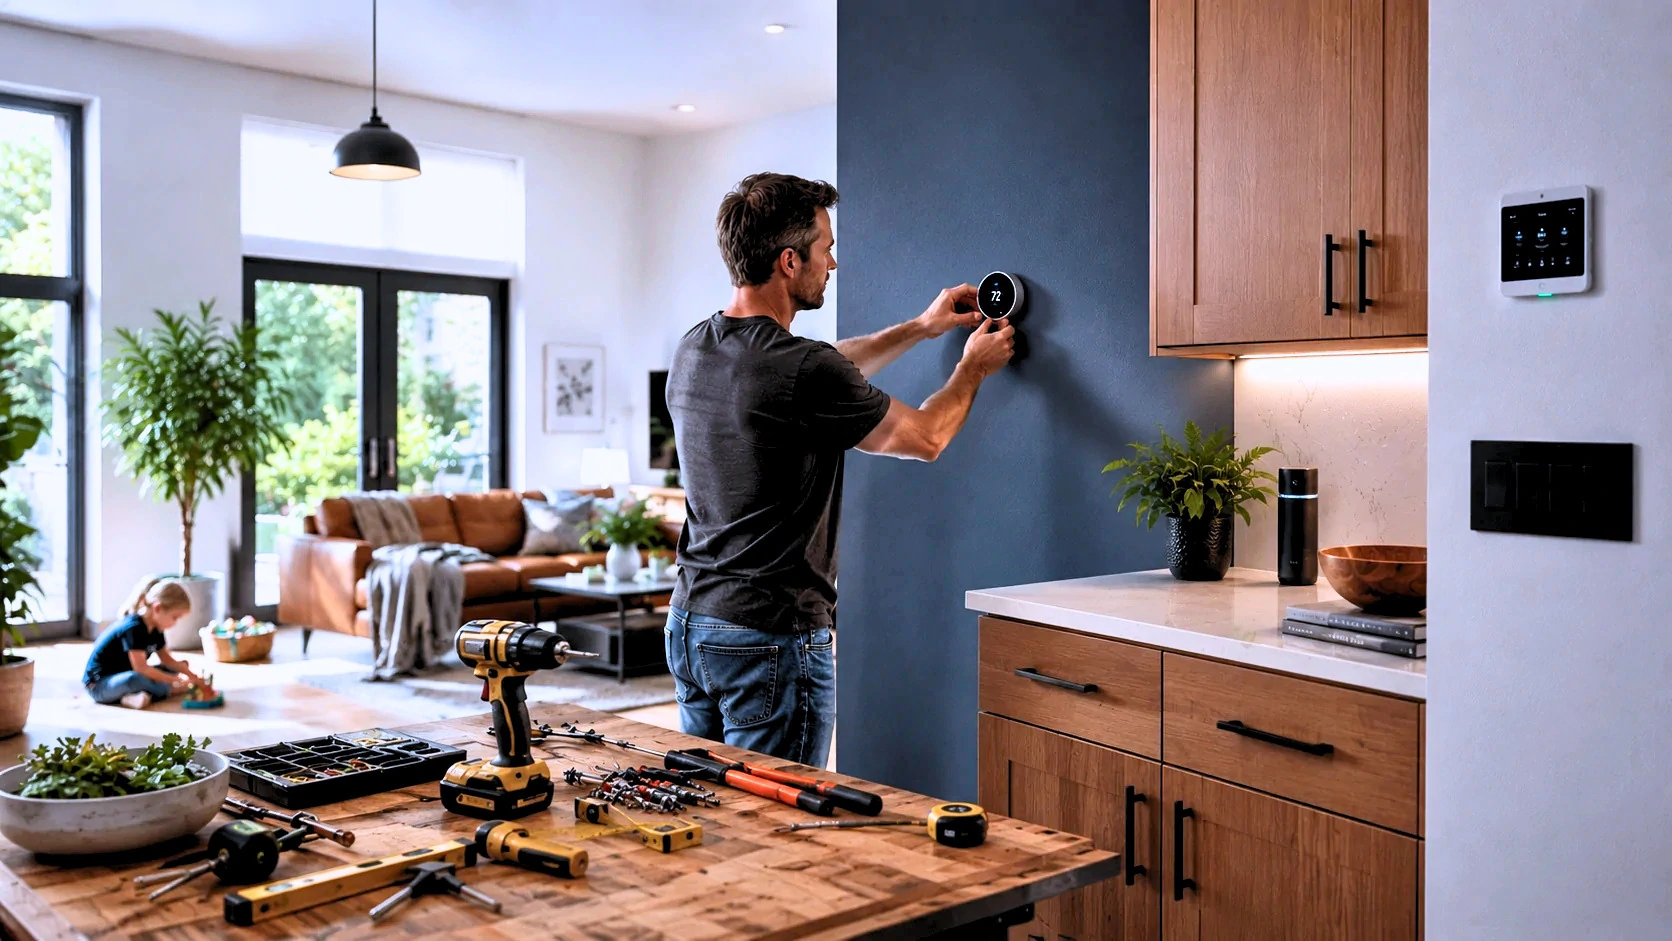
8. Install a Smart Thermostat — The Upgrade With the Longest Payback (1–3 Hours, $80–$250)
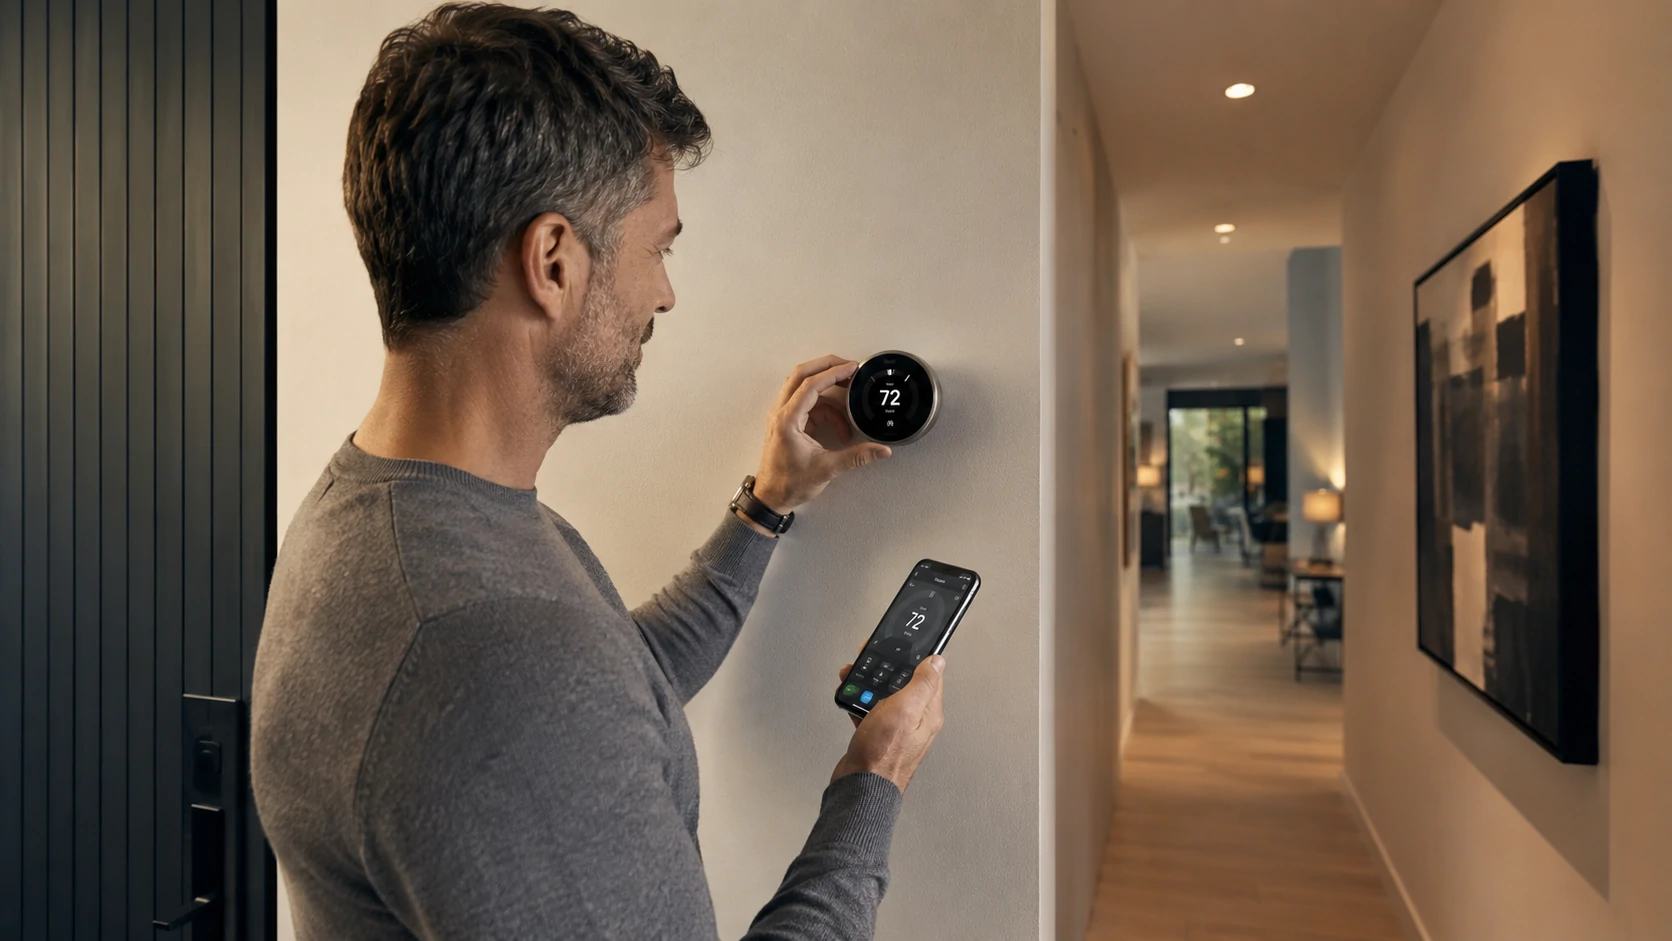
A Google Nest Thermostat installed in a 2,200 sq ft home in Minnesota saves around $23/month during winter — roughly $276/year for a $130 device. That math holds up across most climates when you actually configure the schedule.
The issue is that most people install a smart thermostat and never touch the scheduling settings. That’s the equivalent of buying a hybrid car and driving it exclusively in combustion mode.
Before you buy, do the C-wire check. The C-wire (common wire) provides continuous power to the thermostat so it can maintain a Wi-Fi connection. About 30% of older HVAC systems don’t have a C-wire connected at the thermostat — even if one exists at the HVAC control board. Most modern smart thermostats include a C-wire adapter that draws power from existing wiring without requiring a new wire run. Check your current thermostat’s wiring terminal before ordering. If you see terminals labeled R, G, Y, W, and no C, you’ll likely need the adapter.
Compatibility check before buying:
- Single-stage heat/cool systems: compatible with virtually all smart thermostats
- Multi-stage systems (two-speed HVAC): compatible with most — verify the model
- Heat pump systems: require specific heat pump-compatible thermostats — not all are
- Radiant heat, baseboard heaters, or line-voltage systems: most smart thermostats won’t work
⚠️ Expert Warning: Thermostat wiring errors can damage your HVAC control board — a repair that typically costs $300–$800. If your existing wiring is unclear, unlabeled, or you’re working with a multi-stage or heat pump system, a 1-hour HVAC technician visit ($75–$120) is genuinely worth it.
Regional rebates: In the US, many utility companies offer $50–$100 rebates for qualifying smart thermostat installations. Search the EnergyStar rebate finder with your zip code before buying. In Canada, check provincial energy efficiency programs. UK homeowners may qualify under the Great British Insulation Scheme. Australian states have varying rebate structures through energy efficiency programs.
9. Install Water Leak Detectors (10 Minutes Each, $25–$50 per Unit)
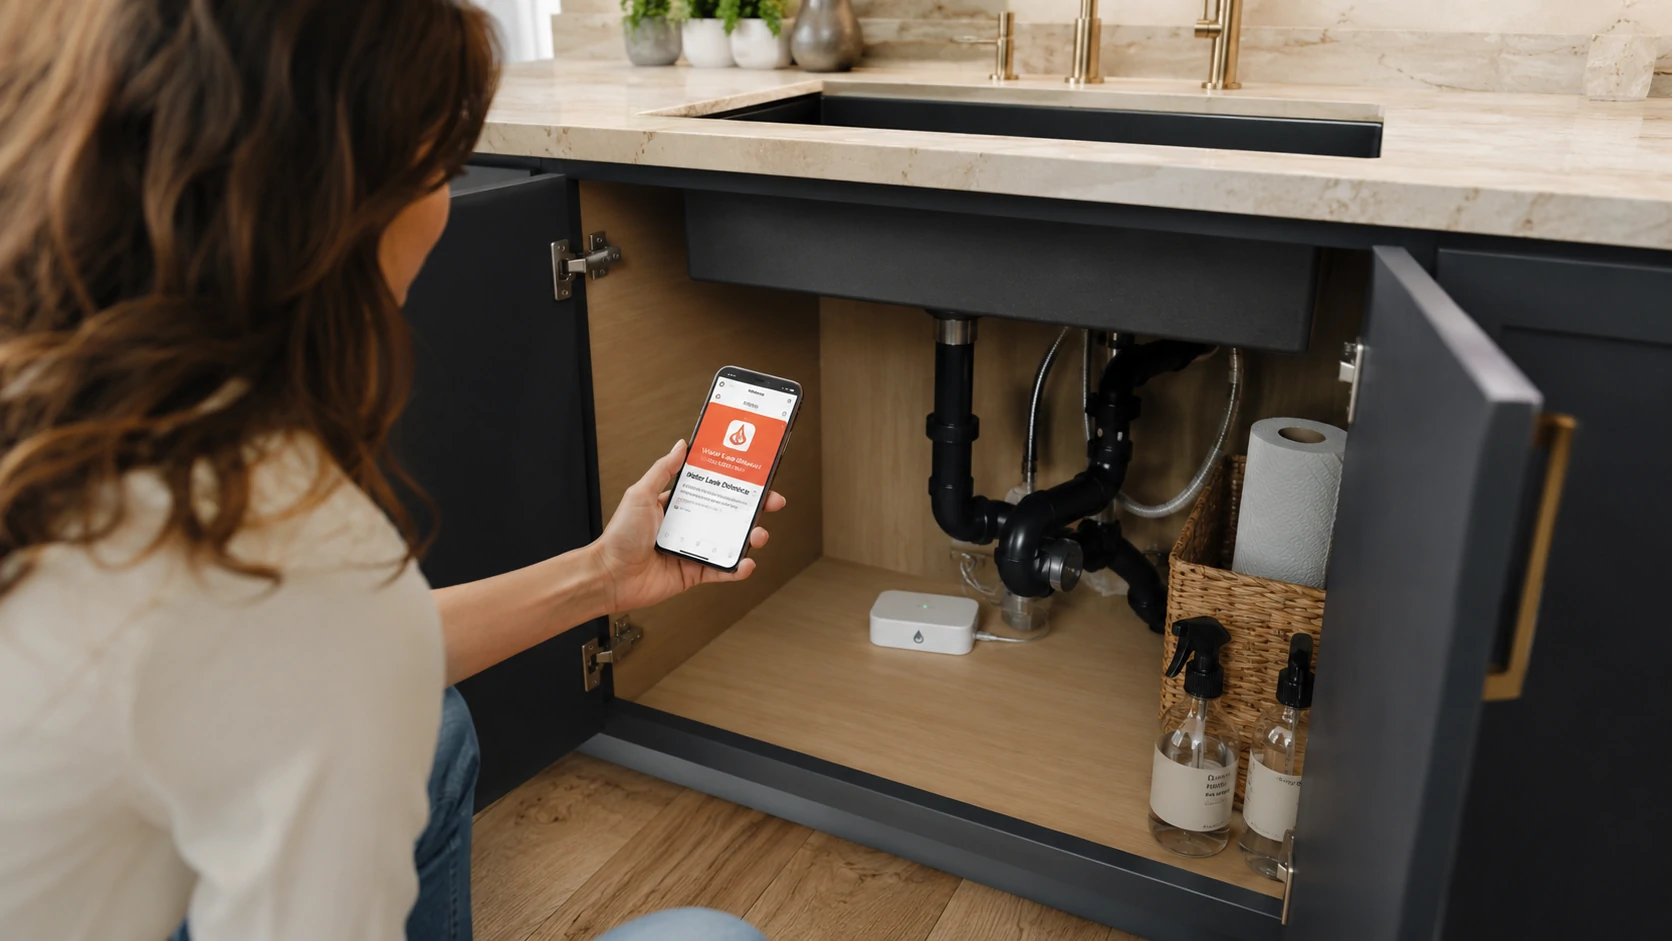
There’s one smart home device that most lists underemphasize — but it has the highest damage-prevention ROI of anything here. It’s this one.
The average water damage claim in the US runs between $10,000 and $15,000. A water leak sensor costs $30. The math is uncomfortable.
Place sensors in these locations:
- Under every kitchen sink
- Behind the washing machine
- Under the water heater
- In the basement near the floor drain
- Under bathroom vanities in older homes
The sensor sits on the floor. When moisture reaches the contacts, it sends an app alert in under 30 seconds. That’s the difference between a mop and an insurance claim.
Wi-Fi vs. Zigbee/Z-Wave sensors: Wi-Fi sensors connect directly to your network and alert through a dedicated app — no hub required. Zigbee and Z-Wave sensors require a compatible smart hub but use far less power and have stronger mesh-network reliability. For most beginners, Wi-Fi sensors are the easier starting point.
The maintenance blind spot: These sensors sit under sinks and behind appliances for years. When the battery dies, the protection disappears — silently, without any notification in most models. Check batteries annually. Set a calendar reminder. The sensor that hasn’t been touched in two years is probably not protecting anything.
💡 Real Talk: The first time you get a phone alert while you’re at the grocery store and come home to a contained drip under the sink — instead of a flooded cabinet and water damage in the subflooring — is the moment you stop thinking of these as optional. Put them everywhere that has a water connection.
10. Set Up Energy Automation Routines (Free — Uses Devices Already Installed)
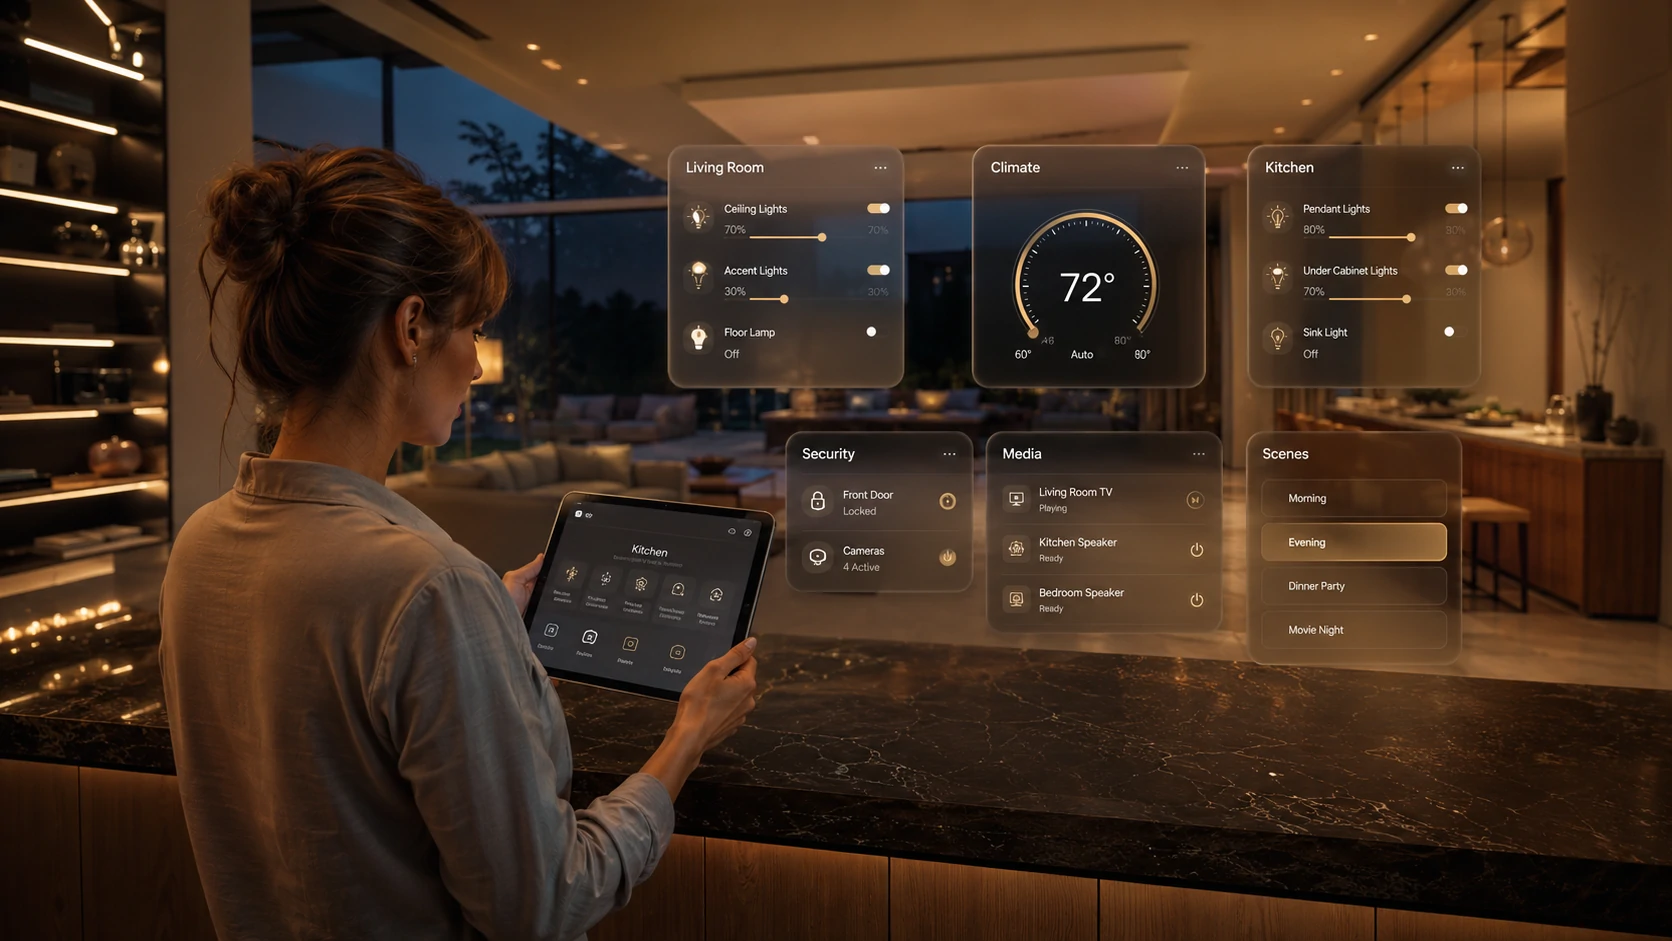
This project costs nothing if you already have a smart thermostat, bulbs, or plugs. It uses what you’ve installed and turns it into an actual system.
Three routines account for most of the energy savings from home automation:
Morning routine: Thermostat starts heating/cooling 30 minutes before you wake up instead of running overnight. Lights in high-traffic rooms turn on at wake time. Coffee maker pre-heats via smart plug.
Away mode: When the last person leaves, thermostat shifts to an efficiency setpoint, non-essential device plugs cut power, and exterior lights activate on motion-only. This single routine — configured properly — delivers the majority of smart thermostat energy savings.
Bedtime routine: Non-essential lights turn off, thermostat drops to sleep setpoint, charging strips turn on.
Properly configured thermostat and lighting routines can reduce HVAC and lighting costs by up to 23%, according to DOE and ENERGY STAR data.
The failure mode nobody warns you about: Routines that conflict with each other. A morning routine that turns on the kitchen lights conflicts with a motion-sensing routine that turns them off when no motion is detected for 10 minutes. Build routines one at a time, test each one, and give them at least a week before adding the next.
Quarterly audit is not optional. Automation routines set in January don’t account for summer sunset times, school schedule changes, or remote work days. Every 90 days, open your automation app and review what’s running. Routines drift, and a routine that fails silently wastes money without telling you.
11. Install a Whole-Home Energy Monitor (2–4 Hours, $150–$300)
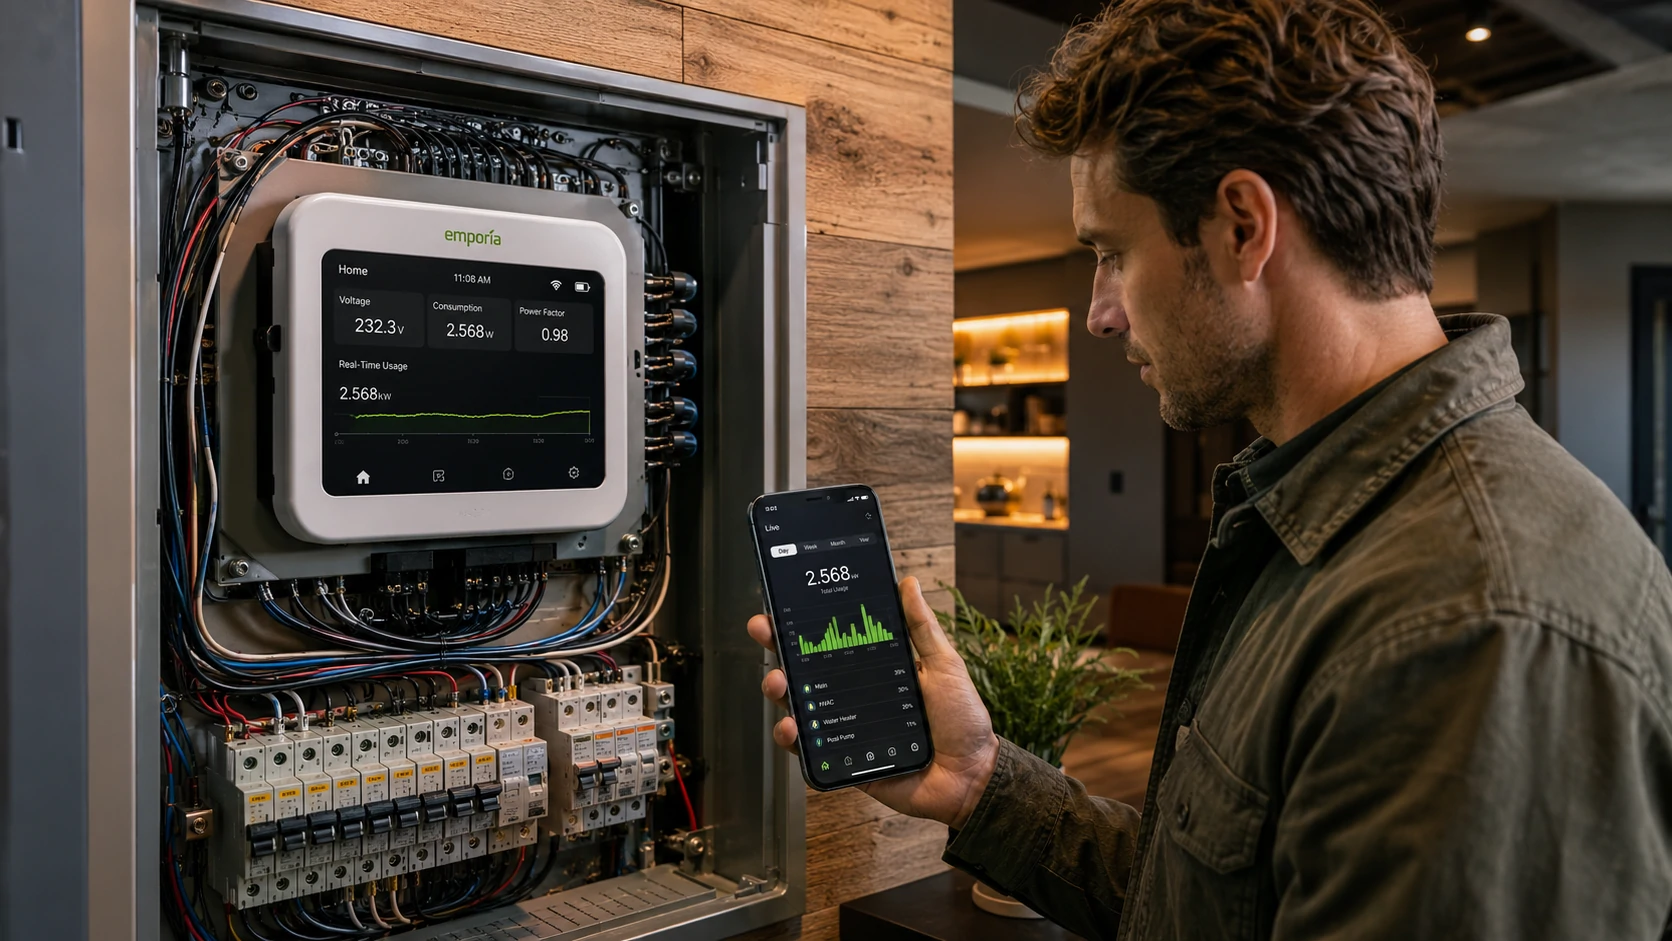
Smart plugs show you what individual devices use. A whole-home energy monitor shows you everything — circuit by circuit, in real time.
Devices like Sense and Emporia Vue clamp onto your main electrical panel’s service lines and learn to recognize individual appliances by their electrical signatures. Within a few weeks, your app identifies which circuit is the refrigerator, which is the A/C compressor, and which is that mystery draw that’s been adding $18/month since you moved in.
The DIY vs. professional question matters here. The monitor clips onto wires inside your main electrical panel. This involves working adjacent to lines that carry live 120/240V current even when your breakers are off. If you’ve worked in a panel before and know how to identify the service entrance conductors, this is a manageable DIY job. If you haven’t, the $100–$150 electrician service call is the right call. This is the one project on this list where the safety stakes are high enough to be direct about it.
What you’ll typically discover: The refrigerator and water heater are the two biggest consistent draws in most homes. The HVAC is the highest peak draw. Everything else is usually smaller than people assume — except old second refrigerators in garages, which are often the biggest surprise on the bill.
Smart Home Infrastructure — The Projects Most People Skip
These projects don’t look impressive on Instagram. They’re also the reason some smart homes work flawlessly and others are a constant source of frustration.
12. Audit and Upgrade Your Home Wi-Fi Network (1 Hour, $0–$200)
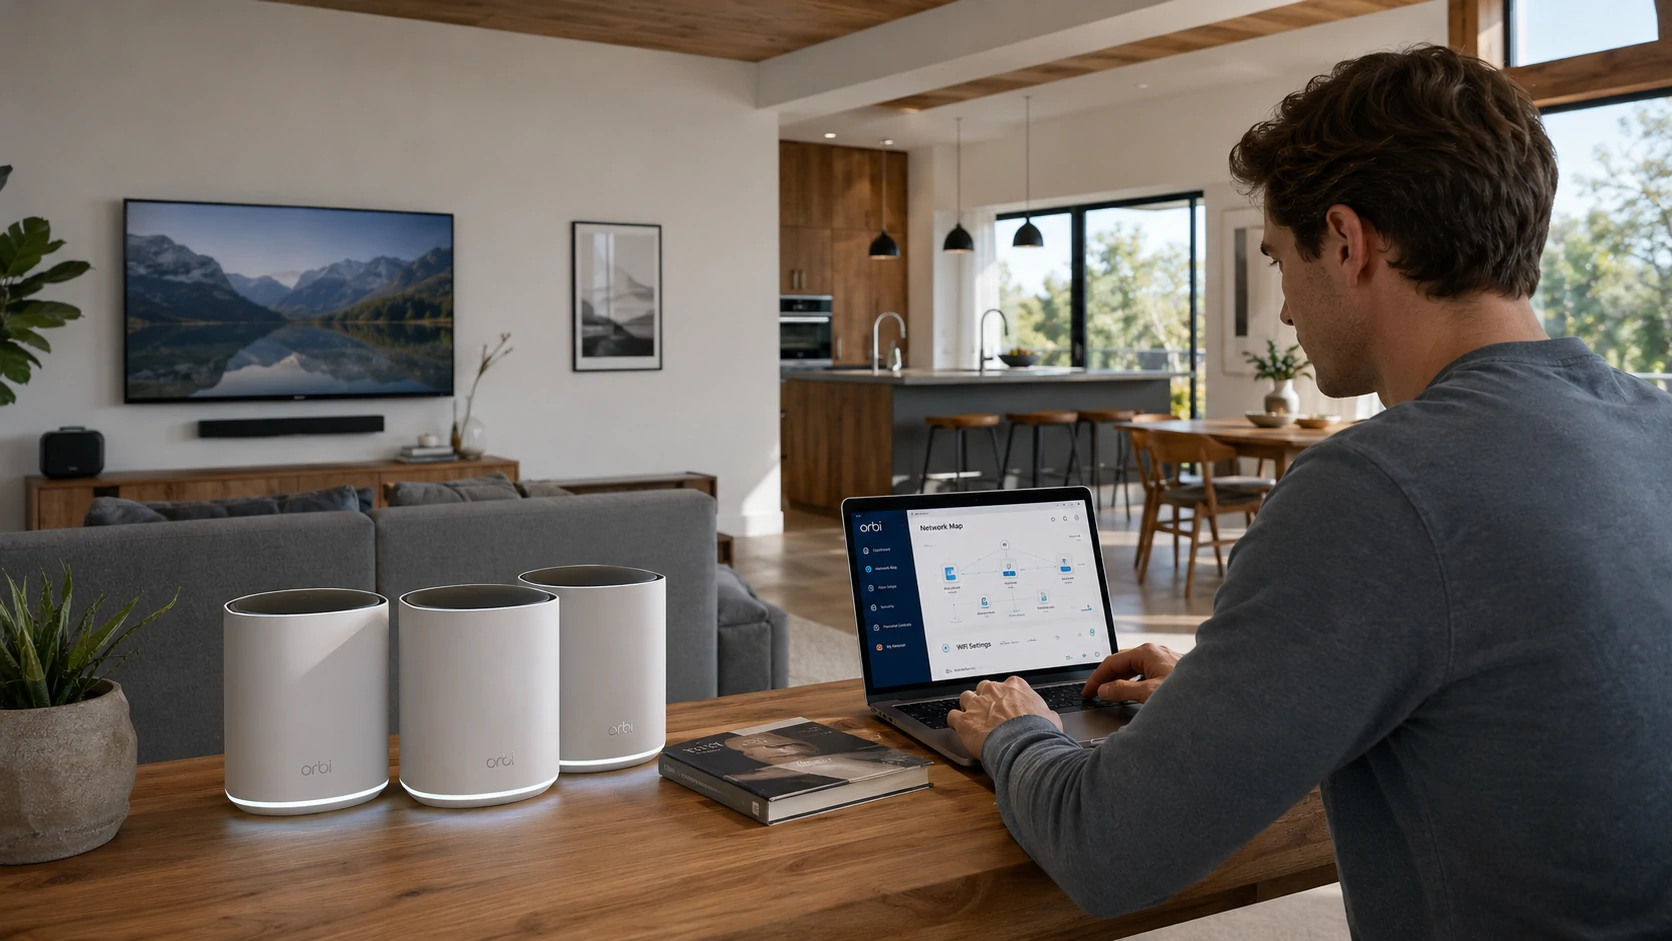
Running 20 smart devices on a 5-year-old router with a default admin password isn’t a smart home. It’s an unlocked door.
Network quality is the single biggest factor in smart home reliability. A device that drops off the network every few days isn’t broken — it’s usually fighting a congested 2.4GHz band, a router that’s too far away, or simply a budget router that can’t handle 15+ connected devices.
Quick Wi-Fi audit checklist:
- Change the router’s default admin credentials (not just the Wi-Fi password — the admin login)
- Enable firmware auto-updates if available
- Create a separate guest network for all IoT/smart home devices — keeps them isolated from your main computers and phones
- Check your router’s placement — it should be centrally located, not stuffed in a closet
- Test speeds in rooms where smart devices are struggling
2.4GHz vs. 5GHz: Most smart home devices use 2.4GHz — it has better range and penetrates walls more effectively than 5GHz. The trade-off is slower speeds and a more congested band in dense neighborhoods. Don’t try to put smart home devices on your 5GHz network unless the device specifically supports it.
Mesh network vs. range extender: Range extenders are cheap and create a noticeably worse experience — they halve your bandwidth each time a device hops through them. A mesh system (Eero, Google Nest WiFi, or similar) creates a single network with seamless handoff. If your home is over 1,500 sq ft or has multiple floors, a mesh setup is worth the $150–$200 investment.
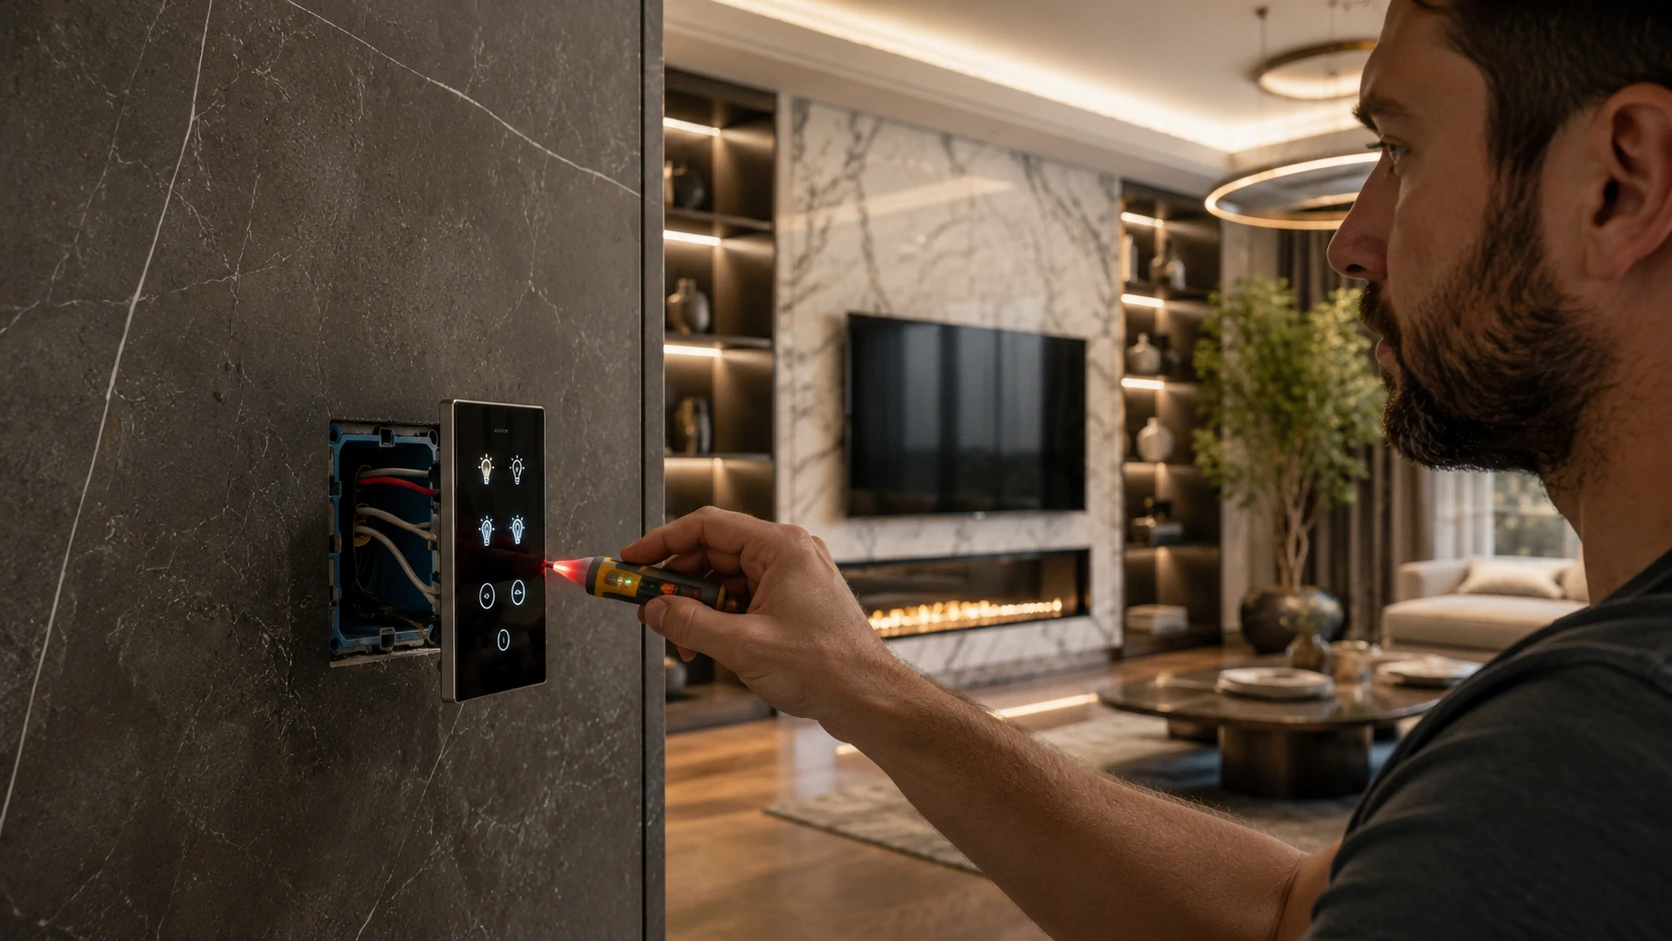
13. Replace Smart Switches (Not Just Bulbs) in High-Traffic Rooms (30–60 Min/Switch, $15–$60/Switch)
Here’s the argument that settles the smart bulb vs. smart switch debate for most homes: switches control entire circuits, not individual bulbs. One smart switch for your living room overhead light costs $30–$60 and controls everything on that circuit. Six smart bulbs for the same room cost $60–$120 and still get turned off at the wall by any guest who’s ever used a light switch.
Smart switches win for rooms with multiple bulbs, frequent guests, and anyone in the household who hasn’t fully committed to app-only lighting control.
Before you buy a single switch, check for a neutral wire. The neutral wire (typically white) completes the electrical circuit and is required by most smart switches to power their electronics. Older homes — particularly those built before the mid-1990s — sometimes have switch boxes with only two wires: a hot (black) and a traveler or return. No neutral means most standard smart switches won’t work. There are no-neutral options available (Lutron Caseta is the most reliable), but they cost more and have a shorter compatibility list.
⚠️ Always turn off the circuit breaker before opening any switch box. Confirm the circuit is dead with a non-contact voltage tester before touching any wires. This is a $15 tool that belongs in every homeowner’s toolkit.
3-way switch warning: If a light is controlled by two switches — common in hallways, stairwells, and large rooms — that’s a 3-way circuit. Smart 3-way setups work, but they require purchasing the correct companion switch (sometimes called an add-on or remote switch) rather than two standard smart switches. If your research on 3-way wiring is making your head spin, this is a reasonable project to hand off to an electrician.
14. Install a Smart Smoke and CO Detector (15–30 Minutes, $100–$130)
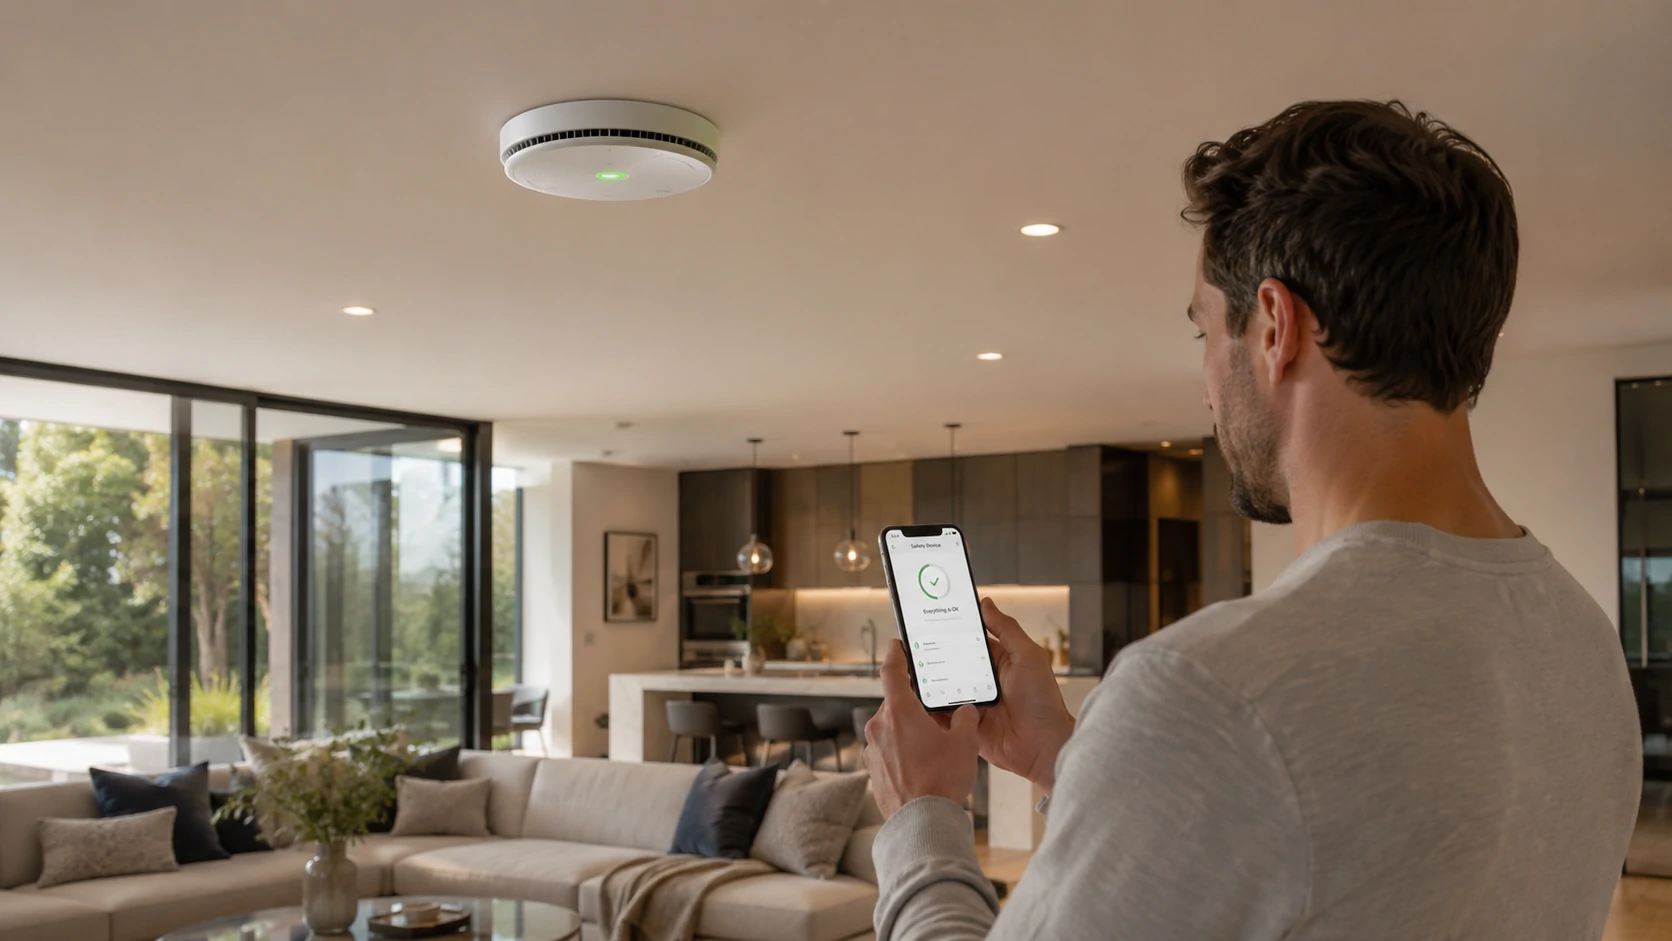
The case for smart smoke detectors over standard ones is simple: when you’re away from home, a standard detector screams into an empty house. A smart detector sends you an alert within seconds, identifies which unit triggered, and in some cases reads the ambient CO level in real time.
Interconnected detectors are the more important upgrade. In homes with interconnected alarms, when one triggers, all of them sound. Standard interconnected detectors use physical wiring. Smart detectors like the Nest Protect use wireless interconnection — if the basement detector triggers, every detector in the house sounds.
Test immediately after installation — same day, before sleeping. Press the test button and confirm the alarm sounds at full volume. Confirm the app registers the test event. Never defer this test.
⚠️ Rental compliance note: In some jurisdictions, landlords are required to provide and maintain smoke detectors, and tenants replacing landlord-provided units — even with better ones — may create liability confusion. Check your lease and local tenancy laws before replacing existing detectors in a rental.
The Outdoor and Specialty Upgrades Worth Your Sunday Afternoon
These projects feel more ambitious than the quick wins, but most only take half a Sunday — and they deliver results that extend well beyond the weekend.
15. Install a Smart Irrigation Controller (1–2 Hours, $80–$200)
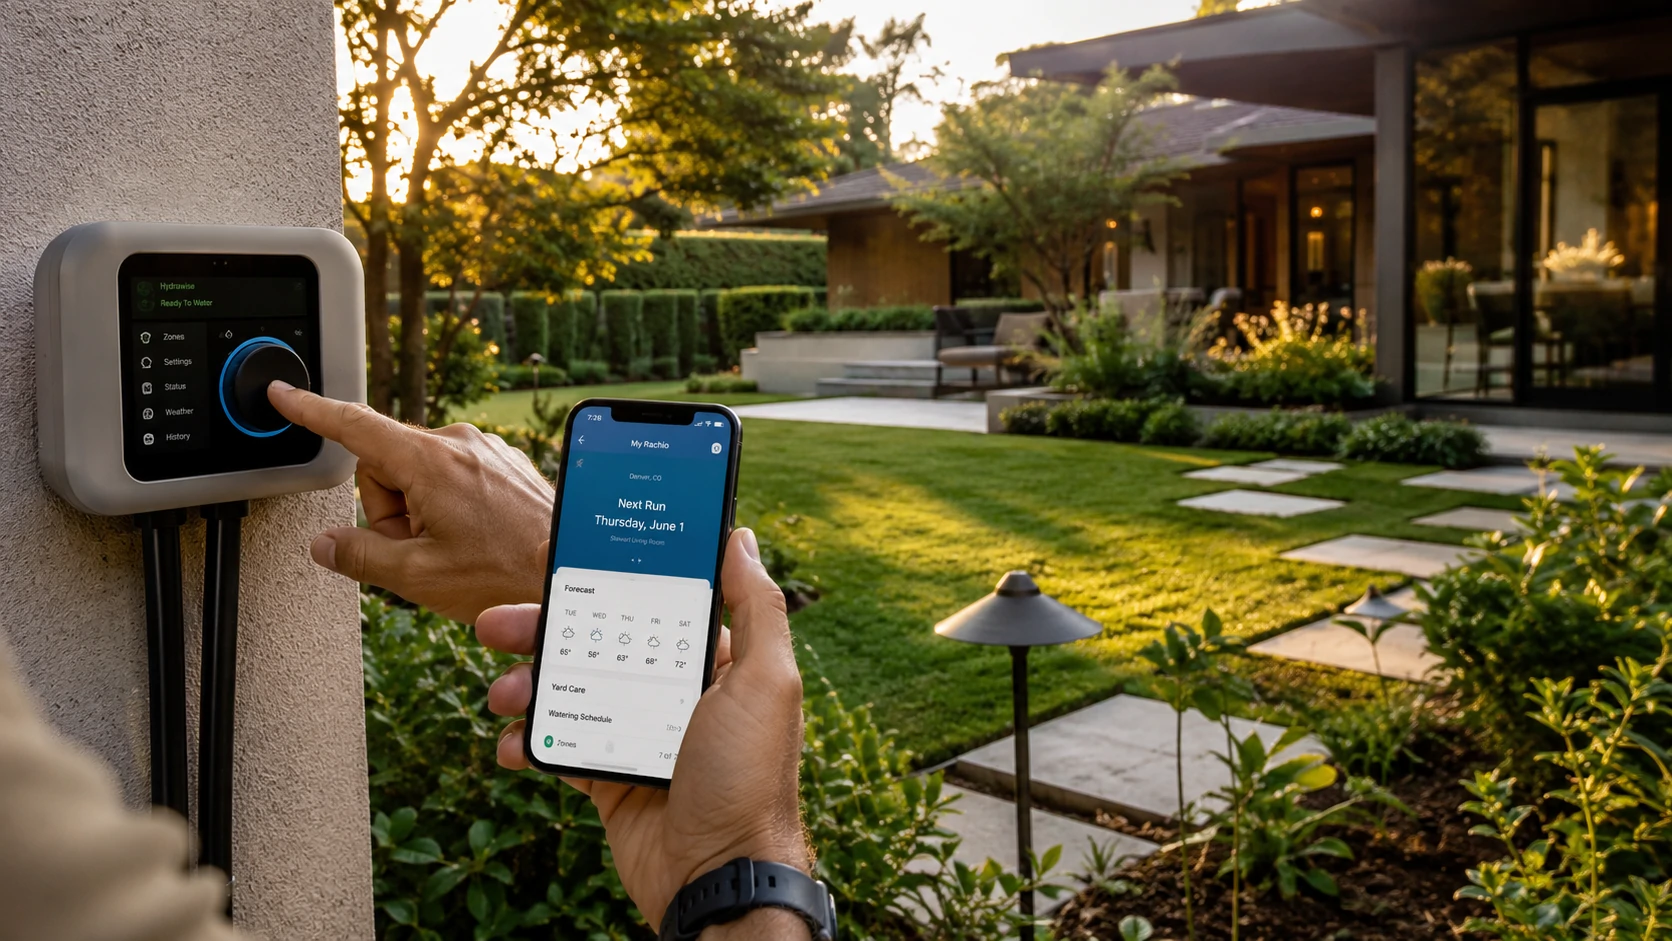
Fixed-timer sprinkler systems run on schedules set once and forgotten. They water on Tuesdays and Saturdays regardless of whether it rained Tuesday morning. Smart irrigation controllers use local weather data to skip watering cycles when rain is forecast or soil moisture is sufficient.
The EPA’s WaterSense program documents 30–50% water use reduction from smart irrigation controllers compared to time-only controllers. At average US water rates, a household that’s overwatering a medium-sized lawn could save $50–$150 per year on the water bill.
EPA WaterSense certification matters beyond just water savings — it’s also the key to rebate eligibility. Many municipalities and water utilities offer $25–$100 rebates on certified smart controllers. Search your local utility’s website for “irrigation rebate” before purchasing.
Compatibility check: Most smart controllers replace your existing timer unit and connect directly to your existing valve wiring. Multi-zone systems (more than 6 zones) require a controller that supports the right number of zones. Count your zones before ordering.
⚠️ Freeze climate note: Smart irrigation controllers don’t winterize your system. In climates with freeze risk, you still need an annual compressed-air blowout of the lines. The controller won’t know the pipes need draining — that’s still a manual process.
16. Add a Smart Garage Door Opener or Retrofit Kit (2–4 Hours, $100–$200)
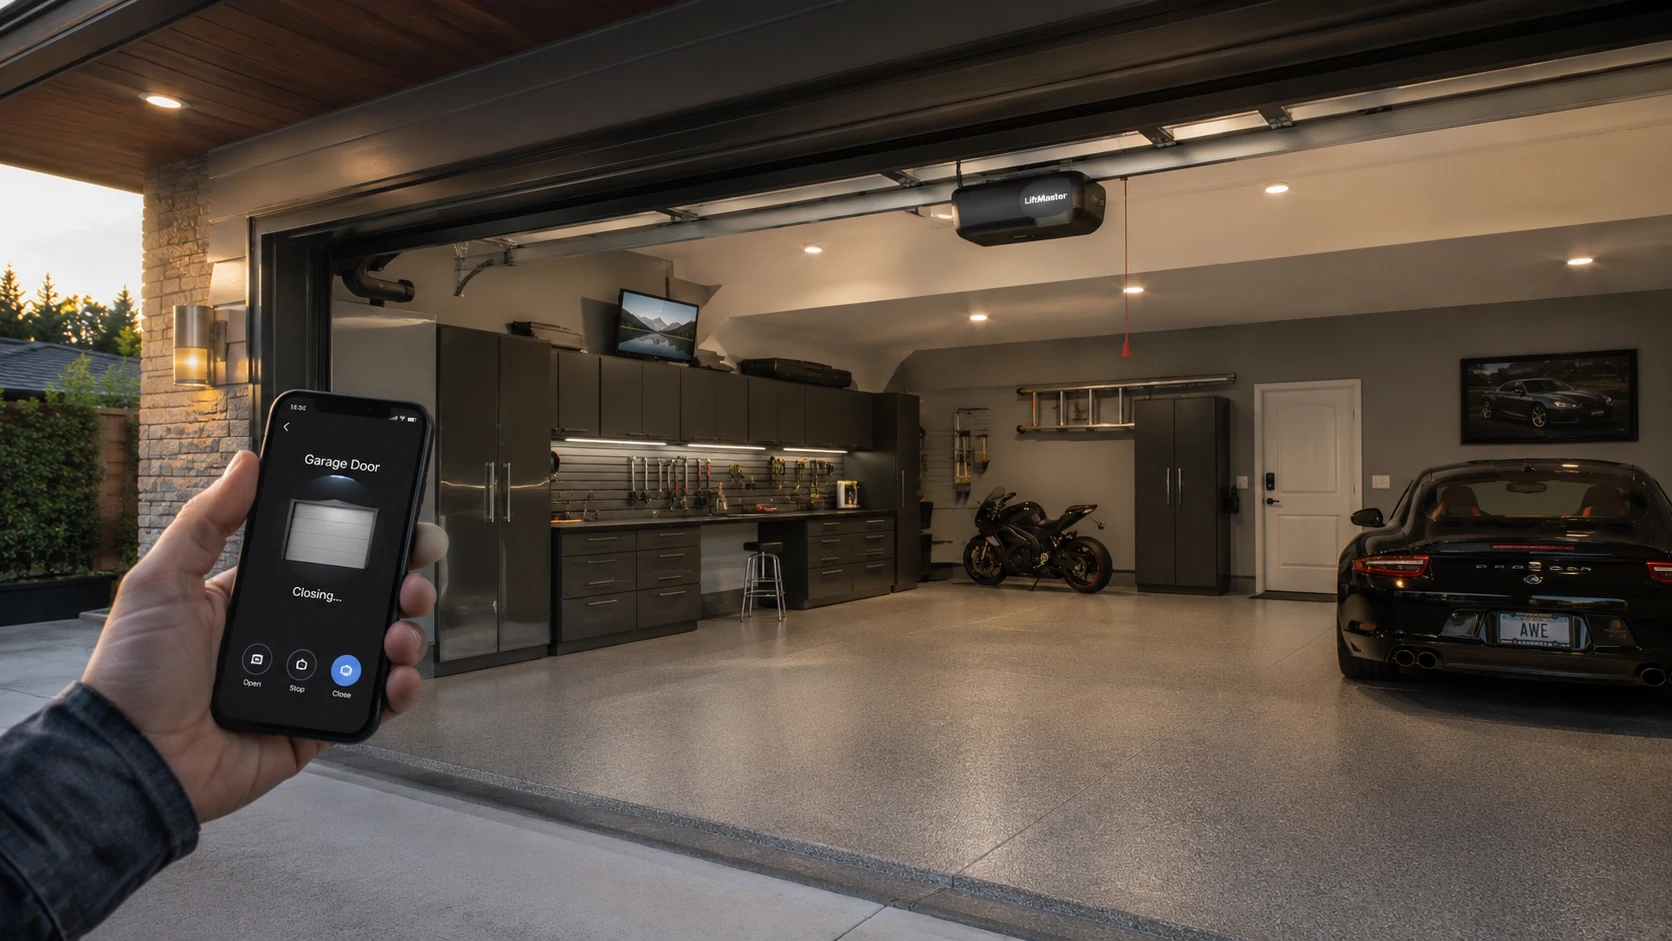
“Did I leave the garage open?” is a thought that hits about 12 minutes into every road trip. A smart garage door opener eliminates it completely — you can check and close the door from your phone anywhere in the world.
Full replacement vs. retrofit add-on: If your opener is more than 15 years old, a full replacement is often the better investment — newer openers are quieter, have built-in obstacle detection improvements, and integrate natively with smart home systems. If your existing opener is newer and working well, a retrofit kit (Meross, Chamberlain myQ, or similar) clips onto the opener and adds app control for $30–$80.
Safety requirement: Any garage door opener sold in the US since 1993 must include auto-reverse safety sensors at floor level. If your opener doesn’t have these, it’s operating outside federal safety standards — replace it regardless of the smart home angle.
Common mistake: Buying a retrofit kit before checking your opener’s protocol. Some older openers use proprietary security codes that budget retrofit kits can’t decode. Check the compatibility list for your specific opener model before purchasing.
What to Expect After You’re Done — The 12-Month Reality Check
Here’s what nobody tells you after the weekend is over.
Maintenance Tasks You Actually Need to Do
Smart devices require more maintenance than people expect. Not much — but the “set it and forget it” reputation is slightly misleading.
Quarterly (every 90 days):
- Review all automation routines — update for season changes, schedule changes, sunset time shifts
- Check smart plug energy data and review any unexpected changes in usage patterns
- Test water leak sensors by touching a damp cloth to the sensor contacts
Every 6 months:
- Check firmware updates for all smart home devices — most update automatically, but some require manual triggers
- Audit your Wi-Fi router admin credentials and IoT network settings
- Test smoke and CO detectors
Annually:
- Replace batteries in all wireless sensors (leak detectors, motion sensors, door/window sensors)
- Physically inspect HVAC filter — a smart thermostat monitors run time, not filter condition
- Review smart home device subscriptions — cancel unused cloud storage plans
When Things Stop Working — The Most Common Failures
Device dropped from Wi-Fi after router reboot: Smart plugs and bulbs often need to be physically power-cycled after a network interruption. If a device goes offline after a router reboot, turn it off at the switch or outlet for 10 seconds. Prevention: configure your router to always assign the same IP address to smart home devices (static DHCP leases).
Smart bulb unresponsive after a power outage: Most smart bulbs return to “on” after power is restored, then accept app commands within 60 seconds. If a bulb stays unresponsive, power cycle it three times — most brands have a physical reset sequence.
Thermostat app disconnection in summer: High HVAC demand can overload network-connected smart hubs and third-party app servers. If your thermostat shows as “offline” in the app but is still controlling your HVAC correctly, this is a cloud service issue — not a device failure. The physical controls will still work.
Water leak sensor battery dead silently: This is the most consequential maintenance blind spot. When a battery-powered leak sensor dies, it simply goes offline. It doesn’t sound an alarm. It doesn’t send a low-battery alert in all models. Your app dashboard might show the device as inactive — or it might not show anything. Annual battery replacement isn’t optional.
The 9 Mistakes Homeowners Make With These Projects (And How to Avoid Every One)
Mistake 1: Buying smart devices without checking platform compatibility You buy a smart thermostat, a video doorbell, and a smart lock — from three different brands — and discover they don’t all work in the same app. Before buying anything, decide on your ecosystem (Alexa, Google Home, or Apple HomeKit) and confirm every device supports it, or choose Matter-compatible devices, which work across all major platforms.
Mistake 2: Skipping the C-wire check before ordering a smart thermostat This is the most common smart thermostat installation problem. It’s also completely avoidable with a 5-minute inspection of your current thermostat before placing an order. Remove the thermostat cover and photograph your wiring. If you don’t see a wire connected to the “C” terminal, read the installation guide’s C-wire adapter section before proceeding.
Mistake 3: Installing a smart switch without checking for a neutral wire Half of smart home support line calls are about this. No neutral wire means most standard smart switches won’t install. Check the switch box before purchasing. The neutral is the white wire — it’s typically bundled with other whites at the back of the box, not necessarily connected to the switch.
Mistake 4: Using uncertified smart plugs in high-load outlets A $25 uncertified smart plug connected to a space heater, air conditioner, or hair dryer is a fire risk. High-load devices generate sustained heat, and uncertified plugs may not handle sustained current draw safely. Only use UL/CE/SAA-certified plugs, and check the plug’s rated amperage against the device you’re connecting.
Mistake 5: Never testing automation routines after setup My automation routine that turned off all lights when we left worked perfectly — except on the mornings my partner left 20 minutes before me. Test every routine with real-world scenarios: one person leaving, power outage recovery, app offline behavior. Edge cases are where routines fail.
Mistake 6: Adding smart devices without securing the network first Adding a smart lock, security camera, and doorbell to a network with a default admin password and no guest network isolation is a security problem. Secure the network (Project 12) before connecting devices that control physical access to your home.
Mistake 7: Installing a smart lock without a physical key backup Smart lock batteries last 6–12 months. Apps have outages. Wi-Fi goes down. Keep a physical key somewhere accessible — not inside the house the lock is protecting.
Mistake 8: Replacing smoke detectors without testing them that same day Install, test, sleep. That order matters. A smoke detector that’s been installed but not tested is worse than none — it creates a false sense of coverage. Press the test button. Confirm the app notification. Confirm every interconnected unit also sounds.
Mistake 9: Treating this as a checklist rather than a priority framework The single most common outcome from these lists: someone attempts all 16, gets stuck on project 8 (thermostat C-wire issue), loses momentum, and ends up with a half-done home and a bad weekend. Pick 3 projects that match your biggest pain point. Complete them. Live with them for two weeks. Then come back for the next three.
Frequently Asked Questions
What home improvements add the most value? Smart thermostat installation (average $150 cost, $150–$300 annual savings), smart locks (security and convenience value), and video doorbells (insurance discount eligibility in some regions) consistently offer the highest ROI for weekend-scale projects. For resale value, cabinet hardware upgrades and lighting improvements have a documented impact on buyer perception in home staging research.
How long does it take to install a smart thermostat? Most modern smart thermostats take 45–90 minutes for a standard single-stage HVAC system. The process is longer if you need to install a C-wire adapter (add 30–60 minutes) or if your system is multi-stage or a heat pump. Always verify compatibility before purchasing.
Can renters do any of these projects? Yes — a meaningful portion of this list is renter-friendly without requiring landlord approval: smart plugs, smart LED bulbs, under-cabinet lighting, Wi-Fi upgrades, water leak detectors, and automation routines. Projects involving wiring, lock replacement, or exterior mounting typically require landlord permission first.
Are smart plugs actually worth it? Smart plugs are worth it if you use the energy monitoring data they generate. The plug itself saves nothing — the savings come from identifying high-standby devices and changing behavior accordingly. For entertainment centers and gaming setups, the savings are typically $5–$15/month. For phone chargers, the savings are negligible.
What should I upgrade in my home first? If saving money is the goal: smart thermostat first, then smart plugs for energy monitoring. If security is the priority: video doorbell or smart lock. If you want the fastest visible transformation: cabinet hardware and lighting, both completable in under two hours.
Do I need a smart hub for any of these projects? Not anymore. In 2026, most smart home devices support Wi-Fi directly or use the Matter protocol, which works across platforms without a proprietary hub. If you plan to expand to a larger ecosystem or want deeper automation capabilities, a hub gives you more control — but it’s not a prerequisite for starting.
My smart thermostat says “no C-wire” — what do I do? Don’t stop the project — this is the most common installation issue. Most smart thermostats include a C-wire adapter that draws power from existing wiring without running a new wire. Check both ends of your system: some HVAC control boards have a C terminal with a wire that was never connected at the thermostat end. Check before ordering an adapter.
Will a smart lock work if my Wi-Fi goes down? Yes. Smart locks store access codes locally and operate offline. App-based features (remote unlock, access logs) require internet connectivity. The physical keypad and key cylinder always work regardless of network status. This is one of the reasons keeping a physical key backup is important.
Why won’t my smart bulbs work with my existing dimmer switch? Smart bulbs are not compatible with most traditional dimmer switches. You need a standard (non-dimming) switch for smart bulbs, a smart dimmer switch designed for LED loads, or smart bulbs that list explicit compatibility with your specific dimmer. This is the most common smart lighting problem and the most frequently asked question in smart home forums.
Is it safe to install a whole-home energy monitor myself? Physically possible as a DIY project, but it involves working inside your main electrical panel adjacent to high-voltage service entrance conductors that remain live even when your main breaker is off. If you’ve worked in a panel before and can identify the service entrance feeds, this is manageable. If you haven’t — and especially if your panel is older or unfamiliar — a licensed electrician’s service call ($100–$150) is genuinely worth it for this specific project.
One Last Thing Before You Start
You’ve got a solid list. You’ve got honest time estimates. You know which ones are right for your situation.
Here’s the perspective worth keeping through the weekend: a home that’s 30% smarter and 100% functional is more valuable than one that has 16 partially finished projects and six app notifications you stopped reading.
Pick the three that match your biggest frustration — energy costs, security, or aesthetics — and do those first. Do them carefully, test them properly, and give yourself Sunday evening to actually enjoy what you built.
The other 13 projects will still be here next weekend.
Before starting any electrical work, confirm your circuit breaker is off and test with a non-contact voltage tester. If you’re uncertain about your home’s wiring — particularly in homes built before 1990 — consult a licensed electrician before proceeding.